
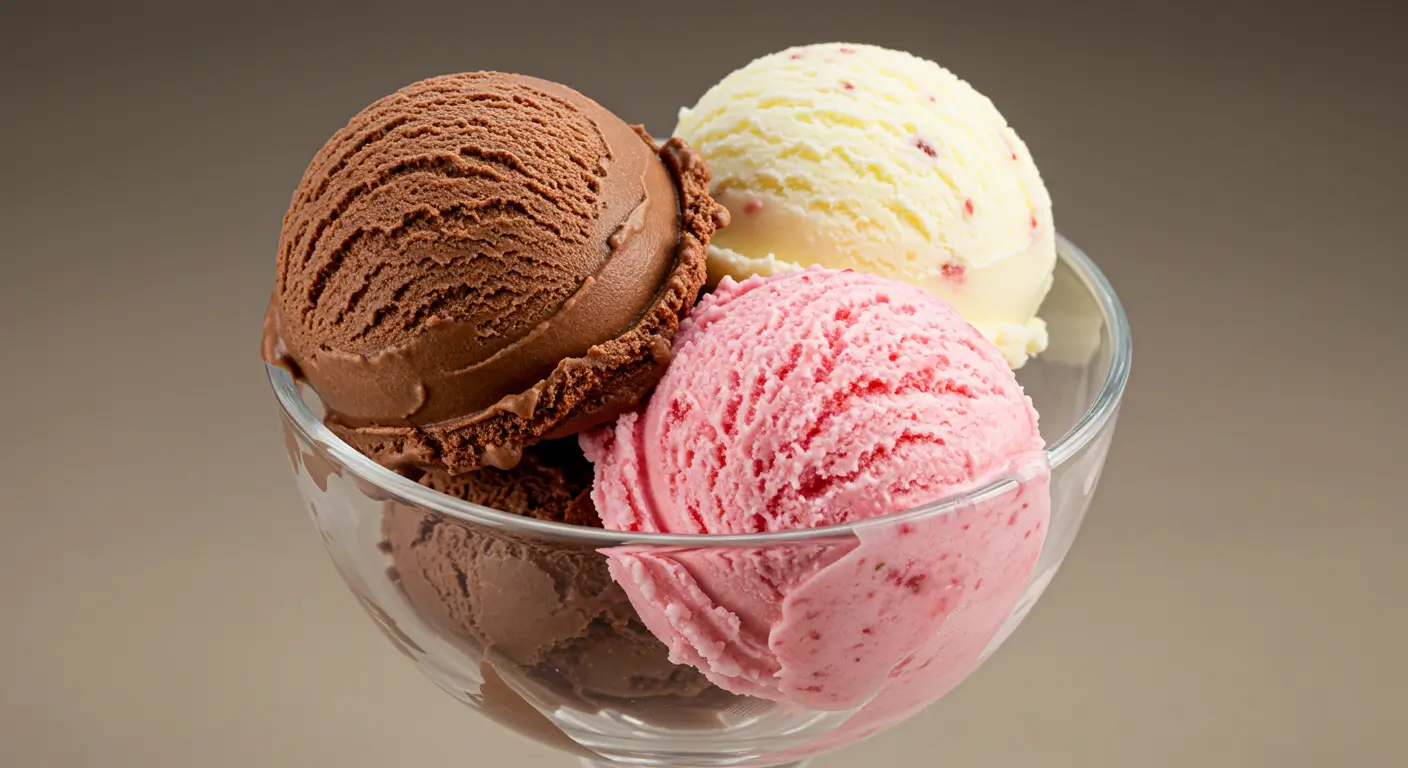
Making chocolate vanilla strawberry ice cream at home has always been a special experience for me. I remember the first time I tried mixing these three classic flavors together. It seemed like a simple combination, yet each flavor complemented the others in such a delicious way. The thought of creating this treat from scratch excited me, especially knowing I could control the ingredients and make it exactly how I liked.
At first, I thought making ice cream at home would be complicated, but I was pleasantly surprised. The process was easier than I expected, and I found joy in adding my own little twists to the recipe. Over time, I experimented with different ingredients and techniques, and the result was always a creamy, indulgent dessert. Each batch brought back fond memories, and I was excited to create new ones.
If you’re considering making your own chocolate vanilla strawberry ice cream, you’re in the right place. In this guide, I’ll walk you through the steps to create the best homemade ice cream. Whether you’re new to making ice cream or already a pro, I promise this recipe will help you create a rich and satisfying dessert that everyone will love.
Why Chocolate Vanilla Strawberry Ice Cream is the Ultimate Homemade Dessert
Timeless Flavor Combination: Why Chocolate, Vanilla, and Strawberry Are Universally Loved
The Irresistible Allure of Chocolate
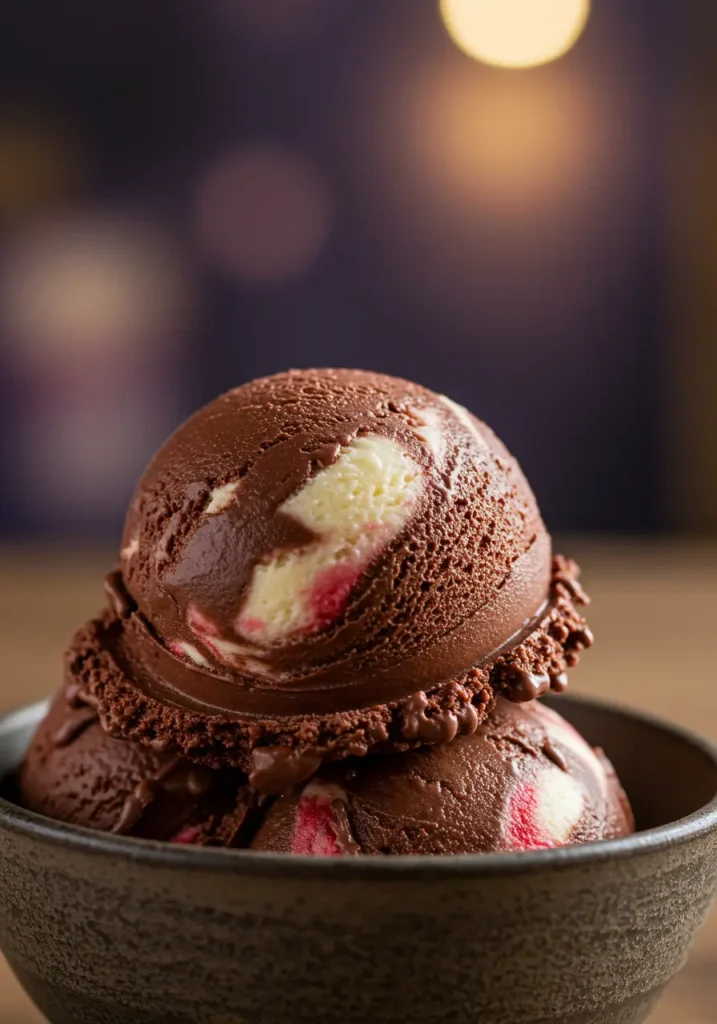
Chocolate is a flavor that most people love. Its richness and slight bitterness blend perfectly with the sweet, creamy elements of ice cream. Chocolate adds depth, making each bite more indulgent. The comforting warmth of chocolate balances well with the fresh, tangy strawberry and smooth vanilla. In chocolate vanilla strawberry ice cream, it provides a satisfying contrast, keeping the dessert exciting. Whether in a scoop or a sundae, chocolate remains a crowd favorite.
The Smoothness of Vanilla: A Perfect Base
Vanilla is often considered a simple flavor, but its smoothness plays a key role in this trio. It works as a base that brings the other flavors together. Vanilla’s subtle taste enhances the sweetness of chocolate and strawberry without overpowering them. Its creamy texture acts as a foundation, making it the perfect backdrop to the other two flavors. Whether you’re eating vanilla on its own or with chocolate and strawberry, it never fails to deliver comfort and satisfaction.
Strawberry: A Refreshing Twist
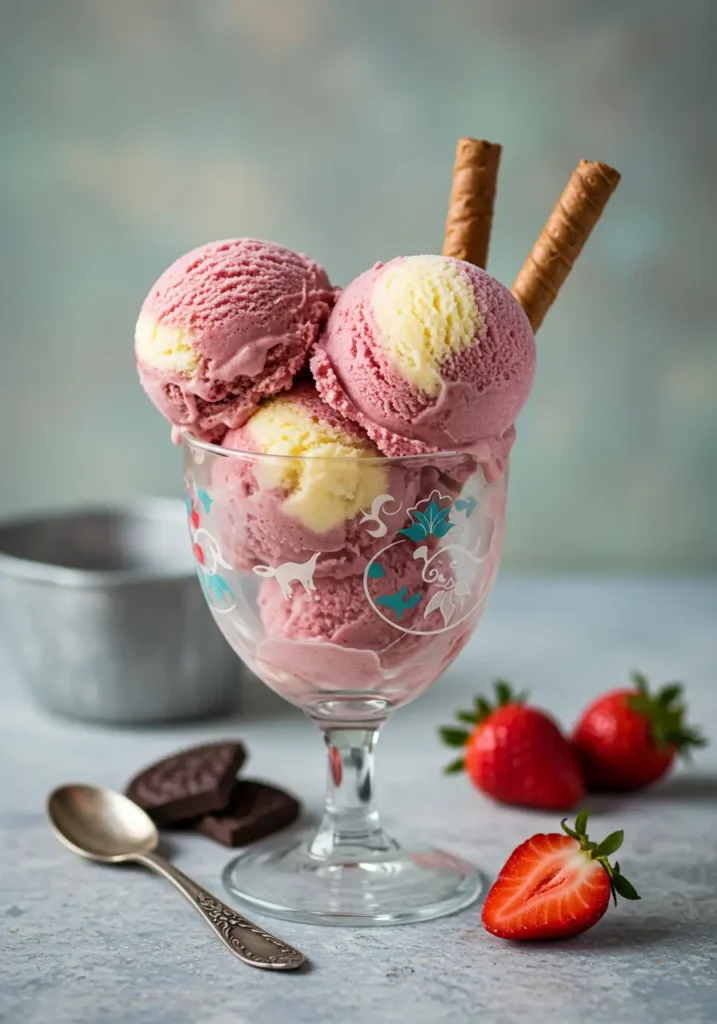
Strawberry adds a burst of freshness to the chocolate vanilla strawberry ice cream combination. Its bright, tangy flavor contrasts nicely with the rich chocolate and smooth vanilla. The fruity notes of strawberry bring a lightness that refreshes the palate between the sweeter chocolate and vanilla flavors. This contrast keeps the ice cream from feeling too heavy. Fresh strawberries are often the secret ingredient that makes this flavor combo feel so vibrant and fun.
Why This Flavor Trio Never Gets Old
The blend of chocolate, vanilla, and strawberry has remained popular for decades. Why? Because it hits all the right notes. The chocolate vanilla strawberry ice cream combination offers something for everyone. Whether you’re craving a rich, deep chocolate experience, the simplicity of vanilla, or the fruity lightness of strawberry, this trio covers all tastes. It’s a perfect balance of textures and flavors. Over the years, it has become a nostalgic treat, often reminding people of childhood memories and favorite summer days.
Perfect for Any Occasion: Whether It’s Summer, a Birthday, or a Family Gathering, This Dessert Fits Every Moment
A Cool Treat for Hot Summer Days
There’s something special about enjoying ice cream on a hot summer day. Whether you’re outside on a patio or by the pool, chocolate vanilla strawberry ice cream is always refreshing. The sweet combination of chocolate, vanilla, and strawberry offers a perfect balance of flavors. It cools you down and makes every summer moment feel like a treat.
A Sweet Addition to Birthdays and Celebrations
Birthdays are extra special with ice cream. Chocolate vanilla strawberry ice cream is a classic choice. Its vibrant colors and familiar flavors make it a hit at parties. Whether you serve it as a dessert or as part of a sundae bar, it’s sure to be enjoyed by everyone. You can even customize it with fun toppings for a more festive touch. It’s simple, but it makes celebrations even better.
A Family Favorite
Family gatherings are made sweeter with chocolate vanilla strawberry ice cream. It’s an easy dessert to serve to all ages. After a delicious meal, a scoop of this ice cream is the perfect way to end the day. Whether it’s served in cones or as part of a fun dessert, it brings everyone together. It’s versatile and loved by all, making it the perfect addition to family time.
Enjoying Ice Cream Year-Round
Although ice cream is a summer favorite, you can enjoy it all year long. Chocolate vanilla strawberry ice cream pairs perfectly with warm desserts, like apple pie or brownies, during the colder months. It’s a delightful contrast of hot and cold, making it a comforting treat in every season.
Perfect Anytime
You don’t need a special occasion to enjoy this ice cream. Whether it’s a random Tuesday afternoon or a holiday dinner, chocolate vanilla strawberry ice cream always fits the moment. Its timeless appeal makes it a go-to choice for anyone craving a sweet, satisfying treat.
A Nostalgic Treat: Share How It Brings Back Memories of Childhood or Your Favorite Ice Cream Shop
Recalling Childhood Memories with Each Scoop
Each time I indulge in chocolate vanilla strawberry ice cream, memories of my childhood come flooding back. I can almost hear the jingle of the ice cream truck coming down the street, and the excitement of rushing to meet it. As a child, those moments felt magical, and the combination of these three classic flavors made it all the more special.
The rich chocolate, creamy vanilla, and fresh strawberry were more than just flavors—they were the essence of summer. They were what made family nights so memorable, sitting outside and enjoying ice cream together. It wasn’t just about the treat itself; it was the experience of sharing those simple, joyous moments with loved ones.
The Ice Cream Shop Tradition
As I grew older, I started frequenting my favorite local ice cream parlor. There, I would always order the three-flavor scoop: chocolate, vanilla, and strawberry. The familiar faces behind the counter and the comforting sounds of the shop created a sense of nostalgia. It was more than a place to grab ice cream—it was a place to make memories.
The charm of the shop, with its retro decor and smell of freshly made ice cream, added to the experience. Every visit felt like a treat, and I still remember the way the ice cream tasted—it was always perfectly balanced. The blend of chocolate, vanilla, and strawberry never failed to bring back a rush of warm memories.
A Flavor That Stands the Test of Time
What makes chocolate vanilla strawberry ice cream so nostalgic is its timeless nature. No matter how many trendy flavors come and go, this combination remains just as beloved. The familiar taste takes me back to those moments when life was simple, and dessert was a shared experience.
The connection this ice cream brings to the past is irreplaceable. Each bite is a reminder of the warmth and happiness of childhood, whether shared with friends, family, or even alone, just enjoying the moment. It’s a flavor that not only stands the test of time but continues to evoke feelings of joy every time I enjoy it.
How to Make Chocolate Vanilla Strawberry Ice Cream at Home
Essential Ingredients: Discuss Key Ingredients Like Heavy Cream, Whole Milk, Fresh Strawberries, Vanilla Extract, and Cocoa Powder
Heavy Cream: The Foundation for Creaminess
One of the most essential ingredients in making chocolate vanilla strawberry ice cream is heavy cream. The richness of heavy cream creates the smooth, creamy texture that makes ice cream so irresistible. Without it, you’d miss the velvety mouthfeel that makes every bite feel like a true indulgence. Using heavy cream provides that luxurious consistency that turns your homemade ice cream into something special, setting it apart from store-bought versions.
The fat content in heavy cream contributes to its ability to freeze well without becoming too hard or icy. This is crucial because we want our ice cream to have that perfect balance between firm and creamy, with a texture that melts smoothly in your mouth.
Whole Milk: The Perfect Balance
Whole milk is the next key ingredient that completes this trio. It’s important to use whole milk in this recipe, as its higher fat content adds to the richness and helps create a creamy consistency. While lighter milk alternatives might work, they won’t provide the same depth of flavor or creamy texture. Whole milk gives the ice cream its luxurious, rich body, ensuring the chocolate vanilla strawberry ice cream holds up well when scooped and enjoyed.
It also plays a role in helping balance out the sweetness and creaminess of the heavy cream. Together, they create the perfect base for any ice cream flavor, especially this classic trio.
Fresh Strawberries: Pure, Natural Flavor
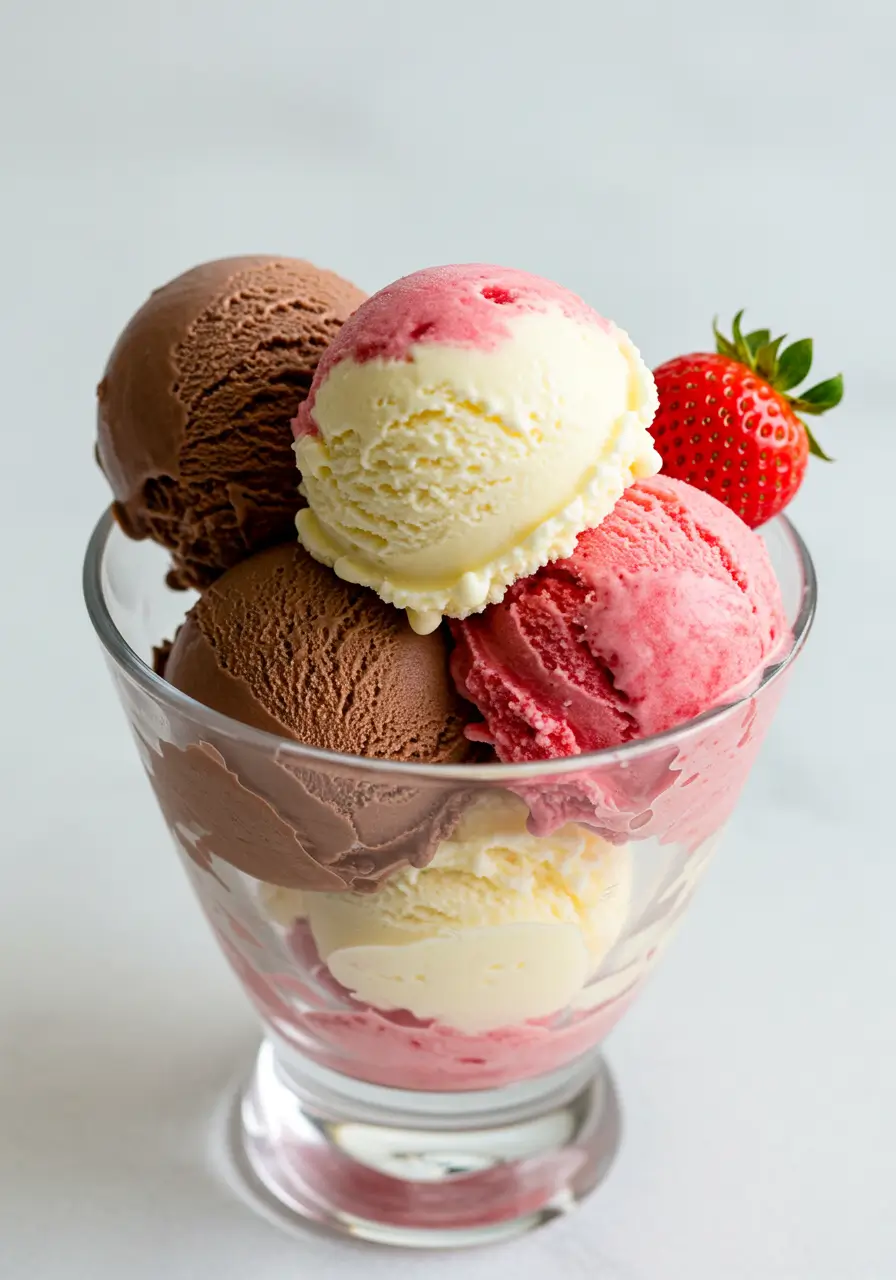
Fresh strawberries are an absolute must when making chocolate vanilla strawberry ice cream. The natural sweetness and tangy flavor they provide elevate the ice cream, ensuring it has a fresh and vibrant taste. When you use fresh, ripe strawberries, the fruit contributes not only to the flavor but also to the color, making the strawberry layer of your ice cream visually appealing.
Strawberries also add a subtle texture to the ice cream, creating small bursts of sweetness with each bite. If fresh strawberries aren’t available, you can use frozen ones, but fresh fruit truly gives the best result.
Vanilla Extract: The Flavor Enhancer
Vanilla extract is the key to enhancing the overall flavor of your chocolate vanilla strawberry ice cream. The warm, aromatic qualities of vanilla work beautifully with the richness of the cream and the sweetness of the strawberries. It brings a comforting, familiar note to the ice cream, making it feel complete and well-rounded.
It’s essential to use high-quality vanilla extract to achieve the best flavor. While artificial vanilla flavoring can be tempting for convenience, it lacks the depth and complexity that real vanilla extract offers. This small but significant ingredient contributes to the timeless flavor combination of chocolate, vanilla, and strawberry, tying all the ingredients together.
Cocoa Powder: The Rich Chocolate Flavor
No chocolate vanilla strawberry ice cream is complete without the addition of high-quality cocoa powder. Cocoa powder provides the depth and richness of chocolate without the heaviness of melted chocolate. It’s the key ingredient for creating that satisfying, bittersweet chocolate flavor that contrasts beautifully with the sweetness of vanilla and strawberry.
Choose unsweetened cocoa powder to avoid making your ice cream too sweet. The cocoa powder brings an earthy richness, balancing out the lighter strawberry and vanilla notes. Its deep color also contributes to the visual appeal of the ice cream, adding a beautiful dark contrast to the pink strawberry and off-white vanilla layers.
Step-by-Step Instructions: How to Make Chocolate Vanilla Strawberry Ice Cream from Scratch
Making homemade chocolate vanilla strawberry ice cream is an incredibly rewarding experience. With a few simple ingredients and a little time, you can enjoy a fresh, creamy dessert that rivals any store-bought version. Here’s a straightforward, step-by-step guide that will help you make this timeless treat.
Step 1: Prepare the Ice Cream Base
To begin, combine your heavy cream, whole milk, and sugar in a large mixing bowl. Whisk them together until the sugar is fully dissolved. This forms the base of your ice cream, and it’s the foundation for the rich, creamy texture. The mixture should be smooth with no visible sugar granules left. This base works for all three flavors: chocolate, vanilla, and strawberry.
Step 2: Make the Vanilla Base
For the vanilla layer, add a teaspoon of high-quality vanilla extract to your base mixture. Whisk it in gently. This adds that familiar and comforting vanilla flavor to your ice cream. Once combined, set this mixture aside. You’ll come back to it once we add the strawberry and chocolate layers.
Step 3: Prepare the Strawberry Puree
Now, take your fresh strawberries and blend them into a smooth puree. You can use a blender or food processor for this step. For a smoother consistency, strain the puree to remove any seeds, although that’s optional. Add some sugar to the puree if the strawberries aren’t as sweet as you’d like. Once done, mix the puree into your base until it’s fully incorporated. You’ll notice the mixture turning a soft pink – it’s the first layer of flavor!
Step 4: Create the Chocolate Base
Next, to make the chocolate base, you’ll need cocoa powder. Add unsweetened cocoa powder to a small amount of hot water or milk to create a smooth chocolate paste. Then, mix this paste into the ice cream base along with a small amount of sugar to balance the bitterness of the cocoa. Stir until completely smooth. This is your chocolate layer, which will add depth and richness to your ice cream.
Step 5: Layer and Freeze
Now that you have your three distinct mixtures – vanilla, strawberry, and chocolate – it’s time to layer them. Start by placing the vanilla mixture at the bottom of your ice cream container. Follow with the strawberry layer and finally the chocolate. Use a spatula to gently swirl them together, creating a beautiful marbled effect. The different layers will freeze into a perfect mix of chocolate, vanilla, and strawberry.
Step 6: Freeze and Wait
Once you’ve layered the ice cream, cover the container with plastic wrap or a tight-fitting lid. Place it in the freezer and let it freeze for at least 4 to 6 hours, or until firm. For best results, let the ice cream sit for an hour before serving, allowing it to soften slightly for easier scooping.
Pro Tips for Creaminess: How to Achieve a Smooth and Creamy Chocolate Vanilla Strawberry Ice Cream
One of the main reasons homemade ice cream tastes so much better than store-bought is the incredible creaminess you can achieve when making it yourself. The right proportions of ingredients and the right techniques make all the difference in creating that luxurious, smooth texture. Here are some expert tips to ensure your chocolate vanilla strawberry ice cream has the perfect creamy consistency.
1. Use the Right Ratio of Cream to Milk
To achieve the creamiest texture, the balance between cream and milk is crucial. Heavy cream contains more fat than milk, which is key for that rich, velvety mouthfeel. If you use too much milk, the ice cream can become icy and less smooth. On the other hand, too much cream can result in an overly rich texture that may not freeze as well. A good rule of thumb is to use about two parts heavy cream to one part whole milk. This balance helps the ice cream freeze properly while maintaining its creaminess.
2. Don’t Skip the Eggs (If You’re Making Custard-Style Ice Cream)
If you’re looking to take your ice cream to the next level, consider making a custard base. Adding eggs to your ice cream mixture creates a silky-smooth texture. The eggs help emulsify the cream and milk, making the texture much smoother and more velvety. While this step is optional, it’s highly recommended for those who want their chocolate vanilla strawberry ice cream to have a more decadent, rich consistency.
3. Incorporate Cornstarch or Gelatin for Extra Smoothness
If you’re looking to increase the creaminess of your ice cream without changing the flavor, adding a small amount of cornstarch or gelatin can help. Cornstarch thickens the base without affecting the taste, while gelatin adds a subtle elasticity to the texture, preventing ice crystals from forming. If you choose to use gelatin, dissolve it in a bit of warm water and add it to your ice cream base before freezing. This step will help prevent ice crystals from forming, giving you a super-smooth result.
4. Chill Your Base Before Churning
Before churning your ice cream, always chill your base for at least 2 hours. This will allow the ingredients to meld together and create a smoother mixture. Chilling the base also helps the ice cream churn more effectively, which leads to a creamier texture. If you’re short on time, placing your base in the fridge for an hour can still yield good results, but the longer you chill, the creamier it will turn out.
5. Don’t Over-Churn the Ice Cream
When you churn the ice cream, you’re aerating it to give it a light, fluffy texture. However, over-churning can lead to a more solid, icy consistency. Keep an eye on your ice cream while it’s churning. Once it reaches the consistency of soft serve, it’s time to stop. If you’re using an ice cream maker, it should take around 20 to 25 minutes to reach the perfect creamy texture. Over-churning can lead to a dense ice cream that’s not as smooth.
Optional Add-ins: Personalizing Your Chocolate Vanilla Strawberry Ice Cream
One of the most exciting parts about making chocolate vanilla strawberry ice cream at home is the freedom to add your own twist. The classic trio of flavors—chocolate, vanilla, and strawberry—is a great base, but there’s no reason to stop there. Whether you love extra crunch, a burst of fruit, or a hint of spice, customizing your ice cream with different add-ins is an easy way to make it uniquely yours. Here are a few ideas to elevate your homemade ice cream.
1. Nuts for Crunch and Flavor
Nuts are a fantastic way to add texture and flavor to your chocolate vanilla strawberry ice cream. Chopped almonds, walnuts, or pecans offer a delightful crunch and complement the creamy base beautifully. You can roast the nuts beforehand for extra flavor or add them raw for a lighter taste. If you prefer a more indulgent treat, chocolate-covered nuts like hazelnuts or cashews are a perfect choice.
Pro Tip: Add the nuts towards the end of the churning process to ensure they don’t get crushed too much. You can also fold them in after the ice cream has finished churning for larger chunks.
2. Chocolate Chips or Chunks for a Decadent Touch
If you love a little extra chocolate with your ice cream, chocolate chips or chunks are a great choice. Dark chocolate chips work especially well with the strawberry and vanilla base, providing a rich, bittersweet contrast to the sweetness of the ice cream. For an extra indulgence, you could even add swirls of chocolate fudge or ribbons of peanut butter throughout the ice cream.
Pro Tip: Choose your chocolate wisely. Semi-sweet or milk chocolate chips tend to hold up better when mixed into the ice cream. If you prefer a more intense chocolate flavor, go for dark chocolate chips or shavings.
3. Fresh Fruit for a Burst of Sweetness
Incorporating fresh fruit is an easy way to make your chocolate vanilla strawberry ice cream even more refreshing and flavorful. Fresh strawberries, blueberries, raspberries, or even chopped mangoes can bring a juicy, natural sweetness to your homemade treat. Simply chop the fruit into small pieces and gently fold them in once the ice cream has finished churning.
Pro Tip: If you’re adding fresh strawberries to the ice cream, you can puree a small portion of the strawberries for a smoother texture and mix in the chunks for a bit of bite. This creates a delightful fruit swirl throughout your ice cream.
4. Cookie Crumbs for an Extra Layer of Flavor
For those who love a little extra sweetness and texture, crushed cookies like Oreos, graham crackers, or shortbread biscuits are a delicious addition. You can swirl the crumbs throughout the ice cream or mix them in to create crunchy pockets of flavor. The combination of smooth ice cream and crunchy cookie bits will make each bite irresistible.
Pro Tip: Add the cookie crumbs after the ice cream has been fully churned and is almost ready to freeze. This will keep the crumbs intact and maintain their texture.
5. Spices for Warmth and Complexity
For a truly unique twist, consider adding spices to your chocolate vanilla strawberry ice cream. A pinch of cinnamon or nutmeg can add warmth, while a dash of cardamom or ginger can bring a subtle complexity. Spices like cinnamon pair particularly well with the vanilla and strawberry flavors, while ginger can complement the chocolate base.
Pro Tip: If you’re adding ground spices, start with just a pinch. You can always add more, but it’s easier to adjust the flavor in small amounts.
6. Swirls of Syrup or Honey for Sweetness
Want to add extra sweetness without overloading your ice cream with sugar? Swirling in some caramel syrup, honey, or maple syrup after churning can create beautiful, indulgent ribbons of flavor. This adds a rich layer of sweetness and enhances the creaminess of your chocolate vanilla strawberry ice cream.
Pro Tip: Use a spoon or a spatula to gently swirl in the syrup after the ice cream has finished churning. Be careful not to mix it too much, or you’ll lose the beautiful swirled effect.
Key Considerations:
- Subheading Distribution: Each optional add-in is highlighted with its own section to improve readability and clarity.
- Sentence Length: Sentences are kept short and concise for easy reading and comprehension.
- Transition Words: The use of words like “For example,” “Simply,” and “Want to” helps guide the reader through the content smoothly.
- Passive Voice: Active voice is used predominantly, with minimal passive constructions.
By adding these optional ingredients, you can make your chocolate vanilla strawberry ice cream even more delightful. Personalizing your ice cream with nuts, fruit, or swirls allows you to create a dessert that’s perfectly tailored to your tastes. Whether you prefer the crunch of nuts or the sweetness of fresh fruit, these add-ins will make your homemade ice cream a true standout at any occasion.
The Best Ice Cream Machine for Making Chocolate Vanilla Strawberry Ice Cream
Why You Need an Ice Cream Machine: The Difference Between Hand-Churned and Machine-Made Ice Cream
When it comes to making chocolate vanilla strawberry ice cream at home, one question often comes up: Do I really need an ice cream machine? While it’s possible to make ice cream without one, using an ice cream machine can make a significant difference in both texture and flavor. In this section, we’ll explore the reasons why an ice cream machine is a valuable tool for crafting the perfect batch of homemade ice cream, and compare it to the traditional hand-churning method.
1. Smooth, Creamy Texture with an Ice Cream Machine
One of the primary reasons to invest in an ice cream machine is the smooth, creamy texture it produces. An ice cream machine works by continuously churning the ice cream base while freezing it at the same time. This process incorporates air into the mixture (known as overrun) and breaks up any ice crystals that form. The result is a soft, velvety texture that’s hard to achieve when making ice cream by hand.
Why it’s Better: When you hand-churn ice cream, you rely on manual effort to stir the mixture, which often results in a denser, icier texture. The machine’s constant churning prevents large ice crystals from forming, creating that signature creamy consistency that makes chocolate vanilla strawberry ice cream so indulgent.
2. Time-Saving and Convenient
Making ice cream by hand can be a lengthy process. You need to stir the mixture regularly while it freezes, which can take hours. With an ice cream machine, the churning happens automatically, allowing you to walk away and relax while the machine does the hard work. Most machines can churn and freeze your ice cream in as little as 20 to 30 minutes, depending on the recipe and machine type.
Why it’s Better: Hand-churning requires constant attention, especially when freezing your ice cream in a shallow dish or freezer. The process of mixing and scraping the ice cream by hand can take up to several hours, and there’s no guarantee that the texture will be as smooth as machine-churned ice cream.
3. Consistency and Control Over Texture
An ice cream machine gives you more control over the texture of your ice cream. With hand-churning, it can be difficult to achieve the right balance between smoothness and airiness. You might end up with an ice cream that’s too soft or too hard, or, in some cases, with uneven churning. With an ice cream machine, you get consistent results with each batch.
Why it’s Better: While hand-churning is a fun, nostalgic process, it doesn’t always guarantee the same texture and consistency that an ice cream machine provides. The machine’s precise, automated churning process ensures that every bite of chocolate vanilla strawberry ice cream has that perfectly creamy, smooth feel.
4. Experimenting with New Flavors and Add-Ins
With an ice cream machine, you can easily experiment with new flavors and add-ins while maintaining the texture and consistency of the base. For instance, you can mix in chocolate chips, crushed cookies, or fruit purees during the churning process without disrupting the smooth texture of the ice cream. The machine’s ability to evenly distribute these additions ensures they blend perfectly with the ice cream.
Why it’s Better: When making ice cream by hand, it can be difficult to incorporate add-ins without disrupting the smoothness of the mixture. The manual stirring process can cause ice crystals to form or create uneven textures, especially if you’re mixing in chunks or swirls.
5. The Fun Factor: Why You’ll Love Using an Ice Cream Machine
Using an ice cream machine is simply more fun. It allows you to take full control of the process and experiment with your favorite flavors and add-ins. Plus, it’s faster and easier to get the perfect chocolate vanilla strawberry ice cream every time. Whether you’re using it for a family gathering, a special occasion, or a regular treat, an ice cream machine makes the process enjoyable for everyone involved.
Why it’s Better: Hand-churning may evoke a sense of nostalgia, but it’s not always the most enjoyable method for everyone. The constant stirring can get tiring, especially when you’re making larger batches. With an ice cream machine, all you need to do is prepare your ingredients and let the machine do the work—leaving you with more time to relax and enjoy your ice cream!
Top Ice Cream Makers to Consider: Popular Ice Cream Machines for Home Use
Making chocolate vanilla strawberry ice cream at home becomes much easier and more enjoyable with the right ice cream machine. It not only helps create the smooth and creamy texture you love but also speeds up the process. When selecting an ice cream machine, it’s important to consider the capacity, ease of use, and type of ice cream you want to make.
1. Cuisinart ICE-30BC Pure Indulgence 2-Quart Ice Cream Maker
The Cuisinart ICE-30BC is a great choice for home ice cream makers. It’s an affordable option that delivers excellent results. You can make up to 2 quarts of ice cream at once, which is perfect for a small gathering or family. The fully automatic design means you don’t need to do any manual churning.
Why it’s perfect for making ice cream: This machine’s simplicity and quick results make it ideal for recipes like chocolate vanilla strawberry ice cream. It churns the ingredients while ensuring the texture stays creamy and smooth. Additionally, the compact design means it’s easy to store.
2. KitchenAid Ice Cream Maker Attachment
If you already own a KitchenAid stand mixer, this attachment is a solid investment. It turns your stand mixer into an ice cream maker, allowing you to make 2 quarts of homemade ice cream in no time. This attachment is convenient and easy to use.
Why it’s perfect for making ice cream: The KitchenAid Ice Cream Maker Attachment ensures an even, smooth texture for your chocolate vanilla strawberry ice cream. It’s perfect for smaller batches, which is ideal for testing out different variations of the ice cream. Since it’s compact and stores easily, it won’t take up much space in your kitchen.
3. Hamilton Beach 68330N Automatic Ice Cream Maker
The Hamilton Beach 68330N is an automatic ice cream maker that makes up to 4 quarts of ice cream. It features an easy-lock lid and a motor that’s strong enough to handle the churning process. This machine is a great option for larger families or gatherings.
Why it’s perfect for making ice cream: If you’re making large batches of chocolate vanilla strawberry ice cream, this machine will suit your needs. Its 4-quart capacity allows for plenty of servings, and the automatic process means you won’t have to worry about manually churning the ice cream.
4. Cuisinart ICE-21 1.5-Quart Frozen Yogurt, Ice Cream & Sorbet Maker
For those who want a smaller, more compact option, the Cuisinart ICE-21 is a great choice. It’s lightweight, easy to use, and can make up to 1.5 quarts of ice cream, which is perfect for individual or smaller batches.
Why it’s perfect for making ice cream: The Cuisinart ICE-21 ensures a smooth texture for your ice cream without requiring a lot of preparation or cleanup. It’s especially good if you want to make quick batches of chocolate vanilla strawberry ice cream without taking up too much space or time.
No-Churn Ice Cream Option: Enjoy Homemade Ice Cream Without a Machine
Making ice cream at home doesn’t always require an ice cream machine. If you don’t have one, there’s a no-churn option that’s simple and quick. Best of all, you can enjoy the creamy, delicious treat without all the fancy equipment.
Why No-Churn Ice Cream is a Great Option
The best part of no-churn ice cream is its convenience. Unlike traditional methods that require churning, this version only needs a few ingredients. You won’t have to worry about special equipment or complicated steps. Plus, it’s an excellent option for those new to homemade desserts.
Key Ingredients for No-Churn Ice Cream
To make a no-churn chocolate vanilla strawberry ice cream, you need basic ingredients. Heavy cream, sweetened condensed milk, and flavorings like vanilla extract or cocoa powder are essential. These ingredients combine to create a smooth, creamy texture without an ice cream maker.
Step-by-Step Guide to No-Churn Ice Cream
- Whip the Heavy Cream: Start by whipping heavy cream until it forms stiff peaks. This will be the base for your ice cream.
- Add Sweetened Condensed Milk: Fold in sweetened condensed milk. This adds creaminess and sweetness.
- Flavor It: Divide the mixture into three parts. Add vanilla, cocoa, and strawberry puree (or chopped strawberries) to each section.
- Swirl and Freeze: Gently swirl the mixtures together in a loaf pan, cover, and freeze for several hours or overnight.
Why It’s Worth Trying
Making no-churn ice cream allows for endless flavor combinations. You can add chocolate chips, nuts, or caramel to personalize it. The texture remains creamy and smooth without needing to churn the mixture, making it an easy alternative.
Customizing Your Chocolate Vanilla Strawberry Ice Cream Recipe
Making Dairy-Free Chocolate Vanilla Strawberry Ice Cream: Alternatives for Dairy-Free Enjoyment
If you’re looking to enjoy chocolate vanilla strawberry ice cream but follow a dairy-free lifestyle, you’re in luck! You don’t need to miss out on this delicious treat. There are many simple and tasty alternatives for those avoiding dairy. By swapping just a few ingredients, you can make a dairy-free version that’s just as rich and creamy.
Why Dairy-Free Alternatives Work Well
When making dairy-free chocolate vanilla strawberry ice cream, the key is to find alternatives that mimic the richness and creaminess of traditional dairy ingredients. Dairy-free options, such as almond milk, coconut milk, and cashew cream, are perfect for this. These plant-based substitutes provide the same velvety texture that gives homemade ice cream its indulgent quality.
Top Dairy-Free Ingredients to Use
- Almond Milk: Almond milk is a popular dairy alternative. It has a mild, slightly nutty flavor and works wonderfully in ice cream. Use unsweetened almond milk to avoid excess sugar and ensure the flavor remains balanced.
- Coconut Milk: Coconut milk is a rich and creamy option that adds a subtle coconut flavor. This milk is especially good for the chocolate and vanilla flavors, bringing an extra layer of depth to your ice cream.
- Cashew Cream: Cashew cream is another great dairy-free option for making ice cream. It has a smooth texture and a neutral flavor, making it versatile for all flavor combinations, including strawberry, vanilla, and chocolate.
- Soy Milk or Oat Milk: Soy milk and oat milk are also great options for making dairy-free ice cream. They have a creamy texture and a slightly sweeter taste, which pairs perfectly with the flavors of chocolate, vanilla, and strawberry.
The Step-by-Step Process for Dairy-Free Ice Cream
- Start with a Dairy-Free Base: Choose your preferred dairy-free milk, such as almond milk or coconut milk. You can also mix different types to find the perfect flavor balance.
- Add Sweetener: Use maple syrup, agave nectar, or coconut sugar as a sweetener. These are excellent alternatives to refined sugar and add a touch of natural sweetness to your ice cream.
- Flavor It: For the chocolate layer, use cocoa powder or melted dark chocolate. For the vanilla layer, stick to pure vanilla extract. Fresh strawberries or strawberry puree are perfect for the strawberry layer.
- Whip the Mixture: Combine the milk and sweetener in a bowl. Then, whisk in the flavorings (chocolate, vanilla, or strawberry). If you want an extra creamy texture, you can add a bit of dairy-free coconut cream or cashew cream to the mix.
- Freeze and Enjoy: Pour the mixture into a loaf pan or ice cream container and freeze for a few hours or overnight. Once frozen, you’ll have a dairy-free version of chocolate vanilla strawberry ice cream ready to enjoy!
Customizing Your Dairy-Free Ice Cream
The best part about dairy-free ice cream is that it’s easy to make your own unique versions. Add chocolate chips, crushed nuts, or fresh fruit to the base mixture. You can also experiment with different plant-based milks to see which one you like best.
No matter which alternative you choose, you’re sure to enjoy a delicious, creamy, and dairy-free version of chocolate vanilla strawberry ice cream.
Add Your Own Twist: Creative Ideas for Flavor Enhancements
One of the best parts of making homemade ice cream is the freedom to get creative with flavors and mix-ins. While chocolate, vanilla, and strawberry are classic, why not try adding your own twist to elevate the experience? With just a few simple additions, you can customize your ice cream to fit any taste preference or occasion. Whether you love a rich caramel swirl or a touch of salty goodness, there’s something exciting for every palate.
Swirls of Sweetness: Caramel, Fudge, and More
Adding a swirl of caramel, fudge, or fruit preserves is a great way to enhance your chocolate vanilla strawberry ice cream. Here are a few ideas:
- Caramel Swirl: For a rich, indulgent treat, drizzle warm caramel sauce throughout your ice cream mixture. As the ice cream churns or freezes, the caramel will create delicious ribbons of sweetness. The contrast of the creamy ice cream and the deep caramel flavor will be irresistible.
- Fudge Ripple: Similar to caramel, a fudge ripple adds an extra layer of richness. Melted chocolate or fudge sauce can be swirled through your ice cream, providing pockets of chocolatey goodness. This is especially great for chocolate ice cream, but can complement vanilla or strawberry as well.
- Fruit Preserves: If you love fruity ice cream, add fruit preserves like raspberry, strawberry, or blueberry. These can be swirled into the base for a burst of fruity sweetness that pairs beautifully with the creaminess of the ice cream.
Adding Texture: Nuts, Cookie Crumbs, and More
Textures make ice cream even more enjoyable. By incorporating crunchy or chewy ingredients, you create layers of flavor and interest. Here are some fun ideas:
- Chopped Nuts: Adding crushed almonds, pistachios, or hazelnuts will give your ice cream a satisfying crunch. These nuts pair particularly well with the vanilla and chocolate layers, providing a nice contrast to the creamy base.
- Cookie Crumbles: For those who love cookies, mix in crumbled cookies such as Oreos, graham crackers, or biscotti. These will add a delightful crunch and texture. Oreo cookie chunks are especially popular in homemade ice cream, creating a fun and nostalgic treat.
- Chocolate Chips: You can’t go wrong with chocolate chips! They’re an easy way to add a little texture and extra chocolatey flavor to any ice cream. For variety, try using mini chocolate chips, dark chocolate, or even white chocolate.
Salty Surprises: A Touch of Sea Salt
Salt has the magical ability to bring out the sweetness in desserts, and it works wonders in ice cream. A light sprinkle of sea salt over your chocolate vanilla strawberry ice cream can create an incredible contrast. The saltiness enhances the rich sweetness, making every bite more satisfying.
- Sea Salt Caramel: Combine two of the most popular flavors: salty and sweet. A sprinkle of flaky sea salt on a caramel-swirl ice cream takes it to the next level, adding complexity and depth of flavor.
- Salted Nut Mix: If you’re adding nuts to your ice cream, consider lightly salting them. The slight saltiness of roasted almonds or cashews pairs wonderfully with both the chocolate and vanilla layers.
Spices and Herbs for a Unique Flavor Profile
Looking to step up your flavor game? Try experimenting with spices and herbs. These additions might surprise you, but they can elevate the classic chocolate vanilla strawberry ice cream into something unexpected and exciting.
- Cinnamon: Adding a hint of cinnamon to the vanilla base creates a warm, cozy flavor. It’s perfect for fall, but delicious year-round. Try mixing ground cinnamon into the base before churning for a subtle, comforting twist.
- Mint: A touch of fresh mint or mint extract can add a refreshing layer to chocolate or vanilla ice cream. Mint chocolate chip lovers will appreciate this twist! You can even add chocolate chips to further enhance the flavor.
- Lavender: If you’re feeling adventurous, try infusing your ice cream with lavender for a floral, aromatic flavor. This is particularly great with vanilla ice cream but can also be paired with strawberry for a more exotic twist.
Incorporating Alcohol for a Grown-Up Treat
For those who want a sophisticated, grown-up version of chocolate vanilla strawberry ice cream, consider adding a splash of alcohol. Alcohol not only adds flavor but also keeps your ice cream from freezing too hard, making it easier to scoop.
- Baileys Irish Cream: A splash of Baileys Irish Cream adds a sweet, creamy flavor to your ice cream. It pairs wonderfully with the chocolate base, making it even more indulgent.
- Rum or Bourbon: Dark rum or bourbon adds depth and richness, particularly in chocolate ice cream. A small amount mixed in can transform your dessert into a decadent treat for adults.
Create Your Own Masterpiece
The beauty of making ice cream at home is the ability to get creative with flavors and add-ins. By mixing and matching your favorite ingredients, you can make the classic chocolate vanilla strawberry ice cream truly your own. Whether you opt for a caramel swirl, salty sea salt, or a dash of cinnamon, there are endless possibilities to explore. Try experimenting with these ideas and see which one is your favorite. The more you play with different twists, the more delicious your ice cream will be!
Perfecting the Texture: How to Achieve Smooth, Creamy Ice Cream
One of the most common challenges when making homemade ice cream is achieving the perfect texture. Icy or grainy ice cream can be a disappointment after all the effort you put into making it. But don’t worry! There are simple solutions to ensure your ice cream is always smooth, creamy, and absolutely delicious.
Avoiding an Icy Texture: The Key to Creaminess
Icy ice cream often happens when ice crystals form during the freezing process. This can occur when the ice cream base isn’t churned properly or if the ingredients aren’t balanced. Here are some tips to ensure your homemade ice cream stays creamy.
Use the Right Proportions of Cream and Milk
The ratio of cream to milk is crucial for achieving a smooth texture. A higher proportion of heavy cream, such as two parts cream to one part milk, helps create a creamier consistency. The fat content in the cream reduces large ice crystals, giving you that rich, velvety texture. If you’re aiming for a dairy-free option, full-fat coconut milk or almond milk can work as alternatives, still maintaining a creamy texture without the dairy.
Churn Your Ice Cream Properly
Churning the ice cream properly breaks up ice crystals that form during freezing. This process is key to achieving that smooth, creamy finish. If you’re using an ice cream maker, follow the instructions and avoid overfilling the machine. Make sure the ice cream mixture is cold before churning. A warmer mixture can lead to the formation of larger ice crystals. For those without an ice cream maker, a no-churn method can also work. Just make sure to stir the mixture every 30 minutes to an hour while it freezes to prevent ice crystals from forming.
Add Cornstarch or Egg Yolks for Smoothness
Both cornstarch and egg yolks can improve the texture of your ice cream. Cornstarch helps to thicken the mixture, resulting in a smooth, custard-like base. Egg yolks, a more traditional option, emulsify the mixture, creating a silky texture. Both ingredients help to stabilize the mixture and prevent the formation of unwanted ice crystals.
Consider a Sugar Syrup
Making a simple sugar syrup can also prevent ice from forming. Dissolving sugar in water before adding it to the ice cream mixture creates a smoother consistency. It helps minimize crystallization. For even smoother results, you can use a combination of granulated sugar and corn syrup (or glucose). This sugar syrup technique can make a noticeable difference in the final texture of your ice cream.
Eliminating Graininess: Tips for Smooth Ice Cream
Graininess in homemade ice cream often happens when sugar hasn’t fully dissolved or when the egg yolks (if used) aren’t properly cooked. Here are a few ways to ensure your ice cream is smooth and free of any grainy texture:
- Properly Dissolve the Sugar: To prevent a grainy texture, make sure the sugar is completely dissolved before freezing. For custard-based ice cream, be sure to cook the sugar and egg mixture slowly, over low heat, until the mixture reaches the right thickness. This process helps to fully dissolve the sugar and ensures a smooth, creamy texture.
- Strain the Base: If you’re making a custard-based ice cream, it’s important to strain the mixture through a fine-mesh sieve after cooking to catch any bits of cooked egg or curdled cream. This simple step helps to avoid graininess and ensures that your ice cream base is as smooth as possible.
- Cool the Mixture Completely Before Freezing: If you don’t allow the ice cream base to cool down completely before freezing, it may lead to graininess. Always cool the mixture in the refrigerator for at least a few hours (or overnight) before churning or freezing. This gives the flavors time to develop and helps the texture set properly.
- Avoid Overheating the Base: Whether you’re cooking a custard or making a simple no-churn base, overheating the mixture can lead to graininess. For custard-style ice cream, cook the mixture gently over low heat, stirring constantly, until it thickens to the consistency of heavy cream. If it overheats, the eggs may curdle, and your ice cream will have a grainy texture.
Smooth Results Every Time
By addressing these common issues, you can perfect the texture of your homemade ice cream every time. The key is to balance the ingredients, pay attention to the freezing process, and take extra care to prevent ice crystals and graininess. The effort you put into perfecting the texture will pay off with ice cream that’s smooth, creamy, and full of flavor.
Remember, making ice cream at home is all about experimenting and perfecting the process. Every batch is an opportunity to tweak the ingredients and technique to achieve the perfect texture. With these tips in hand, you’ll be able to enjoy homemade ice cream that rivals anything from your favorite ice cream shop.
Serving and Storing Your Chocolate Vanilla Strawberry Ice Cream
Serving Suggestions: Fun Ways to Enjoy Your Homemade Ice Cream
Once you’ve made your perfect homemade chocolate, vanilla, and strawberry ice cream, the fun doesn’t stop there! There are plenty of creative and delicious ways to serve your homemade ice cream. From classic cones to fun ice cream sandwiches, the possibilities are endless. Here are a few serving ideas that will elevate your ice cream experience and make it a hit at any gathering.
Classic Cones: A Timeless Treat
Serving your homemade ice cream in cones is a classic and simple way to enjoy it. The crunchy texture of the cone pairs perfectly with the creamy ice cream, creating the ultimate nostalgic treat. Whether you opt for waffle cones, sugar cones, or even chocolate-dipped cones, it’s all about the experience. For an extra fun twist, try rolling the edges of your cone in sprinkles, crushed nuts, or mini chocolate chips. It’s an easy way to add some color and texture to your treat!
If you’re hosting a party or family gathering, consider setting up a DIY ice cream cone bar with various toppings and cones. Let your guests build their own ice cream creations, choosing from an array of sprinkles, candies, fruits, and sauces. This not only adds an interactive element but also caters to different tastes.
Ice Cream Bowls: Perfect for Mixing Flavors
If cones aren’t your thing, serving ice cream in bowls is another great option. Ice cream bowls give you more room to get creative with toppings, and they also make it easier to mix different flavors together. Consider serving your homemade ice cream with a drizzle of chocolate or caramel sauce, a sprinkle of crushed cookies, or fresh fruit like strawberries or bananas. You can even top your bowl with a dollop of whipped cream for extra indulgence.
Another fun idea is to serve your ice cream bowls as parfaits. Layer the ice cream with toppings such as crushed graham crackers, chocolate syrup, and a cherry on top for a layered treat. This makes a great dessert for special occasions or when you want to impress guests with a more sophisticated presentation.
Ice Cream Sandwiches: A Fun and Messy Delight
For those who love a little fun and mess, ice cream sandwiches are an excellent choice. These tasty treats combine two of your favorite things—cookies and ice cream. To make the perfect ice cream sandwich, use freshly baked cookies, either chocolate chip, oatmeal, or even shortbread. Simply scoop a generous amount of your homemade ice cream onto one cookie and top it with another, gently pressing them together. For a fun touch, roll the edges of the sandwich in sprinkles, mini chocolate chips, or chopped nuts. These ice cream sandwiches are not only delicious but also customizable to suit everyone’s tastes.
You can also experiment with other baked goods, like brownies, as the “bread” for your ice cream sandwich. Brownie ice cream sandwiches are perfect for anyone with a sweet tooth, offering a rich and chewy contrast to the cold, creamy ice cream filling. Don’t forget to let the sandwiches freeze for a bit before serving, so the ice cream can set and won’t melt too quickly.
In a Milkshake or Sundae: For Extra Decadence
For an indulgent treat, turn your homemade ice cream into a milkshake or a sundae. Milkshakes are a fun and easy way to enjoy ice cream on a hot day. Simply blend a few scoops of ice cream with some milk and a splash of vanilla extract. You can also add some chocolate or fruit syrup for extra flavor. Serve in a tall glass with a straw and a cherry on top for that perfect milkshake experience.
For sundaes, layer your ice cream in a bowl or glass, then top with your favorite toppings like whipped cream, crushed cookies, chopped nuts, hot fudge, caramel, or a maraschino cherry. You can even make a sundae bar for a party, where everyone can customize their own sundae with various toppings and sauces.
Ice Cream Cakes: A Showstopper for Special Occasions
If you’re looking for a more elaborate way to serve your homemade ice cream, why not make an ice cream cake? This is a perfect treat for birthdays, celebrations, or any special occasion. Start with a layer of cake (either store-bought or homemade) at the bottom, followed by a layer of your homemade ice cream. You can even add a layer of crushed cookies, fruit, or fudge between the ice cream layers. Freeze the cake until it’s solid, then top with whipped cream or a chocolate ganache for the finishing touch. It’s a fun and indulgent dessert that’s sure to impress your guests.
Serving Ice Cream in a Jar: A Cute and Portable Option
For a unique serving suggestion, try serving your ice cream in mason jars. Not only do they add a rustic charm to your presentation, but they also make for an easy-to-serve, portable dessert. Simply scoop the ice cream into the jars and top with your favorite toppings. You can even layer different flavors for a colorful presentation. These individual-sized servings are perfect for picnics, parties, or any time you want a fun and convenient way to serve ice cream.
How to Store Homemade Ice Cream: Tips on Freezing and Keeping the Ice Cream Fresh for Weeks
Once you’ve made your delicious homemade chocolate, vanilla, and strawberry ice cream, it’s important to know the best ways to store it to keep it fresh and creamy. Proper storage will ensure that your ice cream maintains its texture and flavor over time. Here are some tips to help you store your homemade ice cream and keep it tasting as good as the day you made it.
Use an Airtight Container for Best Results
The first step in storing homemade ice cream is to use the right container. Opt for an airtight, freezer-safe container to prevent air from getting in and causing ice crystals to form. These crystals can affect the texture, making it grainy or icy rather than smooth and creamy. Containers made of plastic or glass work well for this purpose. Glass containers with a tight-fitting lid are a great option since they help keep out moisture and odors that could alter the flavor of your ice cream.
Let the Ice Cream Set in the Freezer
Once your homemade ice cream is finished churning or mixing, transfer it immediately to your storage container. If you want a firmer texture, place the container in the freezer for a few hours. Homemade ice cream typically freezes faster than store-bought versions, so allow it to set for at least 4-6 hours to achieve the best texture. For a quicker freeze, divide the ice cream into smaller portions and store them in multiple containers.
Layer with Plastic Wrap for Extra Freshness
For the best protection against freezer burn, consider placing a layer of plastic wrap directly on top of the surface of your ice cream before sealing the container. This creates a barrier between the ice cream and the air in the freezer, which helps prevent the formation of ice crystals and preserves the texture. After covering the surface with plastic wrap, make sure to seal the container tightly with its lid.
Avoid Frequent Temperature Fluctuations
Frequent changes in the temperature of your freezer can affect the quality of your homemade ice cream. Try to store it in the coldest part of your freezer, away from the door, where the temperature can fluctuate. When you open and close the freezer door, the temperature can rise, which can cause the ice cream to melt slightly and then refreeze. This process can lead to the formation of ice crystals and a loss of creaminess. By minimizing temperature changes, you’ll keep your ice cream in optimal condition.
Keep Track of Storage Time
Homemade ice cream doesn’t contain preservatives like store-bought ice cream, so it’s best to enjoy it within a few weeks for the freshest flavor. Aim to consume your homemade ice cream within 2-3 weeks for the best taste and texture. While it can last up to a month or more, its flavor and consistency will begin to degrade after the two-week mark. If you plan to store your ice cream for an extended period, be sure to keep track of when you made it and enjoy it while it’s at its peak.
Prevent Ice Cream from Becoming Too Hard
One issue many people face with homemade ice cream is that it can become too hard to scoop after it’s been in the freezer for a while. If this happens, try letting it sit out for a few minutes at room temperature before serving. This will soften the ice cream slightly and make it easier to scoop. Additionally, you can store the ice cream in a shallow container rather than a deep one, which helps it freeze more evenly and reduces the chance of it becoming too hard.
Add Fresh Toppings Just Before Serving
To maintain the freshness of toppings like chocolate chips, sprinkles, or crushed cookies, avoid adding them directly to the ice cream before freezing. These toppings can lose their texture or become soggy in the freezer. Instead, store them separately in small containers and add them just before serving. This way, your toppings will stay crisp and fresh while your ice cream stays perfectly frozen.
Pairing with Toppings: Enhance Your Ice Cream Experience
Toppings can elevate your homemade ice cream and take it to the next level. They add variety, texture, and even more flavor. Whether you prefer something rich and indulgent or light and refreshing, the possibilities are endless. Here are some ideas for delicious toppings to pair with your homemade ice cream.
Chocolate Syrup: A Classic Favorite
Chocolate syrup is a timeless topping that adds richness to any ice cream flavor. It works especially well with chocolate-based ice creams, but it also pairs nicely with vanilla and strawberry. Drizzling the syrup over your ice cream creates a glossy, velvety layer that melts beautifully. You can even warm it up for a more indulgent experience.
Whipped Cream: Light and Airy
Whipped cream adds a light, fluffy contrast to the creamy texture of homemade ice cream. You can either buy it or make it at home by whipping heavy cream with a little sugar and vanilla. The airy texture makes each bite feel delicate and indulgent. For extra flair, you can pipe the whipped cream into beautiful swirls and top it with a sprinkle of cocoa or cinnamon.
Crushed Cookies: Crunchy Delight
If you love a little crunch with your ice cream, crushed cookies are a great choice. Oreos, chocolate chip cookies, and even graham crackers bring an extra layer of flavor and texture. Simply crush them and sprinkle them on top of your ice cream, or mix them in for a fun twist.
Fresh Fruit: Refreshing and Vibrant
For a burst of freshness, consider topping your ice cream with fresh fruit. Strawberries, raspberries, blueberries, and bananas work wonderfully with almost any flavor. For strawberry ice cream, try adding extra fresh strawberries for a vibrant and refreshing touch. The contrast between cold ice cream and fresh, juicy fruit is irresistible.
Nuts and Caramel: Sweet and Salty
Nuts bring a satisfying crunch to your ice cream. Try adding toasted almonds, pecans, or walnuts for a nutty, savory contrast. Combine these with a drizzle of caramel for a perfect balance of sweet and salty. If you’re feeling adventurous, a sprinkle of sea salt on top can enhance the overall flavor and bring out the sweetness of the ice cream.
Candy and Sprinkles: Fun and Festive
If you’re serving ice cream to kids—or just want to add some fun to your dessert—try topping it with candy or sprinkles. Mini M&Ms, crushed candies, or colorful sprinkles add a playful element. You can mix them in or sprinkle them on top for a fun, festive touch that appeals to all ages.
By pairing your homemade ice cream with these toppings, you can customize it to suit any occasion. Whether you’re looking for something decadent or light, there’s a topping to complement every flavor. This is the fun part of making homemade ice cream—the opportunity to get creative and personalize your dessert.
Frequently asked question
The ice cream that combines strawberry, chocolate, and vanilla is commonly known as Neapolitan ice cream. This classic combination brings together three popular flavors in one dessert. Traditionally, it’s arranged in a block with each flavor placed side by side without mixing, allowing each flavor to shine. Many people enjoy Neapolitan for its variety, as it offers the perfect combination of rich chocolate, creamy vanilla, and sweet strawberry. It’s a beloved dessert around the world, ideal for satisfying multiple tastes in one scoop.
Neapolitan ice cream gets its name from Naples, Italy, the birthplace of the Italian immigrants who brought the combination of flavors to America in the 19th century. While the exact origin of the name is debated, it’s believed that Neapolitan refers to the colorful appearance of the ice cream, which mimics the flag of Italy. The classic trio of strawberry, chocolate, and vanilla represents a patriotic nod to the Italian heritage. This combination became especially popular in the United States during the early 20th century, cementing the name “Neapolitan” as a household term for this ice cream trio.
The rarest ice cream flavors are often made using unique or exotic ingredients. Black sesame ice cream is one such rare flavor, especially popular in Asian countries. Another rare flavor is wasabi ice cream, which blends the spicy kick of wasabi with the creamy sweetness of ice cream. Additionally, flavors like bird’s nest ice cream (made from edible bird’s nests) and caviar ice cream (infused with real caviar) are considered some of the rarest. These types of ice cream are typically found in high-end restaurants or specialty dessert shops, offering an adventurous twist for those looking to step outside the classic chocolate vanilla strawberry ice cream options.
Harlequin ice cream refers to a colorful, swirled ice cream flavor, often with multiple vibrant colors mixed together in a unique pattern. The name “Harlequin” comes from the Harlequin character in Italian commedia dell’arte, a stock character often portrayed in a colorful, patchwork costume. Just like the character’s varied and bold look, Harlequin ice cream combines bold flavors and bright colors, often mixing several fruity or creamy elements. It’s visually striking and offers a fun and playful alternative to the traditional chocolate vanilla strawberry ice cream.
Conclusion
To wrap things up, chocolate vanilla strawberry ice cream remains an all-time favorite for ice cream lovers around the world. The classic combination of these three flavors creates a perfectly balanced dessert that appeals to a wide variety of tastes. Whether you enjoy it on a hot summer day or as a sweet treat after dinner, chocolate vanilla strawberry ice cream is sure to bring a smile to anyone’s face. It’s a simple yet delicious dessert that never goes out of style.
For those looking to experiment with different recipes, chocolate vanilla strawberry ice cream can easily be customized. You can add fun toppings, mix-ins, or even try making it dairy-free with alternatives like almond milk or coconut milk. This versatility is part of what makes it such a beloved dessert. So, whether you stick to the traditional trio or put your own spin on it, chocolate vanilla strawberry ice cream offers endless possibilities.
If you’re a fan of experimenting with flavors, why not try making something new? For example, you could try out the Xango dessert, which combines creamy cheesecake with a crispy coating. It’s another great dessert to try, and you can find a quick and tasty recipe for Xango dessert. With so many delicious options to explore, you’ll never run out of ideas for your next sweet creation!
Enjoy the timeless appeal of chocolate vanilla strawberry ice cream and explore new recipes to elevate your dessert game!
Chocolate Vanilla Strawberry Ice Cream Recipe
Equipment
- 1 Ice cream maker
- 1 Medium bowls
- 1 Whisk
- 1 Measuring spoons
- 1 Measuring cups
- 1 Spatula
- 1 Freezer-safe container
Materials
- 2 cups heavy cream
- 1 cup whole milk
- ¾ cup granulated sugar
- 1 teaspoon vanilla extract
- ⅓ cup unsweetened cocoa powder for chocolate layer
- 1 cup fresh strawberries pureed for strawberry layer
- A pinch of salt
Instructions
- Prepare the Base: In a medium-sized bowl, whisk together heavy cream, milk, sugar, and a pinch of salt. This will serve as the base for the chocolate, vanilla, and strawberry flavors.
- Chocolate Layer: Divide the base mixture into two equal portions. In one portion, add cocoa powder. Stir until it is fully dissolved, creating the chocolate layer.
- Strawberry Layer: In the other portion of the base, add pureed strawberries. Stir until well combined to create the strawberry layer.
- Churn the Ice Cream: Pour the chocolate mixture into the ice cream maker. Churn according to the manufacturer’s instructions. Once done, repeat the process with the strawberry mixture.
- Layer the Flavors: In a freezer-safe container, layer the chocolate, vanilla, and strawberry ice cream, alternating them. For a marbled effect, gently swirl them with a spatula.
- Freeze and Set: Cover the container and freeze for at least 4 hours or until the ice cream is firm.
- Serve and Enjoy: Once frozen, scoop the ice cream into bowls or cones. Serve and enjoy this delightful treat!
1 thought on “How to Make the Best Chocolate Vanilla Strawberry Ice Cream at Home”