
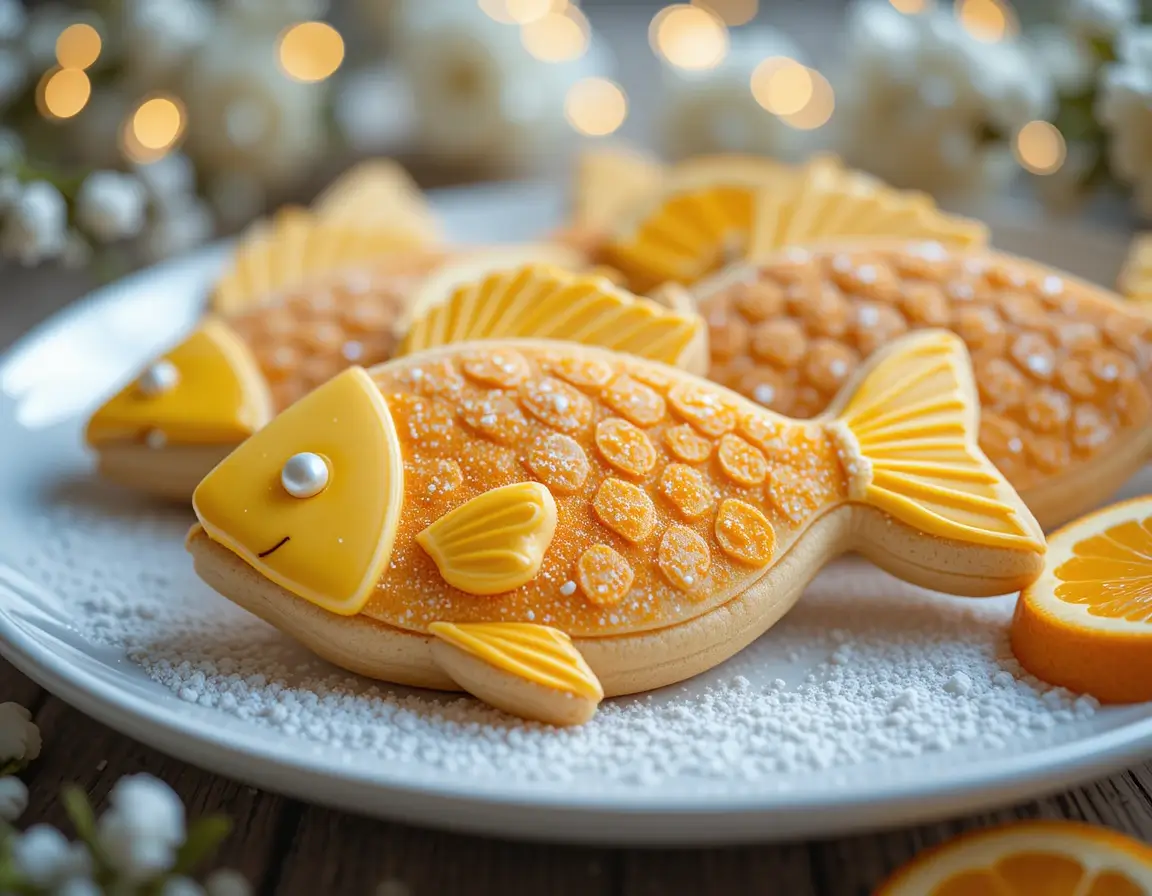
Looking for a fun and easy way to make a colorful treat? Try this orange fish cookies recipe! Perfect for kids and adults alike, these whimsical cookies bring a splash of flavor and creativity to any occasion. The citrusy taste of orange combined with the playful fish shape makes this recipe stand out. Whether you’re baking for a holiday, party, or simply a fun family activity, these cookies are sure to brighten up your day.
This orange fish cookies recipe is simple to follow, with ingredients you probably already have in your kitchen. In just a few easy steps, you can create beautiful, delicious cookies that everyone will love. The vibrant orange color adds a cheerful touch, making them perfect for celebrations or everyday treats. Ready to dive in? Let’s get started on making your very own orange fish cookies!
Why Orange Fish Cookies Are the Perfect Treat
Fun and Creative Designs: Why Fish-Shaped Cookies Are Great for Kids and Family Baking Projects
Baking fish-shaped cookies is a fantastic way to introduce kids to the kitchen. The fun shapes spark creativity, making the baking process enjoyable for everyone. These cookies offer more than just a tasty treat—they’re a chance to create something special together.
Easy and Fun for Kids
Fish-shaped cookies are simple to make. The shape is easy for kids to cut out and decorate. The process helps children practice motor skills and creativity. They can experiment with different colors and designs on each cookie.
Endless Decorating Options
Decorating fish-shaped cookies is where the fun begins. Kids can use vibrant orange icing to create colorful fish. They can add sprinkles, edible glitter, or small candy eyes for extra flair. The possibilities for decoration are endless. This makes it a great project for kids of all ages.
Perfect for Family Bonding
Baking together is a fun bonding activity. Parents and kids can work as a team. Everyone can contribute to making the cookies and decorating them. The activity strengthens family relationships and creates lasting memories.
A Theme for Every Occasion
Fish-shaped cookies are versatile. They fit perfectly with beach parties, ocean-themed birthdays, or even school events. You can personalize them for any occasion with different designs and colors. It’s an easy way to make any celebration extra special.
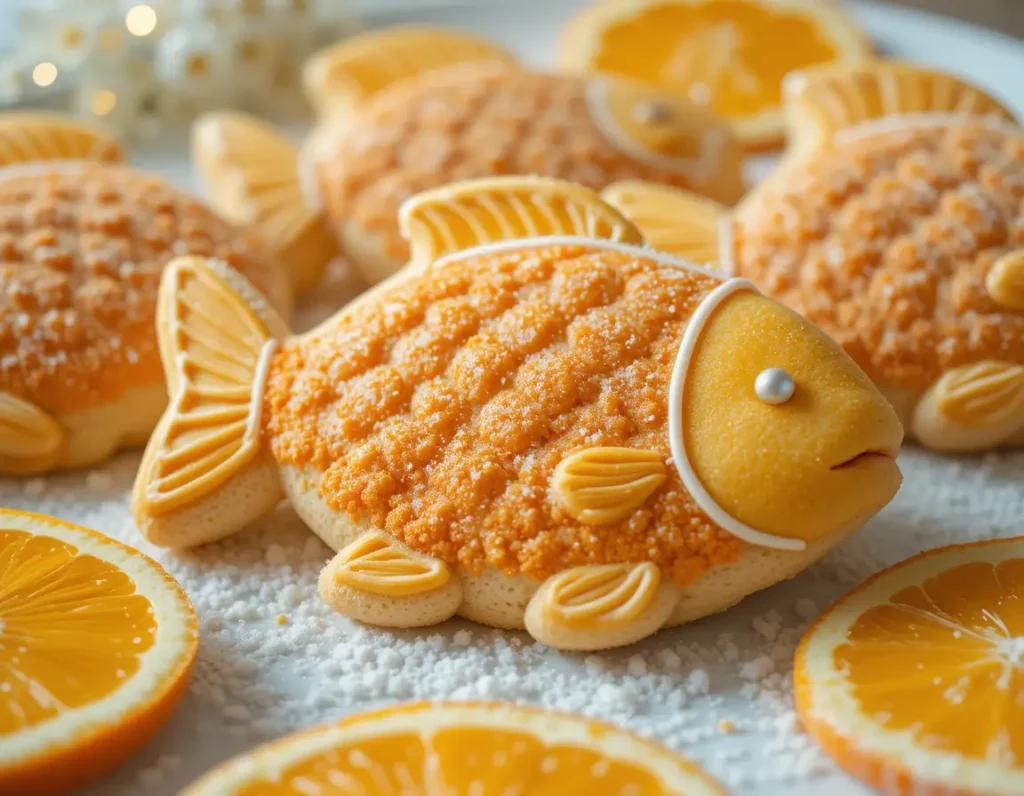
Colorful and Playful: How Adding Orange Icing or Food Coloring Creates a Vibrant, Appealing Look
Adding a splash of orange icing or food coloring takes fish-shaped cookies to the next level. The bright, cheerful hue catches the eye and adds a playful touch to your treats. This colorful finish not only makes your cookies visually appealing but also enhances the overall baking experience.
Orange Icing for a Bright, Citrus Burst
Orange icing is the perfect way to add a zesty twist to your fish cookies. With just a few simple ingredients, you can create a smooth, bright orange glaze. The sweet flavor of the icing complements the citrusy orange in the cookie dough. It gives the cookies a bold, refreshing taste while making them look vibrant and fun.
Food Coloring for Custom Colors
If you want to experiment with different shades of orange or add additional colors, food coloring is the way to go. You can mix yellow, red, or even a little bit of brown to adjust the color to your liking. Food coloring offers endless customization. You can even create colorful gradients or marble effects for a unique look.
Enhancing the Visual Appeal
When you add orange icing or food coloring, you’re not just decorating the cookies—you’re making them a work of art. The bright, playful colors appeal to both kids and adults, making these cookies a hit at parties or family gatherings. The vibrant look alone makes these cookies irresistible, ensuring they will be the highlight of any occasion.
Creative Decoration Ideas
Don’t stop at just icing! Once the orange color is set, you can get creative with additional decorations. Consider adding colorful sprinkles, edible glitter, or small candy pieces to create patterns or designs on each fish. This adds an extra layer of fun and makes each cookie unique.
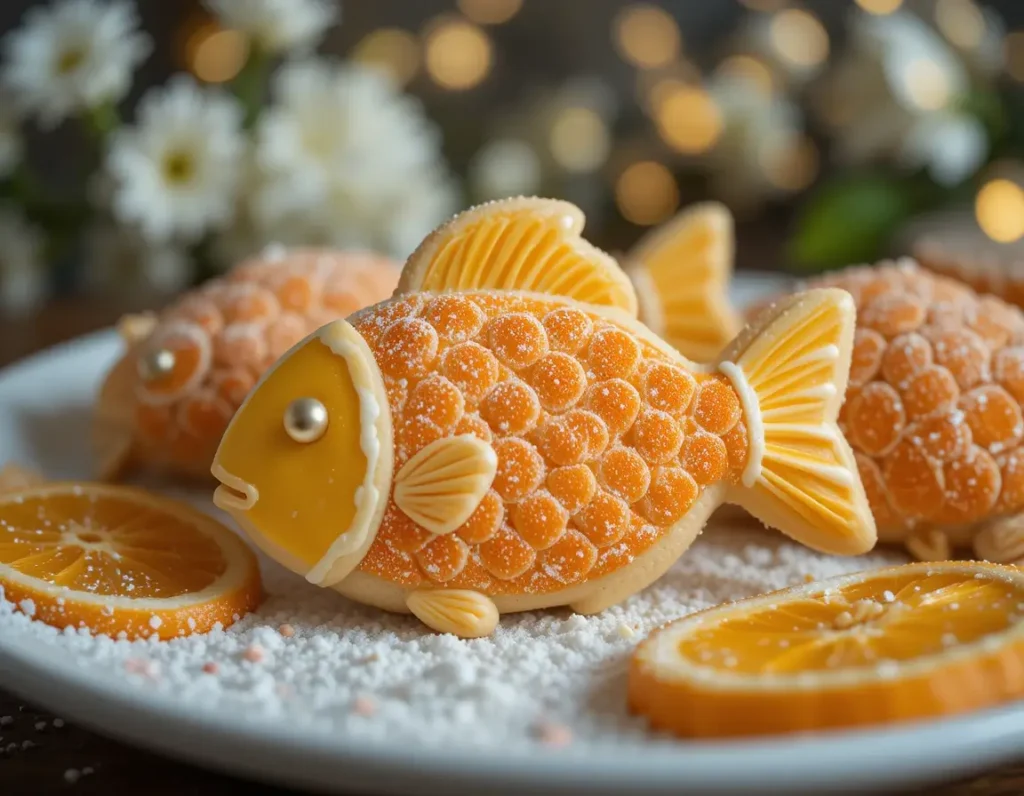
Perfect for Any Occasion: From Holidays to Parties, These Cookies Make a Sweet Statement
Orange fish cookies are not just delicious—they’re perfect for almost any occasion. Whether you’re baking for a holiday, birthday, or family gathering, these cookies make a bold, sweet statement. Their playful design and vibrant color ensure they stand out, no matter the setting.
Ideal for Holiday Celebrations
These cookies shine during holiday season celebrations. Think about the fun of baking orange fish cookies for a summer beach party or an ocean-themed birthday. They’re also great for Easter, where their bright orange color can add to the festive atmosphere. Holiday baking brings family together, and these cookies bring a cheerful touch to the table.
Perfect for Parties and Gatherings
Whether you’re hosting a birthday party or a family reunion, orange fish cookies are a showstopper. Their unique fish shape and vibrant color make them eye-catching, and they’re fun to share. You can even personalize them to match the theme of your event. Add a little sparkle or use different colored icing for a creative twist that will leave guests talking about the cookies long after the party ends.
Fun for School Events
These cookies also work well for school parties or class celebrations. Kids love the fun design, and parents can feel good about serving a homemade treat. Orange fish cookies are easy to transport, store, and share. They’re a simple yet meaningful way to contribute to school events, and everyone will appreciate the effort put into creating something special.
The Perfect Gift or Takeaway Treat
Want to make an event extra special? Consider packaging these cookies as thoughtful gifts or party favors. You can place them in gift boxes or bags, making them a sweet takeaway treat. Whether for a birthday, a holiday, or a simple thank-you gesture, orange fish cookies make a charming gift everyone will enjoy.
Essential Ingredients for Orange Fish Cookies
Basic Cookie Dough Ingredients: Flour, Sugar, Butter, Eggs, and Vanilla Extract
The foundation of any great cookie starts with the basics. For the perfect orange fish cookies, you’ll need just a few essential ingredients. These simple ingredients come together to form a dough that’s easy to work with and delivers a deliciously soft yet crispy texture. Here’s a closer look at the key components of your cookie dough.
Flour: The Essential Base
Flour is the primary ingredient in any cookie dough, and it provides structure. The type of flour you use can make a difference. All-purpose flour is perfect for this orange fish cookies recipe, giving your cookies the right consistency without being too heavy. It also allows the dough to hold its shape when you cut out the fish shapes with a cookie cutter.
Sugar: Sweetness and Texture
Sugar not only sweetens the dough but also contributes to the texture of the cookies. Granulated sugar helps create a slightly crisp edge, while adding just the right amount of sweetness. You can also adjust the sugar level based on your personal taste. If you like your cookies sweeter, feel free to increase the sugar slightly. It’s a great way to control the balance of flavor.
Butter: Richness and Softness
Butter adds richness and softness to the cookie dough. It gives your cookies that melt-in-your-mouth texture that everyone loves. Room temperature butter is easier to mix into the dough, so make sure to let it soften before you start. The fat in butter also helps the cookies bake evenly, resulting in a golden, crisp exterior with a soft, chewy center.
Eggs: Binding and Moisture
Eggs are crucial for binding all the ingredients together and adding moisture to the dough. They help give the cookies structure and prevent them from being too dry or crumbly. The proteins in eggs also contribute to the cookies’ texture, helping them hold their shape while baking. One or two eggs, depending on the batch size, will be enough to achieve the perfect dough consistency.
Vanilla Extract: The Flavor Enhancer
Vanilla extract enhances the flavor of your orange fish cookies by providing a subtle sweetness and depth. A splash of vanilla helps balance the citrusy orange zest in the dough, giving your cookies a full-bodied taste. It’s an ingredient that adds richness and complexity, making your cookies more flavorful without overpowering the orange notes.
Adding Flavor: The Importance of Orange Zest or Orange Extract to Create That Citrus Burst
To elevate your orange fish cookies recipe, adding orange zest or orange extract is essential. These ingredients infuse your cookies with a refreshing citrus flavor, setting them apart from standard sugar cookies. The combination of sweet and tangy notes will leave everyone craving more. Let’s explore why orange zest and orange extract are so important in creating that perfect citrus burst.
Orange Zest: Fresh and Aromatic
Orange zest is the outer peel of an orange, rich in essential oils that provide a bold, aromatic flavor. When you grate the zest into your cookie dough, it releases a fresh, zesty citrus aroma that immediately fills the air. This vibrant scent carries over into the taste, giving your orange fish cookies a tangy kick. The zest is the secret ingredient that enhances the dough’s overall flavor and helps balance the sweetness of the sugar.
In addition to its flavor, orange zest adds texture to your dough. The tiny grated pieces blend in seamlessly, allowing the citrus notes to pop without being overwhelming. The zest’s subtle crunch also adds a delightful contrast to the smoothness of the dough and the icing.
Orange Extract: A Bold Citrus Flavor
If you want to intensify the orange flavor in your cookies, orange extract is the way to go. Unlike zest, orange extract is a concentrated liquid made from the essence of oranges. Just a few drops of orange extract can pack a powerful punch, enhancing the citrus flavor in your cookies without overpowering the other ingredients.
Orange extract is especially useful if you don’t have fresh oranges on hand or prefer a more consistent flavor. It’s easy to incorporate into your orange fish cookies dough, ensuring every bite has a satisfying citrus burst. Because of its concentrated nature, you can control the flavor strength by adjusting the amount used, giving you complete flexibility.
Combining Zest and Extract for the Perfect Citrus Flavor
For the ultimate orange flavor, you can combine both orange zest and orange extract. The zest gives your cookies a fresh, aromatic citrus undertone, while the extract adds a bold, concentrated flavor. The balance between the two results in the perfect citrusy burst that will leave your taste buds tingling. This combination is a simple yet effective way to ensure your cookies are bursting with flavor from start to finish.
Decorating Supplies: Royal Icing, Food Coloring, and Fish-Shaped Cookie Cutters
The key to making your orange fish cookies stand out isn’t just in the dough—it’s in the decorating supplies you use. With the right tools, you can transform simple cookies into creative, vibrant works of art. Royal icing, food coloring, and fish-shaped cookie cutters are essential for crafting your cookies into a fun, eye-catching treat. Let’s take a closer look at these decorating essentials.
Royal Icing: Smooth and Customizable
Royal icing is the ideal choice for decorating your orange fish cookies. This smooth, glossy icing hardens quickly, making it perfect for intricate designs. It’s easy to work with and can be piped into any shape or pattern. To achieve a flawless finish, simply mix powdered sugar, egg whites (or meringue powder), and a little water until you reach a thick yet spreadable consistency.
Royal icing provides the perfect canvas for creativity. Once applied, it hardens to a smooth, glossy finish, making your fish cookies not only delicious but visually stunning. You can use royal icing to outline the edges of your fish or cover the entire surface with a thin layer, giving the cookies a professional, polished look.
Food Coloring: Add Vibrancy and Variety
To make your orange fish cookies even more playful and visually appealing, food coloring is essential. By adding a few drops of food coloring to your royal icing, you can create vibrant shades that will bring your cookies to life. Orange food coloring will deepen the citrus flavor while enhancing the look of your cookies. You can also experiment with other colors to make multi-colored fish, adding a whimsical touch to each cookie.
Food coloring isn’t just limited to icing. You can use it to create different color gradients or patterns on your cookies. By swirling colors together or creating small accent designs, you can give each fish its own personality. Whether you’re creating an ocean-themed batch or just want to experiment with bright shades, food coloring gives you endless possibilities.
Fish-Shaped Cookie Cutters: Achieving the Perfect Shape Every Time with Your Orange Fish Cookies Recipe
Of course, to achieve the signature fish shape, a fish-shaped cookie cutter is essential. These cutters come in various sizes and styles, ensuring you can create the perfect fish shape for your orange fish cookies every time. A sturdy cookie cutter allows for clean, precise edges, making it easy to cut the dough into uniform shapes. The fish design adds a fun, playful element to your cookies that’s perfect for kids and adults alike.
Cookie cutters are also a great way to get creative with the size and layout of your cookies. You can use smaller cutters for bite-sized treats or larger ones for more substantial cookies. The versatility of fish-shaped cutters ensures that no two batches need to look the same. Plus, the design makes it easy to decorate and adds a unique touch to any occasion.
Step-by-Step Guide to Making Orange Fish Cookies
Preparing the Cookie Dough: Mixing Dry and Wet Ingredients, and Incorporating Orange Zest for Flavor
Creating the perfect orange fish cookies starts with preparing the dough. The process of mixing dry and wet ingredients, followed by incorporating fresh orange zest, is key to achieving the right texture and flavor. Let’s break down each step to ensure your cookies turn out perfectly.
Mixing the Dry Ingredients
Start by measuring and mixing your dry ingredients. In a large bowl, combine all-purpose flour, baking powder, and a pinch of salt. These dry ingredients form the base of your dough. Sifting the flour beforehand ensures there are no lumps and that it’s evenly mixed with the baking powder. This step helps your orange fish cookies rise properly while keeping their texture light and airy.
The baking powder in the dry mix helps the cookies maintain a soft texture, while the salt balances the sweetness. Be sure to stir the dry ingredients thoroughly to make sure everything is evenly distributed. This simple step is important for achieving consistent results throughout your batch.
Mixing the Wet Ingredients
In a separate bowl, mix your wet ingredients. Start by creaming the butter and sugar together until smooth and fluffy. This is a key step in creating a soft, tender dough. The sugar will help to aerate the butter, which is crucial for the cookie’s light texture. Once the butter and sugar are well combined, add the eggs one at a time, ensuring each one is fully incorporated before adding the next. The eggs provide moisture and help bind the dough together.
Next, add the vanilla extract, which enhances the overall flavor of your orange fish cookies. Vanilla brings a touch of warmth and complexity that complements the citrusy orange flavor. After the wet ingredients are well blended, it’s time to combine them with the dry mixture.
Incorporating Orange Zest for a Citrusy Flavor in Your Orange Fish Cookies Recipe
Now comes the exciting part—adding orange zest. Grate the outer peel of a fresh orange to release its oils, and fold it into your wet mixture. Orange zest is the key to that bright, citrusy burst that makes your cookies stand out. The oils in the zest add a fragrant aroma and a tangy, flavorful kick to the dough.
When you mix in the orange zest, you’ll start to notice the vibrant citrus notes blending into the dough. This step ensures your orange fish cookies have that signature flavor. The zest’s natural oils mix perfectly with the sugar and butter, creating a balanced and aromatic dough.
Combining Dry and Wet Ingredients
Slowly add the dry mixture to the wet mixture, a little at a time, stirring gently as you go. It’s important not to overmix the dough at this stage—just mix until everything is combined. Overmixing can lead to dense cookies, which we want to avoid. If the dough seems a little too soft, you can chill it in the refrigerator for 30 minutes to make it easier to roll out.
Once your dough is mixed, you’re ready to move on to rolling it out and cutting your fish shapes. But remember, the key to great orange fish cookies lies in the careful mixing of both wet and dry ingredients and the addition of fresh orange zest. This step guarantees that your cookies will be flavorful, soft, and perfectly textured.
Shaping the Cookies: Using a Rolling Pin, Cutting Out Fish Shapes, and Placing Them on a Baking Sheet
Shaping the cookies is a fun step in the baking process. After making your dough, it’s time to roll it out, cut out fish shapes, and arrange them on a baking sheet. This step is simple but essential for creating perfectly shaped cookies.
Rolling Out the Dough
Start by lightly flouring your work surface. Sprinkle a small amount of flour, just enough to prevent the dough from sticking. Roll out the dough to about ¼ inch thick with a rolling pin. Be sure the dough is even. If it’s too thin, the cookies will be crispy. Also if it’s too thick, they might not bake evenly.
If the dough starts sticking to the rolling pin, sprinkle more flour on top. This will make the process smoother. An even thickness is key for consistent baking.
Cutting Out Fish Shapes
Now, use your fish-shaped cookie cutter to cut out the shapes. Press down firmly to ensure clean edges. If the cutter sticks to the dough, dip it into flour. This prevents the dough from sticking to the edges of the cutter. After cutting out the fish, gently lift them off the surface.
Continue cutting out fish shapes, making sure to leave space between each one. If the dough starts to soften, pop it in the fridge for 10-15 minutes. This helps the cookies hold their shape.
Placing Cookies on the Baking Sheet for Perfect Orange Fish Cookies Recipe Results
Transfer the fish-shaped cookies to a baking sheet lined with parchment paper. Leave a little space between each one. This allows room for the cookies to spread while baking. You can use multiple sheets if needed. Overcrowding the tray can cause uneven baking.
For best results, chill the baking sheet for a few minutes before baking. This helps keep the cookies from spreading too much in the oven. Now, you’re ready to bake your perfectly shaped fish cookies!
Baking Tips: Oven Temperature, Bake Time, and Cooling Instructions to Ensure Crispy, Golden Cookies
When baking orange fish cookies, getting the oven temperature, bake time, and cooling process right is essential. These small details are what ensure your cookies turn out crispy and golden every time. By following a few simple tips, you can guarantee that your cookies are perfectly baked and ready for decoration.
Oven Temperature: Preheat for Even Results
First and foremost, preheating the oven is crucial. Always preheat the oven to 350°F (175°C) before placing your orange fish cookies inside. This step allows for even heat distribution and ensures your cookies bake properly from the start. Without preheating, your cookies may not bake evenly, leading to inconsistent results. Therefore, make sure the oven has reached the desired temperature before baking.
Moreover, you might want to check your oven’s temperature with an oven thermometer. This step helps you avoid any temperature discrepancies, as ovens can sometimes run hotter or cooler than their settings indicate. By using an accurate temperature, you can trust the baking process will go smoothly.
Bake Time: Watch for Golden Edges
Bake time is another critical factor to consider. For orange fish cookies, the ideal bake time ranges from 8 to 10 minutes. However, this can vary depending on your oven, so it’s wise to start checking the cookies after 8 minutes. To know when they’re done, look for golden edges and set centers. If you like a softer cookie, you can remove them slightly earlier, around 8 minutes.
On the other hand, if you prefer a crispier texture, leave them in for the full 10 minutes. It’s important to remember that the cookies will continue to cook for a short time even after you take them out of the oven. This means the residual heat can help achieve the perfect texture if you pull them out at just the right time.
Cooling Instructions: Let the Cookies Rest
After removing your cookies from the oven, the cooling process plays a vital role in maintaining their texture. Immediately transfer your orange fish cookies to a cooling rack. This allows air to circulate around the cookies and prevents them from becoming soggy. If left on the hot baking sheet, the cookies might continue baking or become too soft.
Additionally, be patient while they cool. Let them rest for at least 10 minutes before touching them. This waiting time allows the cookies to firm up, making them easier to handle and decorate. If you plan to ice the cookies, it’s essential they’re completely cool. Decorating warm cookies can cause the icing to melt, affecting the design.
Decorating Your Orange Fish Cookies
Royal Icing Basics: How to Make and Apply Royal Icing for a Smooth Finish
Royal icing is an essential part of decorating orange fish cookies, providing a smooth and polished finish. Whether you aim to create intricate designs or simply cover the cookie’s surface, royal icing is perfect for achieving a flawless look. In fact, when following an orange fish cookies recipe, royal icing ensures that your fish-shaped cookies have a beautiful, professional finish.
To get the best results with your orange fish cookies recipe, start by making a batch of royal icing. This icing dries to a hard, smooth finish, making it ideal for decorating your orange fish cookies. Whether you’re creating simple or detailed designs, royal icing can help you achieve the desired effect, making your cookies stand out.
When decorating, make sure to apply the royal icing carefully. It’s important to give each layer time to dry before adding more details, especially when working with an orange fish cookies recipe. Patience is key to ensuring that your royal icing sets properly and your orange fish cookies turn out beautifully every time.
How to Make Royal Icing for Your Orange Fish Cookies Recipe
Making royal icing is easy and requires only a few ingredients. You’ll need egg whites (or meringue powder), powdered sugar, and either lemon juice or water. When combined, these ingredients create a thick and smooth icing that hardens as it dries, making it perfect for decorating your cookies.
Start by beating the egg whites (or the meringue powder mixture) until stiff peaks form. Gradually add the powdered sugar while continuing to mix. To adjust the consistency, add a small amount of lemon juice or water. For thicker icing, add more powdered sugar; for a thinner consistency, add a little more liquid. The goal is to create an icing that’s smooth enough to flow from a piping bag without being too runny.
Tip: If you’re using raw egg whites, ensure they are pasteurized to reduce the risk of foodborne illness. Meringue powder is a safer option and can be used in place of egg whites.
Coloring and Flavoring the Icing
Once you’ve made the royal icing, you can color it to match the theme of your orange fish cookies. For vibrant colors, use gel food coloring instead of liquid. Gel food coloring is more concentrated, so it provides richer colors without affecting the icing’s texture. To achieve a bright orange color, use just a few drops of orange gel food coloring.
Flavoring your royal icing is optional but can add a delicious touch. You could use vanilla, almond, or even citrus extracts. However, make sure the flavor complements the cookie itself, rather than overpowering it. A subtle hint of vanilla works perfectly with the citrusy flavors of the cookies.
Applying Royal Icing to Your Cookies
Now it’s time to decorate. Start by outlining your cookies with a piping bag filled with royal icing. You can use a fine-tipped nozzle for precise, clean outlines around each fish shape. The outline will act as a barrier, keeping the flood icing in place.
Next, fill in the inside of each fish shape with flood icing. This involves using a thinner consistency of royal icing. Pipe the icing into the outlined area, then use a toothpick or small spatula to spread it evenly and fill any gaps. Work quickly, as royal icing begins to dry fast. If you see any air bubbles, gently pop them with a toothpick to keep the surface smooth.
Drying Time and Achieving a Smooth Finish
After applying the royal icing, allow your orange fish cookies to dry completely. The drying time can vary depending on the humidity in your kitchen and the thickness of the icing, but it usually takes about 1-2 hours for the icing to dry to the touch. For best results, leave the cookies to dry overnight to ensure the icing hardens fully.
If you desire a more intricate design, you can add additional layers of royal icing. Just make sure each layer is completely dry before adding another to avoid any smudging. This technique will give you a smooth, glossy finish on your cookies, perfect for showcasing any decorative details.
Using Food Coloring: Tips on How to Achieve Bright, Vivid Orange Colors in Your Orange Fish Cookies Recipe
Achieving the perfect vibrant orange color for your fish cookies can make all the difference in their appeal. Whether you’re creating a simple design or intricate decorations, food coloring is essential to bring your cookies to life. With the right techniques, you can easily achieve a bright and vivid orange color that will make your cookies irresistible. Here are a few tips to help you get the perfect shade of orange.
Choose the Right Food Coloring
When it comes to food coloring, gel colors are your best choice. Gel food coloring is more concentrated than liquid food coloring, which means you’ll need less of it to achieve a rich, vibrant color. This also helps maintain the consistency of your royal icing or dough. Liquid food coloring, on the other hand, can dilute your icing and alter its texture.
For a bold orange hue, start with an orange gel food coloring. Brands like AmeriColor or Wilton offer high-quality gel colors that provide excellent results. A little goes a long way with gel colors, so add a small amount and adjust the shade as needed.
Start with a Small Amount
To get the right shade, start by adding just a few drops of food coloring to your royal icing or cookie dough. You can always add more, but it’s harder to lighten the color once it’s too dark. Mix the food coloring thoroughly to ensure the color is even throughout the icing or dough.
If you want to deepen the orange color, you can add a small drop of red gel food coloring to give it a richer tone. Adding red helps to intensify the orange, creating a more vibrant look that will stand out on your cookies.
Adjusting the Color to Match Your Desired Shade
Achieving the perfect shade of orange for your fish cookies is all about experimenting and adjusting the color. If the orange looks too light, gradually add more food coloring, a drop at a time. Mix thoroughly between each addition and be patient as you see the color develop.
On the other hand, if your orange turns out too dark, add a little bit of white icing or frosting to lighten it up. This will soften the color and bring it closer to the desired shade. Keep in mind that the icing will dry slightly darker than the color you see while mixing, so adjust accordingly.
Test the Color Before Applying
Before you start decorating your fish-shaped cookies, it’s important to test the color to ensure it’s the shade you want, especially when working with an orange fish cookies recipe. To do this, pipe a small amount of the colored icing onto a piece of parchment paper or a scrap piece of dough. Let it dry for a few minutes to see the final color. If the color isn’t quite right, adjust the icing accordingly and re-test until you achieve your desired result. This ensures your orange fish cookies have the perfect vibrant color when you start decorating.
Testing the color is especially important for fish-shaped cookies since the icing’s final hue may appear slightly different after it dries. Taking the time to perfect the color before decorating your orange fish cookies recipe will help you create cookies that not only taste amazing but also look visually appealing. Whether you’re going for a bold orange or a softer shade, getting the color just right will make your cookies stand out!
Tips for Even Coloring
When working with orange in large batches of royal icing or dough, make sure to mix thoroughly to avoid streaks. Stir slowly and evenly until the color is uniform. For large batches, you may need to use a larger mixing bowl and a whisk to ensure every part of the icing or dough is colored the same.
To avoid over-mixing, be gentle when incorporating the food coloring, especially if using a stand mixer. Over-mixing can change the texture of your dough or icing, which could affect the final product.
Keep Your Work Area Clean
Food coloring can stain surfaces, so it’s important to protect your workspace. Use disposable gloves or a silicone spatula to handle the food coloring, and cover your work surface with parchment paper or a non-stick mat. Clean any spills quickly to prevent stains from setting.
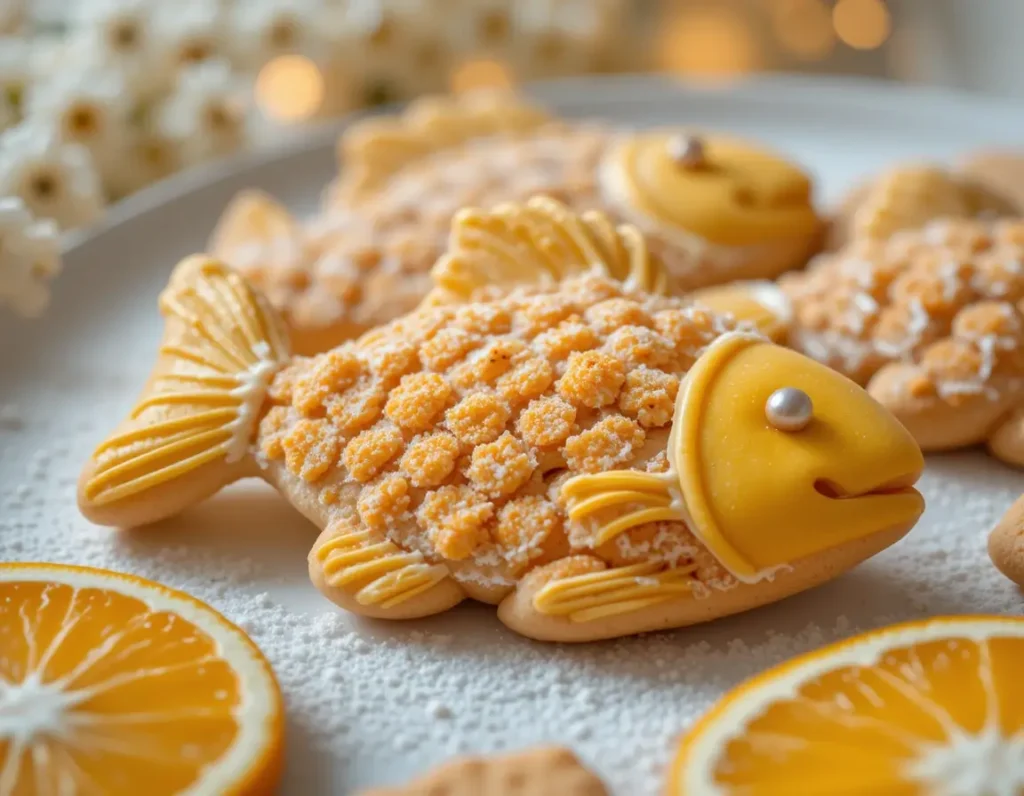
Creative Decoration Ideas: Add Unique Touches Like Edible Glitter or Sprinkles to Elevate Your Orange Fish Cookies Recipe
Decorating your orange fish cookies is where the fun begins! While royal icing creates a beautiful base, adding extra decorative touches can make your cookies truly stand out. Creative decorations like edible glitter, sprinkles, and other embellishments can elevate the visual appeal of your cookies and make them even more exciting. Let’s dive into some unique decoration ideas that will impress everyone at your next celebration.
Edible Glitter: Sparkle and Shine
One of the easiest ways to add a little extra flair to your fish cookies is by using edible glitter. It’s an excellent choice for giving your cookies a magical, sparkly finish that catches the light. You can find edible glitter in a variety of colors, including gold, silver, or even vibrant hues that complement the orange icing.
To apply edible glitter, wait until your royal icing has dried completely to avoid smudging. Once the cookies are dry, gently sprinkle a small amount of glitter over the surface of the cookies. You can use a fine-mesh sieve to create an even, light dusting of glitter for a delicate effect. The sparkle will catch everyone’s eye, adding a touch of elegance and fun to each cookie.
Fun Sprinkles for Added Texture
Another way to enhance the look of your orange fish cookies is by using fun sprinkles. Sprinkles come in many shapes, sizes, and colors, so you can get creative with your designs. For a beachy or underwater vibe, try using starfish-shaped sprinkles or tiny fish-shaped confetti.
You can also experiment with different textures of sprinkles, such as sugar crystals, jimmies, or nonpareils. Sugar crystals give your cookies a textured, sparkling finish, while jimmies and nonpareils add a playful and colorful touch. The key is to choose sprinkles that will contrast well with your orange icing, ensuring the cookies look vibrant and eye-catching.
Shimmering Sugar for a Touch of Elegance
Shimmering sugar is another fun way to give your fish cookies a special touch. This type of sugar is coated with a fine dust of sparkle, adding a subtle yet stunning effect to your cookies. To apply, lightly brush a coat of royal icing over your cookies and immediately sprinkle shimmering sugar on top before the icing has a chance to dry.
The sparkling sugar enhances the colors of the icing and gives the cookies a little extra shine without being overwhelming. This elegant touch works especially well for cookies that will be featured at a party or holiday gathering, making them feel festive and high-end.
Customizing with Colored Sugar in Your Orange Fish Cookies Recipe
If you’re looking to match your fish cookies to a specific theme, colored sugar is a simple yet effective decoration. You can purchase pre-colored sugar or make your own by mixing granulated sugar with a few drops of food coloring. This customization allows you to create sprinkles in any shade you need, ensuring that your cookies fit your theme perfectly.
For example, you could use blue or turquoise sugar to mimic the look of ocean waves for a beach-themed party. Or, go for gold sugar to add a luxurious look to your cookies. Colored sugar can be sprinkled on top of wet royal icing or used to coat the edges of your cookies for a colorful, textured look.
Adding Edible Pearls or Confetti
For even more creativity, consider using edible pearls or confetti to decorate your orange fish cookies. Edible pearls add a sophisticated touch, making your cookies look like tiny works of art. These pearls come in various sizes and colors, so you can choose the best match for your design.
Similarly, edible confetti in fun shapes like hearts, stars, or even tiny fish can add an extra element of fun. Sprinkle these decorations on your cookies once the icing is dry for a pop of color and a playful touch.
Combining Multiple Decorations
The great thing about cookie decorating is the endless possibilities for creativity, especially when working with an orange fish cookies recipe. You can easily combine different decoration techniques to make your cookies stand out. For example, you could use edible glitter to add a sparkly effect, sprinkle colored sugar around the edges, and even add a few edible pearls for extra texture. Mixing and matching various types of decorations allows you to create unique and fun designs each time.
When decorating your fish-shaped cookies, let your imagination run wild! Whether you want to make vibrant designs or opt for something more subtle, an orange fish cookies recipe gives you the flexibility to be as creative as you like. This versatility makes decorating orange fish cookies a fun project for both beginners and experienced bakers. You can even switch up your decorations based on the season or special events, ensuring that each batch of fish-shaped cookies is a unique creation.
By exploring different decorating options, you can personalize your orange fish cookies recipe and impress your friends and family with your cookie-decorating skills!
Tips and Tricks for Perfect Orange Fish Cookies
Adjusting for Texture: How to Achieve the Perfect Balance Between Chewy and Crispy Cookies
Achieving the right texture is key to making your orange fish cookies irresistible. Some people prefer a chewy cookie, while others enjoy a crisp bite. Fortunately, with a few simple adjustments, you can create the perfect balance between chewy and crispy textures in your cookies. Whether you want a soft, melt-in-your-mouth experience or a crunchy finish, this guide will help you get it just right.
Ingredients That Affect Texture
The texture of your fish cookies begins with the ingredients you use. Different types of fat, sugar, and flour can all influence whether your cookies turn out chewy or crispy.
- Butter vs. Shortening: Butter is the most common fat used in cookies and gives them a rich flavor. However, it tends to make cookies crispier, especially when baked at a higher temperature. Shortening, on the other hand, creates a softer, chewier texture, making it a good choice if you prefer a tender bite. You can also experiment with a mix of butter and shortening for a balanced result.
- Sugar Types: The type of sugar you use plays a significant role in texture. Granulated sugar contributes to a crispier texture, while brown sugar helps make the cookies chewier. Brown sugar contains molasses, which retains moisture and creates a soft, chewy interior. For the perfect balance, you might want to use a combination of both brown and granulated sugar.
- Flour Variations: All-purpose flour is the go-to option for many cookie recipes, but adjusting the flour-to-liquid ratio can change the texture. A higher proportion of flour can make your orange fish cookies crispier, while adding a little more liquid (such as egg or milk) will lead to a chewier texture.
Baking Time and Temperature
Baking time and temperature are crucial in determining the texture of your cookies. A higher baking temperature will often result in crispier edges, while a lower temperature helps cookies stay soft and chewy in the center.
To get that perfect chewy-and-crispy balance, consider baking at around 350°F (175°C). Start by baking your cookies for a slightly shorter time than the recipe suggests if you want them soft and chewy. Check them about 2 minutes before the recommended time to ensure they are lightly golden around the edges but still soft in the middle. If you prefer crispier cookies, extend the baking time by a few minutes to achieve a more golden color and firmer texture.
Cooling Method
How you cool your orange fish cookies after baking plays a crucial role in determining their texture. For a chewy result, let your orange fish cookies cool on the baking sheet for a few minutes before transferring them to a wire rack. This helps the cookies set without becoming too firm too quickly. If you’re following the orange fish cookies recipe to make chewy treats, allowing them to cool slowly ensures they maintain a soft and tender texture.
On the other hand, if you’re aiming for crispy orange fish cookies, it’s important to transfer them to a wire rack right away to cool completely. This allows air to circulate around the cookies, helping them crisp up, particularly around the edges. The cooling process is vital for achieving the desired texture in your orange fish cookies recipe.
By understanding how to cool your orange fish cookies properly, you can control the final texture of your cookies. Whether you prefer a chewy or crispy version, following these cooling tips will help you perfect your orange fish cookies recipe every time.
Adding Extra Ingredients for Texture
If you want to play around with the texture even more, consider adding a few ingredients that can enhance the chewiness or crispiness of your fish cookies.
- Cornstarch: Adding a small amount of cornstarch to your cookie dough can result in a softer, more tender texture. Cornstarch helps create a delicate bite that isn’t too firm, which works well for chewy cookies.
- Oats or Nuts: Adding rolled oats or finely chopped nuts to your dough can give your cookies a chewy bite and a bit of crunch. If you’re adding nuts, like almonds or pecans, chop them finely to ensure they don’t interfere with the fish shape. This is a great way to add some variety and texture to your cookies.
- Chilling the Dough: Chilling your cookie dough before baking can make a significant difference in the texture. It helps solidify the fats in the dough, leading to a firmer texture that may result in a slightly crispier cookie. However, if you want a chewy texture, avoid chilling the dough for too long, as this can cause the cookies to spread less during baking.
Testing and Adjusting the Texture
Everyone has different preferences when it comes to cookie texture, so don’t be afraid to experiment! If you’re unsure whether your orange fish cookies are the perfect balance of chewy and crispy, bake a test cookie first. This allows you to adjust the dough and baking time as needed to get the texture you love.
If you like chewier cookies, consider slightly underbaking them. If you prefer a crispier cookie, increase the baking time or lower the oven temperature slightly for an even bake. Remember, the cookies will continue to firm up as they cool.
Avoiding Common Mistakes: Troubleshooting Issues Like Spreading Dough or Uneven Icing in Your Orange Fish Cookies Recipe
Baking orange fish cookies can be a delightful and creative process, but there are a few common issues that can affect your final product. Whether it’s dough that spreads too much during baking or uneven royal icing that doesn’t set right, these problems can leave you frustrated. However, with the right knowledge, you can avoid these pitfalls and ensure your orange fish cookies recipe results in perfect fish-shaped cookies every time. Whether you’re looking for a fun family project or a sweet treat for a special occasion, following the correct techniques will help you master your sweet cookies recipe.
If your cookies spread too much or the icing doesn’t set, you might be using the wrong dough consistency or not giving your orange fish cookies enough time to dry. With simple adjustments, such as chilling your dough before baking and ensuring your royal icing is the correct thickness, you can solve these problems and create perfectly shaped, beautifully iced fish-shaped cookies. The key is knowing how to troubleshoot these issues to guarantee that your orange fish cookies recipe turns out just as you envision them.
By understanding and addressing these common baking issues, you’ll be able to perfect your orange fish cookies recipe and enjoy delicious, vibrant cookies with minimal effort. Let’s dive into some troubleshooting tips to help you get the best results from your baking!
Dough Spreading Too Much in Your Orange Fish Cookies Recipe: How to Fix It
One of the most common issues when baking fish-shaped cookies is dough spreading too much during baking. This can result in cookies that are too thin and lose their shape, which is especially problematic for detailed shapes like fish. Fortunately, this issue is easy to prevent.
- Chill the Dough: If your dough is too warm when placed on the baking sheet, it can spread excessively in the oven. To avoid this, always chill your cookie dough for at least 30 minutes before baking. Chilled dough helps the fats in the recipe solidify, reducing spread and allowing your orange fish cookies to hold their shape.
- Use the Right Flour-to-Fat Ratio: If your dough is too greasy or contains too much fat, it can cause spreading. To fix this, adjust the flour-to-fat ratio in the recipe. You may need to increase the amount of flour slightly to help the dough stay firmer during baking.
- Use Parchment Paper: Using parchment paper on your baking sheets helps create an even surface for your cookies and prevents the dough from sticking or spreading too much. It also makes cleanup easier!
Uneven Icing
Achieving a smooth, even layer of royal icing on your fish cookies can be tricky, but with a few tips, you can avoid common mistakes like uneven coverage or icing that doesn’t dry properly.
- Consistent Consistency: One of the main reasons for uneven icing is using the wrong consistency of royal icing. For outlining the cookies, the icing should be thicker, almost like toothpaste. For flooding the cookies, the consistency should be thinner, similar to warm honey. Always test the icing by running a spatula through it—if the line disappears within 10 seconds, it’s the right consistency.
- Sifting the Powdered Sugar: Lumps in your royal icing can result in uneven application, leaving your orange fish cookies looking less than perfect. Make sure to sift your powdered sugar before mixing it with egg whites or meringue powder. This ensures a smooth texture and helps the icing set evenly.
- Even Application: When applying the icing, use a piping bag or a spoon to apply a thin layer over the entire cookie surface. If you’re using a piping bag, make sure the tip is fine enough to control the icing flow. For a smooth finish, use a flat spatula to spread the icing evenly.
Cracked or Dry Royal Icing
Another common issue when decorating cookies is cracked or dry royal icing, which can ruin the look of your orange fish cookies. Here’s how to avoid this problem:
- Proper Drying Time: Make sure to allow your royal icing to dry completely before handling or stacking the cookies. If you rush this process, the icing can crack or smudge. Depending on the humidity in your area, drying time can vary, so be patient. It’s best to let the cookies dry at room temperature for several hours or overnight.
- Humidity Control: Royal icing can be affected by the humidity in the air. If the air is too dry, the icing may dry too quickly, leading to cracks. If it’s too humid, the icing may not set properly. Try to decorate your fish cookies in a room with controlled humidity to ensure the icing sets evenly and dries smooth.
Fixing Air Bubbles in Icing
Air bubbles trapped in royal icing can create uneven surfaces on your fish cookies, leaving unsightly holes or cracks. To fix this, you can use a few simple techniques:
- Tap the Cookies: After applying the icing, gently tap the baking sheet on the counter to release any trapped air bubbles. This will help smooth out the icing and create a more even surface.
- Use a Toothpick: If you notice air bubbles after the icing has dried, you can use a toothpick to gently pop them. Be careful not to damage the icing beneath, as it may cause streaks or uneven patches.
Uneven Cookie Shapes
Sometimes the shape of your fish cookies can end up uneven after baking, especially if the dough isn’t rolled out evenly. This issue can be easily avoided with a few adjustments:
- Use a Rolling Pin with Guides: A rolling pin with adjustable guides can help ensure that your dough is rolled to an even thickness. This is especially helpful when making shapes like fish that require consistent edges.
- Chill the Dough Before Cutting: If your dough is too soft, it can warp or lose shape when you cut it with your cookie cutter. Chilling the dough for about 10-15 minutes before cutting will firm it up, making it easier to achieve clean, precise cuts.
Overbaking or Underbaking
If your fish cookies are too hard or too soft, it could be due to overbaking or underbaking. To avoid this, keep a close eye on your cookies as they bake, especially during the final few minutes.
- Check for Golden Edges: A good rule of thumb is to look for golden edges around your cookies. Once the edges turn golden, it’s time to remove them from the oven. This ensures they’re baked through but not overdone.
- Oven Temperature: Make sure your oven is properly calibrated. An oven that runs too hot can cause cookies to bake too quickly, resulting in an overly crisp or hard texture. Use an oven thermometer to ensure the temperature is accurate.
Storing and Serving: Best Practices for Storing Your Cookies and Making Them Last Longer
Baking orange fish cookies can be a delightful and creative process, but there are a few common issues that can affect your final product. Whether it’s dough that spreads too much during baking or uneven royal icing that doesn’t set right, these problems can leave you frustrated. However, with the right knowledge, you can avoid these pitfalls and ensure that your orange fish cookies recipe results in perfect fish-shaped cookies every time. Whether you’re looking for a fun family project or a sweet treat for a special occasion, following the correct techniques will help you master your sweet cookies recipe.
If your cookies spread too much or the icing doesn’t set, you might be using the wrong dough consistency or not giving your orange fish cookies enough time to dry. With simple adjustments, such as chilling your dough before baking and ensuring your royal icing is the correct thickness, you can solve these problems and create perfectly shaped, beautifully iced fish-shaped cookies. The key is knowing how to troubleshoot these issues to guarantee that your orange fish cookies recipe turns out just as you envision them.
By understanding and addressing these common baking issues, you’ll be able to perfect your orange fish cookies recipe and enjoy delicious, vibrant cookies with minimal effort. Let’s dive into some troubleshooting tips to help you get the best results from your baking!
Storing Fish Cookies at Room Temperature
If you plan to enjoy your orange fish cookies within a few days, storing them at room temperature is the best option. Keep them in an airtight container to prevent them from drying out. Make sure the container is completely sealed to maintain freshness. A good rule of thumb is to place parchment paper between the layers of cookies to avoid them sticking to one another or becoming squished.
- Keep Away from Heat and Sunlight: Store your cookies in a cool, dry place, away from direct sunlight and heat sources. Excessive heat can cause the cookies to become stale or lose their texture. A kitchen pantry or cupboard is usually the best place for storing cookies at room temperature.
- Shelf Life: When stored properly at room temperature, your fish-shaped cookies should stay fresh for about 3 to 5 days. After this time, the texture may begin to change, and the flavor may diminish.
Freezing for Long-Term Storage
If you have a large batch of orange fish cookies or want to save some for later, freezing is an excellent way to extend their shelf life. Freezing allows you to store cookies for up to 3 months without sacrificing flavor or texture. Here’s how to do it properly:
- Cool Completely: Before freezing your cookies, make sure they have cooled completely. Freezing warm cookies can lead to condensation, which can cause them to become soggy once thawed.
- Wrap and Seal: Wrap each cookie individually in plastic wrap or wax paper, then place them in a freezer-safe, airtight container or a resealable freezer bag. This double-layer protection helps prevent freezer burn and keeps the cookies fresh. For added protection, consider wrapping the cookies in a layer of aluminum foil before placing them in the freezer bag.
- Thawing: When you’re ready to enjoy your frozen cookies, remove them from the freezer and let them thaw at room temperature. This process can take several hours, depending on the size and thickness of the cookies. Once thawed, you can touch up the decorations or serve as is!
Storing Fish Cookies with Royal Icing
Royal icing is a popular choice for decorating orange fish cookies, but it requires special care to prevent it from cracking or becoming sticky. Once you’ve decorated your cookies, let the royal icing dry completely before storing. Here’s how to keep those beautifully iced cookies fresh:
- Allow the Icing to Dry Fully: For the best results, give the royal icing at least 12 hours to dry before placing your cookies in storage. This ensures that the icing hardens and won’t smear or lose its smooth finish.
- Layer Carefully: If you need to stack your decorated cookies, place parchment paper between each layer to protect the icing from being damaged. Even if you’re only storing cookies for a day or two, this extra step will keep them looking neat.
- Avoid Storing Iced Cookies in the Refrigerator: Although it might seem like a good idea to refrigerate decorated cookies to help preserve the royal icing, this can lead to condensation, making the icing soft or sticky. Instead, always store them at room temperature.
Serving Your Orange Fish Cookies
Once your cookies are ready to serve, presenting them in an appealing way can make all the difference, especially for special occasions. Here are some creative ways to serve your fish cookies:
- Cookie Platters: Arrange your cookies on a beautiful platter or cake stand. Group them by color or design to create a cohesive look. If you’re making them for a party or event, consider adding other fun treats to the platter for variety.
- Personalized Packaging: If you’re gifting your cookies, packaging them in clear gift bags or small boxes with decorative ribbons adds a personal touch. You can even add a small tag with a note or a fun fact about the fish-shaped cookies to make the presentation even more special.
- Cookie Displays: For a more dramatic effect, you can display your fish cookies as part of a larger themed dessert table. Consider arranging them alongside themed cupcakes, cakes, or other ocean-inspired treats to create a memorable presentation.
Keeping Cookies Fresh on the Go
If you’re planning to take your orange fish cookies to a picnic, party, or other event, it’s important to keep them fresh during transport. Here’s how:
- Use an Airtight Container: Choose a sturdy, airtight container that can protect your cookies from breaking or getting crushed during transport. Line the bottom of the container with wax paper to add extra cushioning.
- Avoid Humidity: If you’re traveling to a humid climate, take extra precautions to avoid your cookies becoming soggy or soft. Consider using moisture-absorbing packets or placing the container in a cooler bag with ice packs to help maintain the freshness of your cookies.
Conclusion
In conclusion, the orange fish cookies recipe is a fun and creative way to bring a burst of flavor and color to any occasion. Whether you’re making these delightful treats for a holiday, birthday party, or just as a fun family activity, the process is both simple and enjoyable. The key to perfect orange fish cookies lies in the right ingredients, including the zest of fresh oranges and a beautifully smooth royal icing finish. By following the detailed steps in this orange fish cookies recipe, you’ll be able to impress your guests with not only the taste but also the vibrant look of these adorable cookies.
If you love experimenting with different recipes, don’t forget to check out our other delicious treat ideas, like the Papas Rellenas recipe, a savory Chilean dish that will surely bring a new flavor to your cooking. You can find the full recipe here: Papas Rellenas Recipe Chilean Style: A Step-by-Step Easy Recipe to Try.
So, gather your ingredients and try this orange fish cookies recipe today to add a cheerful and delicious touch to your next baking session. The colorful and tasty cookies will not only be a hit with kids but will also become a favorite among adults!