
When it comes to creating flavorful and satisfying meals, beef recipes always stand out. Beef’s rich taste and versatility make it a staple in kitchens around the world. Whether you’re whipping up a cozy weeknight dinner or preparing a dish to impress guests, beef is the perfect choice.
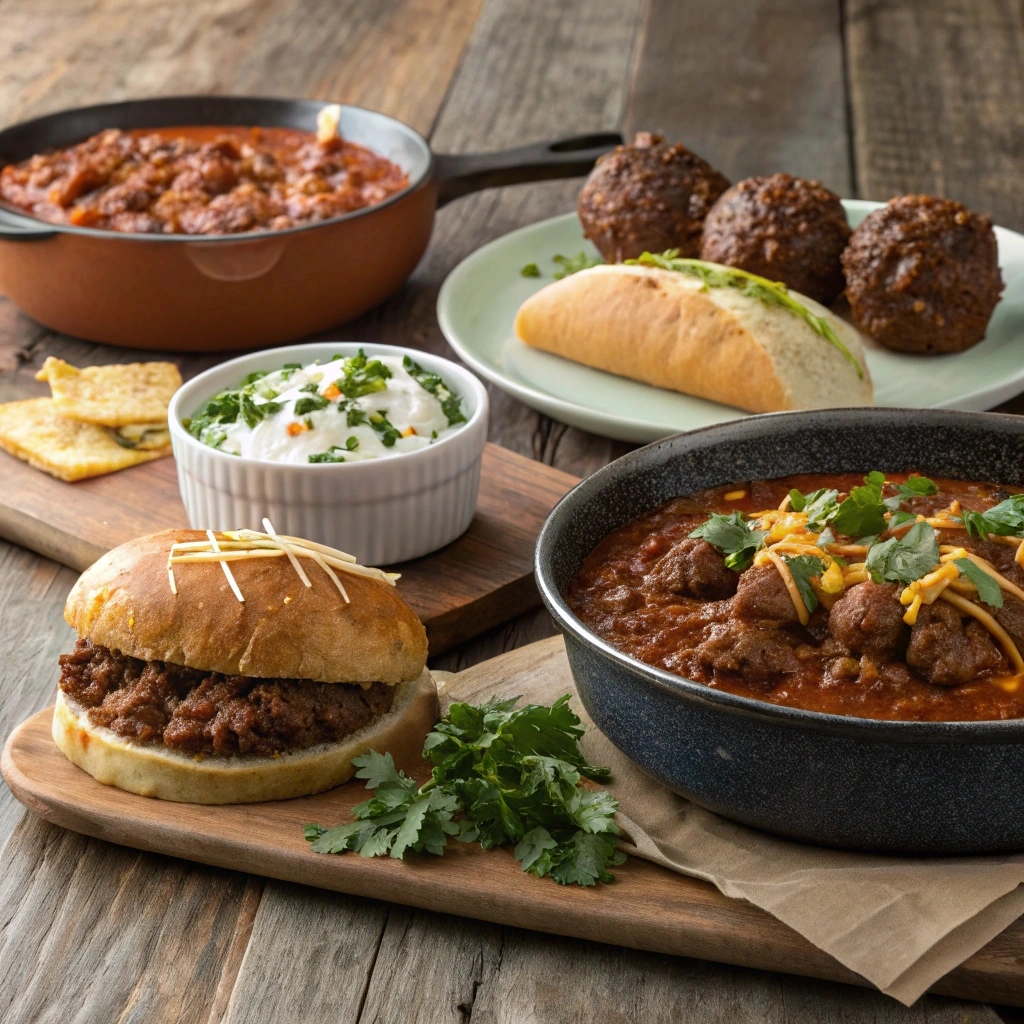
These recipes include a variety of mouthwatering options, such as hearty chili with enchilada sauce, creamy dried beef cheese balls, savory sausages, and classic deli sandwiches. Each dish brings unique flavors to the table, offering something for every occasion. Plus, they’re easy to make, saving you time in the kitchen without sacrificing taste.
What makes these recipes even better? They’re practical, delicious, and perfect for busy schedules. Whether you’re planning a family dinner or a casual get-together, these easy beef recipes will help you serve meals that everyone will love. Let’s dive into these five irresistible creations!
Chili Recipe with Enchilada Sauce and Ground Beef

Overview: Why Chili with Enchilada Sauce Adds a Unique Twist
Chili is a beloved dish known for its comforting warmth and bold flavors. Adding enchilada sauce to your chili takes this classic recipe to an entirely new level of deliciousness. The rich, smoky flavors of enchilada sauce infuse the chili with a depth that’s hard to achieve with traditional tomato-based broths. This combination creates a perfect harmony of savory, tangy, and slightly spicy notes that keep you coming back for more.
Simplifying the Cooking Process
Using enchilada sauce also simplifies the cooking process. Instead of measuring out multiple spices and seasonings, the sauce acts as a flavorful base packed with ingredients like chili powder, garlic, and cumin. This not only saves time but also ensures a consistent, well-seasoned result every time you make it. It’s an excellent way to give your chili an authentic Tex-Mex flair without needing a long list of spices.
Versatility and Perfect Pairings
Another reason to love this twist is its versatility. Enchilada-style chili pairs wonderfully with a variety of toppings and sides. Add shredded cheese, sour cream, or avocado for extra richness, or serve it with tortilla chips or cornbread for added texture. The unique flavor profile makes it a hit at potlucks, game nights, and family dinners alike. Whether you’re a chili enthusiast or trying it for the first time, this recipe is sure to impress your taste buds.
Ingredients: Ground Beef, Enchilada Sauce, Spices, Beans (Optional), and Toppings Like Cheese
To make this irresistible chili with enchilada sauce, you’ll need a few key ingredients that come together to create a rich, flavorful dish.
Ground Beef
Start with ground beef, which forms the base of your chili. This ingredient adds heartiness and richness to the dish. You can choose lean beef for a lighter version or full-fat beef for extra flavor.
Enchilada Sauce
Next, you’ll need enchilada sauce. This brings the signature smoky, tangy flavor to the chili, elevating it beyond traditional recipes. Choose a mild or spicy version depending on your preference.
Spices
To give your chili that bold flavor, spices like chili powder, garlic powder, onion powder, and cumin are essential. These add depth and warmth, complementing the enchilada sauce perfectly.
Beans (Optional)
While beans are optional, they add texture and fiber to the chili. Popular choices include kidney beans, black beans, or pinto beans. If you prefer a meatier chili, feel free to skip the beans.
Toppings Like Cheese
Top your chili with shredded cheese, sour cream, chopped onions, or cilantro for extra freshness. Cheese adds a creamy, melty texture that pairs beautifully with the spiciness of the chili.
These ingredients come together to make a rich, flavorful dish that’s perfect for any occasion. Ready to start cooking?
Steps to Make: A Simple One-Pot Chili Recipe
Making this chili with enchilada sauce is quick and easy, with minimal cleanup thanks to the one-pot method. Follow these simple steps to create a hearty and flavorful dish everyone will love.
Step 1: Brown the Ground Beef
In a large pot, heat a little oil over medium heat. Add the ground beef and cook until browned, breaking it up with a spoon as it cooks. Drain any excess fat if necessary. This step is crucial for adding that savory base to your chili.
Step 2: Add Spices and Enchilada Sauce
Once the beef is browned, add your spices—chili powder, garlic powder, onion powder, and cumin. Stir to coat the beef evenly. Then, pour in the enchilada sauce and mix everything together. Let it simmer for a couple of minutes to allow the flavors to meld.
Step 3: Add Beans and Simmer
Next, add your beans (if using) and any additional ingredients like diced tomatoes or broth. Stir well and bring the mixture to a boil. Once it reaches a boil, reduce the heat and let it simmer for 20-30 minutes, stirring occasionally. This allows the chili to thicken and the flavors to develop.
Step 4: Adjust Seasoning and Serve
Taste your chili and adjust the seasoning as needed. If you like it spicier, add a pinch of cayenne pepper or some hot sauce. Once you’re happy with the flavor, remove the pot from the heat and serve.
Step 5: Add Toppings
Serve your chili hot with your favorite toppings like shredded cheese, sour cream, chopped onions, or cilantro. For a complete meal, pair it with tortilla chips or cornbread on the side.
This easy one-pot chili recipe is perfect for busy nights or casual gatherings. Enjoy the rich, smoky flavor with minimal effort!
Tips: Pair with Tortilla Chips or Cornbread for Serving
Pairing your chili with enchilada sauce with the right sides can elevate the meal, adding texture and enhancing the overall flavor. Here are a few tips to make your chili experience even more delicious:
Tortilla Chips
For a satisfying crunch, serve your chili with tortilla chips. The salty, crispy texture contrasts perfectly with the rich, hearty chili, adding a fun and flavorful twist. You can also use the chips to scoop up the chili, making it a hands-on meal that’s perfect for casual dinners or gatherings.
Cornbread
Another classic pairing is cornbread. Its slightly sweet flavor and soft, crumbly texture complement the spiciness of the chili. Whether you opt for traditional cornbread or a jalapeño-cheddar version for an added kick, cornbread is a comforting and filling side. It’s also great for dipping into the chili’s savory sauce.
Other Serving Ideas
You can also add fresh sides like a simple green salad or sautéed vegetables to balance the richness of the chili. If you want to go all out, serve with a side of guacamole or sour cream for extra creaminess.
These sides are easy to prepare and will turn your chili with enchilada sauce into a complete, satisfying meal.
Easy Beef Sausage Recipes for Every Meal

Overview: The Versatility of Beef Sausages in Meals
Beef sausages are incredibly versatile, making them a staple in many kitchens. Whether you’re making a quick breakfast, preparing a hearty dinner, or even crafting a fun appetizer, beef sausages can easily be incorporated into a variety of dishes. Their rich flavor and satisfying texture are perfect for pairing with vegetables, starches, and spices, allowing you to create diverse meals for any occasion.
Quick and Easy Meals
One of the best things about beef sausages is how quickly they cook. Whether you’re grilling, pan-frying, or roasting them, beef sausages cook fast, making them a go-to choice for busy weeknights. Pair them with sautéed veggies, potatoes, or even toss them in a stir-fry for a complete meal in less than 30 minutes.
Breakfast Dishes
In the morning, beef sausages shine as a star ingredient in breakfast dishes. You can serve them alongside eggs and toast for a classic breakfast or use them as a filling for breakfast burritos, sandwiches, or even quiches. The savory flavors of beef sausages blend perfectly with the richness of eggs and cheeses, offering a hearty and satisfying start to the day.
Grilled or Stuffed Delights
Grilling beef sausages adds a smoky flavor that complements the natural spices in the meat. You can also get creative by stuffing them into vegetables like bell peppers, mushrooms, or zucchini for a delicious, low-carb meal. For a different twist, try cutting the sausages into bite-sized pieces and adding them to pastas, salads, or soups for extra protein and flavor.
The versatility of beef sausages makes them an excellent ingredient for nearly any meal, whether it’s a quick weeknight dinner, a leisurely breakfast, or a festive barbecue. Their rich taste and adaptability make them a must-have in your recipe rotation.
Recipe 1: Beef Sausage and Veggie Skillet
This beef sausage and veggie skillet is a one-pan wonder that combines savory beef sausages with colorful, nutrient-packed vegetables for a quick and satisfying meal. It’s perfect for a busy weeknight or a hearty breakfast, and it’s customizable to your taste!
Ingredients
- 2-3 beef sausages, sliced
- 1 bell pepper, diced
- 1 zucchini, sliced
- 1 medium onion, sliced
- 2 cloves garlic, minced
- 1 cup cherry tomatoes, halved
- 1 tablespoon olive oil
- 1 teaspoon paprika
- 1/2 teaspoon garlic powder
- Salt and pepper to taste
- Fresh parsley (optional for garnish)
Instructions
- Cook the Sausages
Heat the olive oil in a large skillet over medium heat. Add the sliced beef sausages and cook until browned and cooked through, about 5-7 minutes. Once done, remove the sausages from the skillet and set them aside. - Sauté the Vegetables
In the same skillet, add the onion, bell pepper, and zucchini. Sauté for about 5 minutes, stirring occasionally, until the vegetables are tender and starting to caramelize. Add the minced garlic and cook for an additional minute, stirring constantly to avoid burning. - Combine and Season
Add the cooked beef sausages back into the skillet along with the cherry tomatoes. Sprinkle in the paprika, garlic powder, salt, and pepper. Stir to combine, letting everything cook for another 3-4 minutes, allowing the flavors to meld together. - Serve
Once everything is well combined and heated through, remove from heat. Garnish with fresh parsley if desired and serve hot.
Serving Suggestions
- Serve the skillet as-is for a low-carb meal, or pair it with rice, quinoa, or mashed potatoes for added texture.
- Add a dollop of sour cream or a sprinkle of shredded cheese for extra richness.
This beef sausage and veggie skillet is an easy, satisfying meal that packs a punch of flavor. It’s perfect for any time of day and offers a hearty combination of protein and vegetables in every bite!
Recipe 2: Sausage-Stuffed Bell Peppers
These sausage-stuffed bell peppers are a fantastic, healthy, and flavorful meal that combines the savory goodness of beef sausages with the sweetness of bell peppers. It’s an easy-to-make dish that works well for dinner or as a satisfying lunch.
Ingredients
- 4 large bell peppers, any color
- 2 beef sausages, casings removed
- 1 cup cooked rice (or cauliflower rice for a low-carb option)
- 1 small onion, finely chopped
- 1 garlic clove, minced
- 1 cup shredded cheese (cheddar or mozzarella works best)
- 1 teaspoon Italian seasoning
- 1/2 teaspoon paprika
- Salt and pepper to taste
- 1 tablespoon olive oil
- Fresh parsley (optional for garnish)
Instructions
- Prepare the Bell Peppers
Preheat the oven to 375°F (190°C). Cut the tops off the bell peppers and remove the seeds and membranes. Set the peppers aside. - Cook the Sausage
Heat the olive oil in a skillet over medium heat. Add the beef sausages (casings removed) and break them up as they cook. Stir occasionally until the sausage is browned and cooked through, about 5-7 minutes. - Sauté the Onion and Garlic
Add the onion and garlic to the skillet with the cooked sausage. Sauté for 2-3 minutes until the onion softens and becomes translucent. - Mix the Filling
Remove the skillet from the heat. Add the cooked rice (or cauliflower rice) to the sausage mixture. Stir in the Italian seasoning, paprika, salt, and pepper. Mix everything until well combined. - Stuff the Peppers
Spoon the sausage and rice mixture into the hollowed-out bell peppers, packing them tightly. Top each stuffed pepper with a generous amount of shredded cheese. - Bake
Place the stuffed peppers in a baking dish and cover with foil. Bake for 25-30 minutes until the peppers are tender. For the last 5 minutes, remove the foil to allow the cheese to melt and become golden. - Serve
Once done, remove the stuffed peppers from the oven and let them cool for a few minutes before serving. Garnish with fresh parsley if desired.
Serving Suggestions
- Serve with a side of green salad or roasted vegetables for a complete meal.
- For an extra kick, drizzle with a little hot sauce or add some jalapeños to the sausage mixture.
These sausage-stuffed bell peppers are the perfect balance of savory, cheesy, and slightly sweet, making them a great choice for any meal. You’ll love the simplicity and rich flavor of this dish!
Tips: Use Pre-Cooked or Fresh Beef Sausages for Quicker Preparation
For a faster and even more convenient sausage-stuffed bell peppers recipe, consider using pre-cooked beef sausages or fresh beef sausages that don’t require a long cooking time. Here’s how this simple tip can help:
Pre-Cooked Beef Sausages
Using pre-cooked beef sausages cuts down on prep time significantly. Since these sausages are already cooked, you simply need to slice them and incorporate them into your dish. This means you don’t need to spend time browning the meat, which makes this a perfect option for a quick weeknight dinner.
Fresh Beef Sausages
If you prefer to use fresh beef sausages, opt for ones with a thinner casing or less fat. These will cook faster and will still provide the full, rich flavor. Make sure to break them up into smaller pieces as they cook, which helps them blend better into the filling for your bell peppers.
Using either pre-cooked or fresh beef sausages will allow you to save time and get this tasty dish on the table even quicker, without sacrificing flavor or quality.
How to Make a Dried Beef Cheese Ball Recipe
Overview: A Party-Perfect Appetizer That’s Always a Hit
Looking for a crowd-pleasing appetizer that’s simple to make and always leaves guests asking for the recipe? Look no further than beef sausage-based dishes! Whether you’re hosting a casual get-together or a more formal event, beef sausage appetizers are sure to be a hit. Their versatility, rich flavor, and ability to pair perfectly with a variety of sides make them ideal for any occasion.
Easy to Prepare, Hard to Resist
Beef sausages are the perfect appetizer because they require minimal prep and cook time, yet deliver big on flavor. From mini sausage skewers to sausage-stuffed pastries, these appetizers are guaranteed to disappear fast. Whether served on their own or as part of a larger spread, they cater to various tastes and dietary preferences.
Perfect for Pairing and Dipping
Pairing beef sausages with easy-to-make dips like mustard, barbecue sauce, or creamy ranch makes them even more irresistible. These appetizers also go great with complementary sides such as cheese platters, veggie trays, or crackers for added texture and variety. The options are endless, allowing you to customize your dish to fit the theme and flavor profile of your party.
A Flavorful Crowd Favorite
Beef sausage appetizers are a great way to start a meal or simply to enjoy as part of a light snack. Their hearty, satisfying flavor makes them a filling treat that guests will remember long after the event is over. Perfect for both casual gatherings and more elaborate events, these appetizers are always a reliable crowd-pleaser!
Ingredients: Dried Beef, Cream Cheese, Cheddar Cheese, Spices, and Garnishes
For a savory and creamy dried beef cheese ball that will impress your guests, you’ll need the following ingredients:
Dried Beef
The star ingredient of this recipe is dried beef. It adds a rich, smoky flavor to the cheese ball, making it the perfect base for your appetizer. You’ll want to chop the dried beef into small pieces to ensure it’s evenly distributed throughout the mixture.
Cream Cheese
Cream cheese provides the creamy texture and base for the cheese ball. It blends seamlessly with the other ingredients to create a smooth, spreadable filling. Make sure the cream cheese is softened before mixing to make it easier to incorporate with the other ingredients.
Cheddar Cheese
For extra flavor and a slight tang, add cheddar cheese to the mix. Shredded cheddar cheese gives the cheese ball a deliciously sharp flavor that contrasts beautifully with the richness of the cream cheese and dried beef. You can use mild, sharp, or even extra sharp cheddar depending on your preference.
Spices
Seasoning is key to bringing out the flavors in the cheese ball. Common spices include garlic powder, onion powder, paprika, and a pinch of black pepper. These spices add depth to the creamy base and balance out the richness of the cheeses.
Garnishes
For an added touch of color and flavor, garnish your cheese ball with chopped fresh parsley, chives, or a sprinkle of paprika. You can also roll the cheese ball in chopped nuts like pecans or walnuts for a delightful crunch.
These ingredients come together to create a savory, creamy dried beef cheese ball that will be the star of your next party or gathering. Ready to make it?
Steps: Combine, Shape, and Chill the Cheese Ball
Making a delicious dried beef cheese ball is easy and quick, especially with these simple steps. Follow along to create a savory appetizer that’s perfect for your next party or gathering.
Step 1: Combine the Ingredients
In a large mixing bowl, add the softened cream cheese, shredded cheddar cheese, and chopped dried beef. Sprinkle in your spices (garlic powder, onion powder, paprika, black pepper) and mix everything together until well combined. Use a spatula or your hands to ensure the ingredients are evenly distributed.
Step 2: Shape the Cheese Ball
Once the mixture is thoroughly combined, shape it into a ball. You can do this by simply rolling the mixture in your hands or using a spoon to form a compact ball. Make sure it’s tightly packed so it holds its shape when chilled.
Step 3: Chill the Cheese Ball
Wrap the cheese ball in plastic wrap or place it in an airtight container. Refrigerate for at least 2 hours to allow the flavors to meld and the cheese ball to firm up. This chilling step ensures the cheese ball maintains its shape and is easier to serve.
Step 4: Garnish and Serve
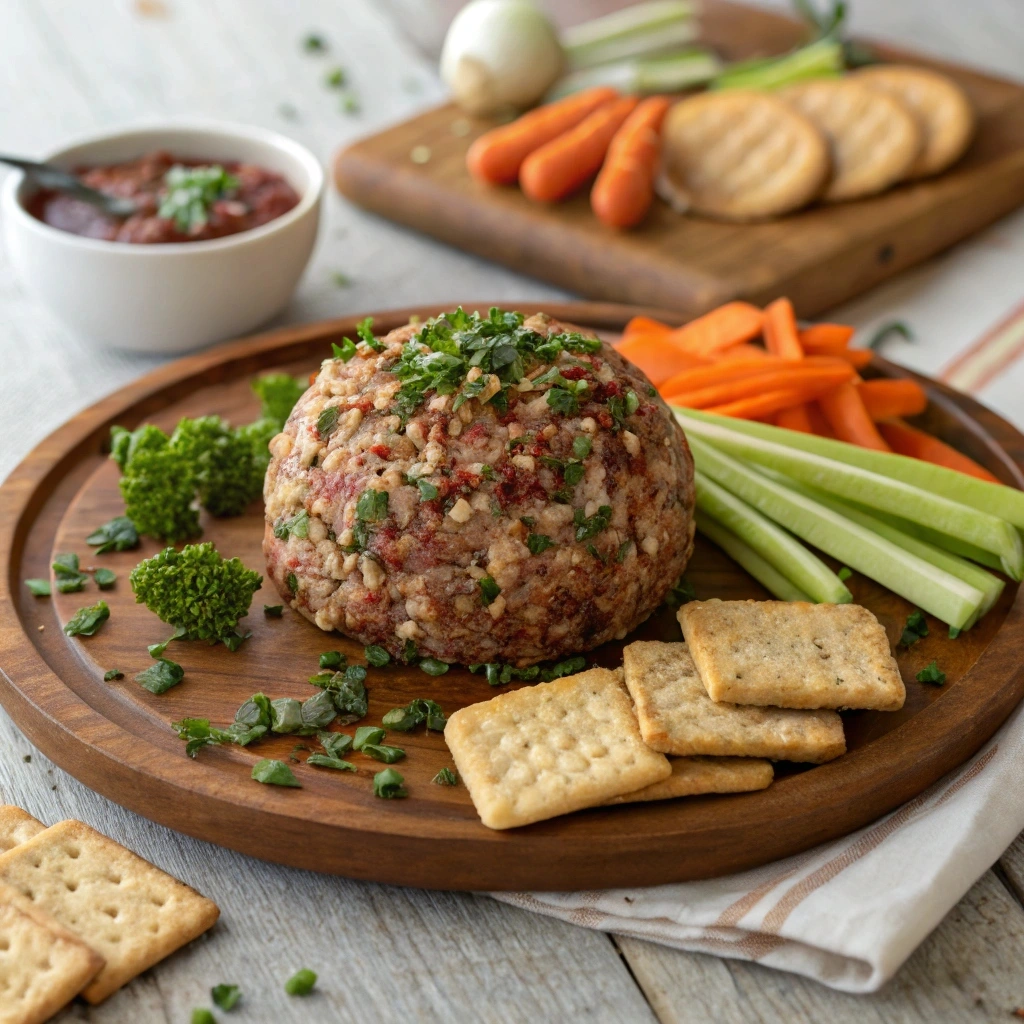
After chilling, remove the cheese ball from the fridge. You can roll it in finely chopped nuts (such as pecans or walnuts) for added texture, or garnish with fresh parsley or chives for a pop of color. Serve with crackers, veggie sticks, or slices of bread.
This simple, no-bake recipe ensures you have a flavorful dried beef cheese ball ready in no time, perfect for parties or as a snack for any occasion!
Serving Tips: Serve with Crackers, Pretzels, or Veggie Sticks
To make your dried beef cheese ball even more irresistible, consider these serving suggestions that will complement the creamy, savory flavors of the dish. Here are some perfect pairings for your cheese ball:
Crackers
Crackers are a classic choice for serving with cheese balls. Their crispy texture and neutral flavor make them the ideal vessel for scooping up the cheese mixture. Opt for savory crackers, like Ritz or water crackers, that won’t overpower the flavors of the cheese ball. You can even offer a variety of crackers, such as whole grain, flavored, or garlic-infused, to create a fun tasting experience.
Pretzels
For a salty and crunchy contrast, pretzels are an excellent choice. Their distinctive texture pairs wonderfully with the smoothness of the dried beef cheese ball. Choose pretzel crisps for a light, crisp texture, or go for mini pretzels if you want bite-sized treats that are easy to serve and dip.
Veggie Sticks
For a healthier option, serve your dried beef cheese ball with an assortment of veggie sticks. Carrot sticks, celery, cucumber, and bell pepper strips are all perfect for dipping. The crisp and fresh vegetables balance the richness of the cheese ball, providing a refreshing contrast.
These serving tips make your dried beef cheese ball an even more enjoyable appetizer for all your guests. You can customize the sides to match your party theme or cater to different dietary preferences, ensuring everyone has something to enjoy.
Beef and Cheese Deli Sandwich Recipe
Overview: A Hearty and Satisfying Deli-Style Sandwich
A deli-style sandwich is the epitome of comfort food. Packed with layers of flavorful ingredients, these sandwiches are hearty, satisfying, and perfect for any time of day. Whether you’re enjoying a quick lunch or preparing a delicious dinner, a well-constructed deli sandwich can be both filling and flavorful. The combination of beef, fresh bread, and a variety of condiments creates a perfect balance of textures and tastes.
Classic Ingredients for a Hearty Deli Sandwich
A traditional deli-style sandwich features slices of high-quality beef, often paired with savory cheese, crisp vegetables, and tangy spreads. Additions like pickles, mustard, or mayo enhance the flavors, making each bite more delicious than the last. Whether you’re using roast beef, corned beef, or beef sausage, the richness of the beef is always the star of the show.
Perfect for Any Occasion
From a casual meal at home to a special gathering, deli-style sandwiches are versatile and crowd-pleasing. You can serve them for lunch, as part of a picnic, or even as an appetizer during parties. Their portability and satisfying nature make them an easy choice for any event.
A deli-style sandwich is more than just a quick bite—it’s a hearty, fulfilling meal that will leave you feeling completely satisfied. Whether served warm or cold, it’s an ideal choice for any occasion.
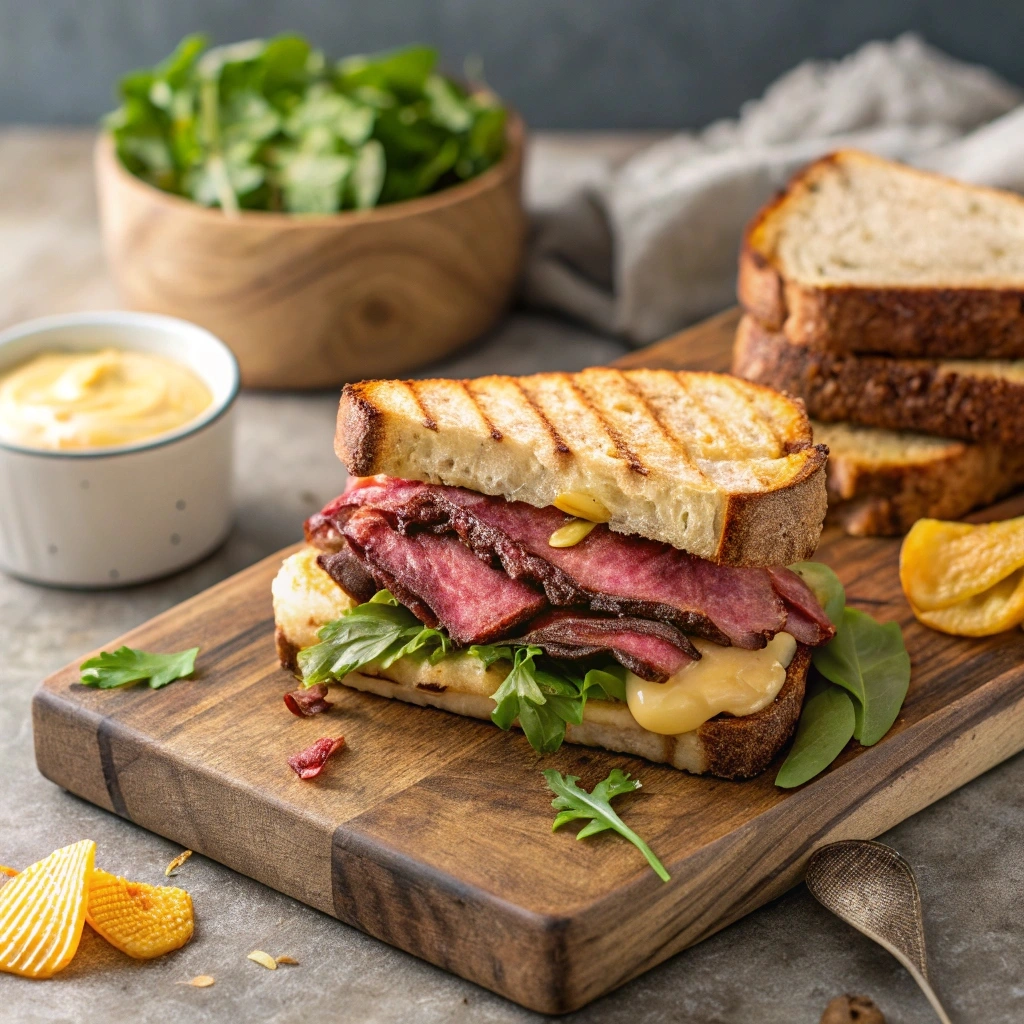
Recipe: Layered Sandwich with Roast Beef, Cheddar Cheese, Lettuce, Tomatoes, and Condiments
This layered deli-style sandwich is the perfect combination of savory roast beef, rich cheddar cheese, and fresh veggies. It’s a satisfying meal that’s both simple to make and deliciously filling. Packed with flavor, this sandwich is perfect for lunch or dinner.
Ingredients
- 2 slices of hearty whole grain bread or sourdough
- 4-6 slices of roast beef
- 2 slices of cheddar cheese
- 2-3 leaves of romaine lettuce
- 2-3 slices of tomatoes
- Mayonnaise or mustard (or both!)
- Pickles (optional)
- Salt and pepper to taste
Instructions
- Prepare the Bread
Start by spreading a thin layer of mayonnaise (or mustard, or both) on each slice of bread. If you prefer a little extra flavor, you can lightly toast the bread for added crunch. - Layer the Roast Beef
Place the slices of roast beef on one slice of bread. Pile it high for a hearty sandwich! The beef should be stacked evenly to create a satisfying bite with every mouthful. - Add the Cheese
Lay the cheddar cheese slices on top of the roast beef. If you want the cheese to melt slightly, you can microwave the sandwich for 10-15 seconds or place it under a broiler for a minute. - Add Fresh Veggies
Layer on the romaine lettuce leaves and tomato slices. The lettuce adds a refreshing crunch, while the tomatoes provide a juicy balance to the rich beef and cheddar cheese. - Finish with Pickles (Optional)
If you enjoy a bit of tang, add a few slices of pickles to the sandwich for an extra burst of flavor. - Assemble and Serve
Place the second slice of bread on top, mayo or mustard side down. Press gently to compact the sandwich. Slice it in half and serve with your favorite side, such as chips, a pickle spear, or a salad.
Serving Suggestions
- For a classic deli experience, serve this sandwich with a side of crispy potato chips and a cold beverage.
- You can also pair this sandwich with coleslaw or a simple green salad for a well-rounded meal.
This layered deli-style sandwich is sure to be a crowd favorite. The combination of fresh ingredients, savory roast beef, and sharp cheddar cheese makes it a delicious and filling option for any time of day.
Customization: Add Pickles, Onions, or Spicy Mustard for Extra Flavor
One of the best things about a deli-style sandwich is its versatility. You can easily customize your sandwich to suit your taste preferences or to make it even more exciting. Here are a few simple additions to take your roast beef and cheddar cheese sandwich to the next level:
Pickles
Add some pickles for a tangy kick! Dill pickles or bread-and-butter pickles are both excellent choices. The crisp texture of pickles contrasts beautifully with the soft bread and rich roast beef, while their acidity balances the richness of the cheese. You can either slice them thin and add them inside the sandwich or serve them as a side.
Onions
For a bit of sharpness and extra crunch, throw some thinly sliced red onions or sweet onions into the mix. Red onions add a nice pop of color and a mild, slightly sweet flavor that pairs well with beef. If you like a more intense flavor, opt for pickled onions, which bring an added tanginess to the sandwich.
Spicy Mustard
If you enjoy a little heat, swap out regular mustard for spicy mustard or horseradish mustard. The spicy mustard will give the sandwich a nice zing that complements the roast beef and adds an extra layer of flavor without overwhelming the other ingredients.
These customization options allow you to personalize your deli sandwich, making it your own! The beauty of this recipe is that you can add your favorite toppings or spices to create a unique, satisfying meal every time.
Tips: Use Crusty Bread or Fresh Buns for the Best Results
The type of bread you use for your deli-style sandwich can make all the difference in achieving the perfect bite. Here are some tips to ensure you get the best results when making your sandwich:
Crusty Bread
For a satisfying crunch, crusty bread like a French baguette or ciabatta is an excellent choice. The crust provides a nice texture that complements the soft filling inside, making every bite enjoyable. The chewy interior also adds substance, making the sandwich feel hearty and filling.
Fresh Buns
If you prefer a softer texture, opt for fresh buns like brioche buns, potato rolls, or sandwich rolls. These buns are slightly sweeter and soft, offering a different texture that pairs beautifully with the rich roast beef and cheddar cheese. Brioche buns, in particular, bring a buttery richness that elevates the overall flavor of the sandwich.
Toasting the Bread
If you like your sandwich with a little extra crunch, consider lightly toasting the bread or buns. Toasting the bread will add a warm, crisp texture that complements the flavors of the fillings without overwhelming them. Just be sure not to over-toast, as you still want the bread to remain soft enough to bite into easily.
Using the right type of bread—whether it’s crusty or soft—helps create a more balanced, flavorful deli sandwich. The bread is just as important as the fillings, so choose wisely based on your personal preference for the perfect sandwich experience.
Quick and Easy Beef Recipes for Busy Days
Overview: Highlight Recipes That Can Be Made in Under 30 Minutes
In today’s busy world, having a collection of quick and easy beef recipes is a game-changer. Whether you’re preparing a hearty meal for the family or need something delicious on a tight schedule, recipes that can be made in under 30 minutes are a lifesaver.
These time-saving recipes don’t sacrifice flavor or quality. With a few key ingredients like ground beef, sausages, or dried beef, you can whip up satisfying dishes such as chili, skillet meals, or cheese balls in no time.
Perfect for weeknight dinners, parties, or quick lunches, these recipes ensure that even the busiest cook can serve up something delicious without spending hours in the kitchen. Let’s dive into some simple yet flavorful ideas that prove you can create amazing meals in just half an hour!
Recipe 1: Ground Beef Tacos with Enchilada Sauce
These ground beef tacos with enchilada sauce are a delicious and speedy meal perfect for busy weeknights. Combining the bold flavors of seasoned beef and rich enchilada sauce, these tacos are sure to become a family favorite. Ready in just under 30 minutes, they deliver a delightful mix of savory, spicy, and tangy flavors in every bite.
Ingredients
- 1 lb ground beef
- 1 cup enchilada sauce (mild or spicy, based on preference)
- 1 packet of taco seasoning
- 8 taco shells (soft or crunchy)
- 1 cup shredded cheddar cheese
- 1 cup shredded lettuce
- 1 diced tomato
- ½ cup chopped onions (optional)
- Sour cream and salsa for topping
Instructions
- Cook the Ground Beef
Heat a skillet over medium heat and add the ground beef. Cook until browned, breaking it apart with a spatula to ensure even cooking. Drain any excess grease. - Season and Add Enchilada Sauce
Sprinkle the taco seasoning over the cooked beef and mix well. Pour in the enchilada sauce and stir to coat the meat evenly. Let it simmer for 5-7 minutes to allow the flavors to meld. - Prepare the Toppings
While the beef simmers, prepare your toppings. Shred the lettuce, dice the tomato, and chop the onions. Arrange everything in small bowls for easy assembly. - Assemble the Tacos
Warm the taco shells (in a microwave or oven). Fill each shell with a generous scoop of the seasoned beef mixture. Add shredded cheddar cheese, lettuce, and tomatoes. Top with a dollop of sour cream and a drizzle of salsa.
Serving Suggestions
- Pair these tacos with tortilla chips and guacamole for a complete meal.
- Serve with a side of Mexican rice or refried beans for added heartiness.
These ground beef tacos with enchilada sauce are a quick, flavorful, and satisfying meal that’s perfect for both casual dinners and festive gatherings.
Recipe 2: Beef Stir-Fry with Veggies
This beef stir-fry with veggies is a quick and healthy dish perfect for busy weeknights. With tender beef, fresh vegetables, and a savory sauce, it’s a meal that’s packed with flavor and ready in just under 30 minutes. Serve it with rice or noodles for a complete and satisfying dinner.
Ingredients
- 1 lb beef strips (sirloin, flank steak, or pre-cut stir-fry beef)
- 2 tbsp soy sauce
- 1 tbsp cornstarch
- 2 tbsp vegetable oil
- 2 cups mixed veggies (e.g., broccoli, bell peppers, carrots, and snap peas)
- 3 cloves garlic, minced
- 1 tbsp minced ginger
- 2 tbsp oyster sauce or hoisin sauce
- 1 tbsp sesame oil
- Salt and pepper to taste
- Optional: sesame seeds and green onions for garnish
Instructions
- Marinate the Beef
In a bowl, toss the beef strips with soy sauce and cornstarch. Let it sit for 5-10 minutes to tenderize the meat and enhance its flavor. - Prep the Veggies
Wash and chop your choice of vegetables into bite-sized pieces. Make sure everything is ready to cook, as stir-frying is a fast process. - Cook the Beef
Heat 1 tablespoon of vegetable oil in a large skillet or wok over high heat. Add the marinated beef and stir-fry for 2-3 minutes until browned. Remove from the skillet and set aside. - Stir-Fry the Veggies
Add the remaining 1 tablespoon of vegetable oil to the skillet. Toss in the garlic and ginger and cook for 30 seconds until fragrant. Add the veggies and stir-fry for 3-5 minutes until tender but still crisp. - Combine and Add Sauce
Return the cooked beef to the skillet with the veggies. Stir in the oyster sauce (or hoisin sauce) and sesame oil. Mix well to coat everything evenly. Cook for an additional 2 minutes, ensuring the sauce thickens slightly. - Season and Serve
Adjust seasoning with salt and pepper as needed. Serve immediately over steamed rice or noodles. Garnish with sesame seeds and chopped green onions for extra flavor and presentation.
Serving Suggestions
- Pair this stir-fry with a side of fried rice or cauliflower rice for a low-carb option.
- Add a drizzle of sriracha or chili oil for some heat if you enjoy spicier dishes.
This beef stir-fry with veggies is a balanced and flavorful meal that’s as quick to prepare as it is satisfying to eat.
Recipe 3: Mini Beef Sliders with Melted Cheese
These mini beef sliders with melted cheese are a crowd-pleasing favorite perfect for gatherings, game days, or casual dinners. Juicy beef patties topped with gooey, melted cheese served on soft slider buns—this recipe combines simplicity with irresistible flavor. Best of all, they’re ready in under 30 minutes!
Ingredients
- 1 lb ground beef
- 1 tsp salt
- ½ tsp black pepper
- ½ tsp garlic powder
- ½ tsp onion powder
- 1 tbsp Worcestershire sauce
- 6-8 slider buns
- 6-8 slices of cheddar cheese or your preferred cheese
- 2 tbsp butter, melted
- Optional toppings: lettuce, tomato slices, pickles, and mayonnaise
Instructions
- Prepare the Beef Patties
In a mixing bowl, combine the ground beef, salt, black pepper, garlic powder, onion powder, and Worcestershire sauce. Mix gently until just combined, being careful not to overwork the meat. Form the mixture into 6-8 small patties, slightly larger than the size of the slider buns (they will shrink when cooked). - Cook the Patties
Heat a skillet or grill pan over medium-high heat. Lightly grease the surface with a drizzle of oil or nonstick spray. Cook the beef patties for 3-4 minutes on each side, or until they reach your desired level of doneness. - Melt the Cheese
During the last minute of cooking, place a slice of cheese on top of each patty. Cover the skillet with a lid for about 30 seconds to allow the cheese to melt beautifully over the patties. - Prepare the Buns
Brush the insides of the slider buns with melted butter and lightly toast them in a separate pan or under the broiler until golden. This step adds flavor and helps prevent the buns from becoming soggy. - Assemble the Sliders
Place each cooked patty on the bottom half of a toasted bun. Add your desired toppings, such as lettuce, tomato slices, pickles, or a dollop of mayonnaise. Cover with the top bun and gently press to hold everything together.
Serving Suggestions
- Serve these sliders with a side of crispy fries, potato wedges, or a side salad for a complete meal.
- Offer a variety of sauces, such as ketchup, mustard, or aioli, to allow everyone to customize their sliders.
Customization Ideas
- For a gourmet twist, swap cheddar for Swiss cheese and add sautéed mushrooms or caramelized onions.
- Try using brioche slider buns for a rich, buttery flavor.
These mini beef sliders are as versatile as they are delicious, making them perfect for any occasion.
Tips: Batch-Cook Beef for Meal Prep
Batch-cooking beef is a game-changer for saving time and ensuring you always have flavorful, ready-to-use protein for meals throughout the week. With a little prep, you can create a versatile base for countless recipes while cutting down on cooking time during busy days.
Why Batch-Cook Beef?
- Time-Saving: Cooking in bulk reduces the need to start from scratch for every meal.
- Versatility: Prepared beef can be used in a variety of dishes, from tacos and stir-fries to salads and soups.
- Budget-Friendly: Buying ground beef or larger cuts like roast beef in bulk often costs less.
Steps for Batch-Cooking Beef
- Choose Your Cut
Select cuts that work well for multiple recipes. Popular options include:- Ground beef: Great for tacos, chili, and casseroles.
- Beef strips: Perfect for stir-fries and wraps.
- Beef roasts: Ideal for shredding into sandwiches or soups.
- Season Wisely
When batch-cooking, keep seasonings simple. Use basic spices like salt, pepper, and garlic powder. This allows the beef to blend seamlessly into different dishes. - Cook in Batches
Cook your beef in a large skillet, slow cooker, or instant pot depending on the cut. For ground beef, cook in crumbles; for roasts, cook until tender and shred. - Cool and Store Properly
- Let the cooked beef cool completely.
- Divide it into portions based on your meal needs (e.g., 1-cup servings).
- Store in airtight containers or resealable bags. Label with the date for easy tracking.
Storage Tips
- Refrigerator: Store for up to 3-4 days in an airtight container.
- Freezer: Freeze for up to 3 months. Lay resealable bags flat to save space.
Ideas for Batch-Cooked Beef
- Quick Dinners: Use it for beef tacos or spaghetti sauce.
- Lunches: Add to salads, wraps, or grain bowls.
- Snacks: Reheat and use as a filling for sliders or quesadillas.
Pro Tip
Freeze beef in portioned bags with marinades to enhance the flavor when reheated. For example, marinate cooked strips in teriyaki sauce for stir-fries or enchilada sauce for tacos.
Batch-cooking beef is an excellent way to stay ahead in meal prep, giving you flexibility and delicious options all week long.
Conclusion
Beef recipes offer incredible versatility that makes them perfect for every occasion, from hearty family meals to elegant appetizers. Whether you’re craving the bold flavors of chili with enchilada sauce, the convenience of mini sliders, or the crowd-pleasing appeal of a dried beef cheese ball, there’s something here to satisfy every taste.
We hope these 5 irresistible beef recipes inspire you to get creative in the kitchen. They’re not only delicious but also easy to prepare, making them ideal for both weeknight dinners and special gatherings.
Which recipe will you try first? Share your thoughts, tips, or variations in the comments below—we’d love to hear from you!