
Ninja foodi recipes are transforming home cooking into a simple, enjoyable experience. This versatile appliance combines multiple functions, including air frying, pressure cooking, steaming, and slow cooking. These features allow you to create flavorful meals quickly and with minimal effort. It’s no surprise that so many people rely on Ninja foodi recipes to save time and enhance their cooking.
With these recipes, you can prepare dishes that suit every occasion. From quick weeknight dinners to healthy snacks, there’s always a way to make mealtime exciting. The Ninja Foodi also helps you cook healthier options by reducing the need for excessive oil. These recipes cater to busy schedules and family-friendly meals while delivering amazing results.
This post will introduce you to ten must-try Ninja foodi recipes. These recipes will inspire you to use your Ninja Foodi to its full potential. Whether you’re a beginner or an experienced cook, these dishes are easy to make and perfect for anyone. Let’s explore these recipes and elevate your cooking game!
Why the Ninja Foodi Is a Game-Changer in the Kitchen
Multi-Functionality: Air Fryer, Pressure Cooker, and Steaming Capabilities
The versatility of ninja foodi recipes lies in the appliance’s multi-functionality. It seamlessly combines air frying, pressure cooking, and steaming, allowing users to explore a variety of cooking methods. This combination not only saves space but also simplifies meal preparation, making it ideal for busy households.
Air Fryer: Healthy Crispy Results
The air fryer function delivers crispy, golden textures without the need for deep frying. By circulating hot air evenly, it replicates the effect of traditional frying while using significantly less oil. This makes ninja foodi recipes both healthier and more flavorful. Popular options include fries, wings, and roasted vegetables, offering convenience for quick snacks or side dishes.
Pressure Cooker: Fast and Flavorful Meals
The pressure cooker feature transforms time-consuming dishes into quick and easy meals. By creating a sealed environment, it speeds up cooking while locking in flavors and moisture. Ninja foodi recipes like stews, soups, and tender meats benefit greatly from this feature. It also retains more nutrients compared to other cooking methods, ensuring that meals are both delicious and healthy.
Steaming: Gentle and Nutritious Cooking
Steaming preserves the natural taste and texture of ingredients while keeping their nutrients intact. This method is perfect for ninja foodi recipes that include vegetables, fish, or dumplings. It’s especially useful for those aiming to prepare light, healthy meals. The gentle process ensures vibrant colors and fresh flavors in every dish.
By combining these features, ninja foodi recipes offer endless possibilities. Whether you’re roasting, tenderizing, or steaming, this appliance empowers you to create meals that are both nutritious and delicious.
Time Efficiency: How the Ninja Foodi Makes Meal Prep Faster
Meal prep can be time-consuming, especially when using multiple appliances for different cooking methods. The ninja foodi addresses this by combining the functions of an air fryer, pressure cooker, and steamer in one device. This eliminates the need for switching between gadgets, saving valuable time in the kitchen.
One Device, Multiple Functions
Instead of using a separate air fryer, pressure cooker, and steamer, the ninja foodi consolidates these tools into a single appliance. This reduces the number of steps in your cooking process, making meal prep more streamlined. You can use one pot to prepare an entire meal, from protein to sides, with minimal effort.
Faster Cooking Times with Pressure Cooking
Pressure cooking significantly cuts down on cooking time. Dishes that would normally take hours, such as stews or roasts, cook in a fraction of the time. For example, tough cuts of meat can become tender in as little as 30 minutes, which would typically take several hours using traditional methods. By cooking under high pressure, the ninja foodi reduces cooking time without sacrificing flavor or texture.
Air Fryer for Quick and Easy Snacks
When you need to prepare quick snacks or sides, the air fryer is a game-changer. It cooks food faster than traditional frying, without preheating an oven or waiting for oil to heat up. Ninja foodi recipes for crispy fries, chicken wings, or roasted vegetables can be completed in less than 20 minutes, making meal prep much quicker.
Efficient Steaming for Healthy Meals
Steaming in the ninja foodi also saves time compared to stovetop steaming. The appliance’s fast heating element ensures that food cooks quickly while retaining nutrients. You can steam fish, vegetables, and rice simultaneously while preparing other components of your meal in the pressure cooker or air fryer. This simultaneous cooking maximizes efficiency and speeds up meal prep.
In conclusion, the ninja foodi enhances time efficiency by simplifying cooking with its multi-functional design. Whether you’re preparing quick weeknight dinners or cooking large meals, the ninja foodi reduces both prep and cooking times, giving you more time to enjoy your meal.
Healthier Cooking Options: How Air Frying Reduces the Need for Oil
One of the standout features of the ninja foodi is its air fryer function, which provides a healthier alternative to traditional deep frying. By using hot air circulation to cook food, it creates that crispy, golden texture we love, but with significantly less oil. This change not only reduces fat intake but also makes meals lighter without sacrificing flavor.
How Air Frying Works
Air frying works by circulating hot air around the food at high speed, producing a crispy outer layer while retaining moisture inside. Unlike deep frying, which requires submerging food in oil, the ninja foodi air fryer uses a minimal amount of oil—often just a light spray or brush—to enhance the crispiness. This method results in up to 75% less fat than traditional frying, making it an ideal cooking option for those looking to eat healthier without compromising on taste.
Healthier Versions of Your Favorite Foods
One of the best aspects of air frying is its ability to make traditionally fried foods much healthier. Foods like French fries, chicken wings, and fish fillets typically require a large amount of oil to achieve their signature crispy texture. With ninja foodi recipes, you can air fry these foods with only a fraction of the oil—sometimes even none at all—while still getting the satisfying crunch and flavor. This allows you to enjoy your favorite comfort foods with fewer calories and less fat.
Nutrient Preservation
Because air frying cooks food at a faster rate compared to traditional frying, it also helps preserve more of the food’s nutrients. Since less oil is used, there’s less oxidation of nutrients that can occur during deep frying. This means you can enjoy a healthier version of your meals while still getting all the essential vitamins and minerals from the ingredients.
Cutting Down on Unhealthy Fats
Excessive consumption of oils, especially trans fats and saturated fats, can lead to health issues like heart disease and obesity. Air frying reduces your exposure to these unhealthy fats, as it requires less oil, and you can control the type of oil used. For example, you can opt for heart-healthy oils like olive oil or avocado oil when air frying, offering more nutritional benefits.
In conclusion, air frying with the ninja foodi not only makes your meals healthier by reducing oil use, but it also maintains the delicious, crispy texture we crave in fried foods. With ninja foodi recipes, you can make healthier choices without compromising on taste.
Quick and Easy Ninja Foodi Recipes for Busy Weeknights
One-Pot Chicken and Rice: A Classic Comfort Meal Made with Minimal Cleanup
One-pot meals are a lifesaver for busy cooks, and one-pot chicken and rice is a classic dish that fits perfectly into the ninja foodi’s multi-functional capabilities. This hearty, comforting meal is quick, flavorful, and easy to prepare, making it ideal for family dinners or meal prep. Plus, since it only requires one appliance, cleanup is a breeze.

Why One-Pot Chicken and Rice Works Well in the Ninja Foodi
The ninja foodi’s pressure cooking, air frying, and steaming functions come together to create the perfect cooking environment for this dish. The pressure cooking function allows the chicken to become tender and juicy, while the rice cooks to perfection without burning or sticking to the bottom. All the flavors meld together in a single pot, making each bite even more satisfying. The best part? There’s no need for multiple pots and pans, reducing both cooking time and cleanup effort.
How to Make One-Pot Chicken and Rice in the Ninja Foodi
Start by sautéing the chicken with your favorite seasonings in the ninja foodi’s sauté mode. This step adds depth of flavor and creates a perfect base for the rice. Once the chicken is browned, add your rice, broth, and any vegetables or aromatics you desire. Using the pressure cooker function, cook everything together under high pressure for about 10 minutes. The result is a perfectly cooked chicken and rice dish with tender, flavorful chicken and fluffy rice—all in one pot.
Minimal Cleanup, Maximum Flavor
One of the biggest perks of this recipe is the minimal cleanup involved. Since everything cooks in the ninja foodi’s pot, there’s no need to wash multiple dishes. The non-stick inner pot makes it easy to clean, and you won’t have to worry about scrubbing burned-on rice or chicken. After dinner, just a quick rinse is all it takes to have your ninja foodi ready for the next meal.
Variations and Customization
This one-pot chicken and rice recipe is incredibly versatile. You can easily customize it to suit your family’s tastes by adding different vegetables, such as peas, carrots, or bell peppers, or even incorporating spices and herbs to change the flavor profile. Want a richer dish? Try adding a bit of coconut milk or cream for a creamy texture. You can also adjust the protein, swapping the chicken for other meats like beef or pork.
In conclusion, one-pot chicken and rice made in the ninja foodi is a quick, easy, and delicious meal that minimizes both cooking time and cleanup. With the ability to combine multiple functions, the ninja foodi ensures that your dish turns out perfectly every time, and you can spend less time in the kitchen and more time enjoying your meal.
Air-Fried Crispy Wings: Perfect for Game Nights or Family Dinners
Air-fried crispy wings are a crowd-pleaser, whether it’s game night, a casual family dinner, or a weekend snack. With the ninja foodi’s air fryer function, you can make wings that are crispy on the outside and tender on the inside, all without the need for deep frying. The convenience of air frying cuts down on both cooking time and oil, making it a healthier, faster option for preparing this beloved dish.
Why Air-Fried Wings Are So Delicious in the Ninja Foodi
The ninja foodi’s air fryer uses hot air circulation to crisp up the skin of the wings while retaining their moisture on the inside. This process is similar to traditional frying but without the need for large amounts of oil, making the wings much lighter and healthier. The result is a perfectly crispy, golden exterior with juicy, tender meat inside—just like wings from a deep fryer, but without the excess fat.
How to Make Air-Fried Crispy Wings in the Ninja Foodi
Making air-fried crispy wings in the ninja foodi is quick and easy. Start by seasoning your wings with your favorite spices or a marinade of choice. You can opt for classic buffalo flavor, BBQ, or even a dry rub for a more unique taste. After seasoning, place the wings in the ninja foodi’s basket or on the rack, depending on your preference. Set the air fryer to 400°F (200°C) for about 20 minutes. Halfway through, shake the basket or turn the wings to ensure they cook evenly.
By the time the cooking cycle finishes, you’ll have crispy wings that are perfect on their own or ready to be tossed in your favorite sauce. The ninja foodi’s versatility means you can air fry a large batch of wings at once, making it ideal for feeding a group.
Perfect for Game Nights, Parties, and Family Dinners
Air-fried crispy wings are the ideal dish for social gatherings. Whether you’re hosting a game night, throwing a party, or simply enjoying a family dinner, wings are a guaranteed hit. With ninja foodi recipes, you can quickly prepare a large amount of wings in just one batch, making it easy to serve a crowd. Plus, since they cook so quickly, you won’t have to spend all night in the kitchen.
Wings also pair well with a variety of sides, from crispy fries and coleslaw to vegetable platters and dipping sauces. You can mix and match flavors and sauces to satisfy everyone’s preferences. This flexibility ensures that air-fried crispy wings in the ninja foodi become a go-to recipe for any occasion.
Healthier and Less Mess
One of the biggest advantages of using the ninja foodi air fryer for crispy wings is the reduction of oil. Traditional frying requires the wings to be submerged in oil, which adds excess calories and fat. With the air fryer, you can enjoy the same crispiness with a fraction of the oil. Additionally, the mess and cleanup are significantly reduced. Since you don’t need a deep fryer or oil splattering all over, the kitchen stays cleaner, and cleanup is quick and easy.
In conclusion, air-fried crispy wings made in the ninja foodi are a delicious, healthier alternative to traditional fried wings. Whether you’re hosting a party or just feeding the family, these wings are sure to please. With minimal prep and cleanup, air-fried wings are an easy, go-to dish for any occasion.
Pressure Cooker Chili: A Hearty and Flavorful Dish Ready in Under 30 Minutes
Chili is a comfort food classic, perfect for chilly nights or feeding a hungry crowd. Traditionally, chili can take hours to simmer and develop its rich, deep flavors. However, the ninja foodi’s pressure cooker function allows you to create a hearty and flavorful chili in under 30 minutes. This time-saving feature ensures you can enjoy a delicious, comforting meal without spending hours in the kitchen.
Why the Pressure Cooker is Ideal for Chili
The pressure cooker function in the ninja foodi accelerates the cooking process by using high-pressure steam to cook ingredients faster, while locking in all the flavors. When making chili, the pressure cooker ensures that the meat, beans, and spices meld together beautifully, creating a thick, hearty stew with a deep, rich flavor. The high-pressure environment breaks down tougher cuts of meat and infuses the spices evenly throughout the dish, resulting in a chili that tastes like it’s been simmering for hours, but is ready in no time.
How to Make Pressure Cooker Chili in the Ninja Foodi
Start by sautéing your onions, garlic, and ground meat (beef, turkey, or chicken) in the ninja foodi’s sauté function. This step allows the ingredients to develop flavor before adding the remaining ingredients. Once your meat is browned, add your chili beans, diced tomatoes, broth, and a blend of spices such as cumin, chili powder, and paprika. Stir everything together, ensuring that the spices are evenly distributed.
Next, close the lid, set the pressure cooker function, and cook under high pressure for about 15 minutes. While the chili cooks, you can prepare your toppings, such as sour cream, shredded cheese, or chopped cilantro. After the cooking cycle is complete, allow the pressure to release naturally for about 10 minutes before opening the lid. The result is a rich, flavorful chili that is as hearty as one that’s been simmering for hours but only took a fraction of the time.
Minimal Prep and Maximum Flavor
The pressure cooker functionality not only speeds up cooking but also minimizes the amount of prep time. You can quickly sauté and pressure cook everything in the same pot, meaning there’s less cleanup at the end. The ninja foodi’s non-stick inner pot makes it easy to clean, so you can spend more time enjoying your chili than washing dishes.
The pressure cooker method also helps retain more nutrients from the ingredients compared to long simmering. The beans and vegetables hold their texture and flavor, while the meat becomes wonderfully tender and infused with the seasonings. This method ensures your chili is not only fast but also nutrient-dense and delicious.
Perfect for Weeknight Dinners or Meal Prep
Pressure cooker chili is an ideal meal for busy weeknights or meal prep. You can make a large batch in less than 30 minutes, which makes it easy to serve a family or prepare meals for the week ahead. You can store leftovers in the fridge for a couple of days or freeze them for later, making it a great make-ahead option.
This chili is also incredibly customizable. If you prefer a spicier kick, you can add jalapeños or hot sauce. For a heartier dish, you can add additional vegetables like bell peppers or sweet potatoes. Whether you like your chili mild or spicy, the ninja foodi ensures you can customize it to suit your tastes.
In conclusion, pressure cooker chili made in the ninja foodi is a quick, easy, and flavorful dish that’s perfect for any occasion. With the pressure cooking function, you can make a rich, hearty chili in under 30 minutes, making it a go-to recipe for busy nights or meal prep. It’s a perfect balance of time efficiency, flavor, and convenience, giving you a delicious homemade chili without all the wait.
Vegetarian Stir-Fry: A Quick, Healthy Option Loaded with Veggies and Flavor
Vegetarian stir-fry is one of the best ways to get a quick, healthy, and flavorful meal on the table. Packed with vibrant vegetables, plant-based protein, and a savory sauce, this dish is as nutritious as it is delicious. Thanks to the ninja foodi’s air frying and sauté functions, you can prepare a vegetable stir-fry in a fraction of the time it would take with traditional stovetop methods. Plus, the versatility of the ninja foodi allows you to add your favorite vegetables and customize the recipe to suit your taste.
Why the Ninja Foodi is Perfect for Stir-Fry
The ninja foodi’s sauté function allows you to quickly cook vegetables and tofu or tempeh, giving them a golden, slightly crispy texture that’s perfect for stir-fry. The air fryer function is also great for roasting or crisping up vegetables like bell peppers, zucchini, or broccoli, giving them a slightly caramelized flavor that’s hard to achieve with stovetop cooking. The high heat generated by the ninja foodi ensures that the vegetables remain crisp-tender, preserving both their nutrients and vibrant color.
How to Make Vegetarian Stir-Fry in the Ninja Foodi
Start by chopping your favorite vegetables—carrots, bell peppers, onions, broccoli, snap peas, and mushrooms all work well for stir-fry. You can also add tofu or tempeh for a plant-based protein source. Begin by sautéing your vegetables in the ninja foodi’s pot using a small amount of oil or vegetable broth. The sauté function will quickly soften the vegetables while keeping their texture intact. If you’re using tofu or tempeh, cook it first in the pot until crispy and golden, then set it aside.
Next, add your veggies to the pot, toss them to coat in the remaining oil, and season with soy sauce, garlic, ginger, and your favorite stir-fry spices. You can also add a splash of rice vinegar, sesame oil, or chili flakes for additional flavor. The ninja foodi’s high heat ensures that your vegetables cook quickly without becoming too soft or soggy. If you prefer your vegetables extra crispy, you can finish them off in the air fryer for a few minutes.
Loaded with Flavor and Nutrients
The best part of a vegetarian stir-fry is how easy it is to pack in lots of flavor and nutrients. Vegetables like bell peppers, broccoli, and carrots are rich in vitamins and antioxidants, and adding a variety of colors to your stir-fry means you’re getting a range of essential nutrients. The ninja foodi ensures that the vegetables stay vibrant and full of nutrients, as it cooks them quickly while retaining their natural flavor.
You can also add a protein-packed sauce made from soy sauce, sesame oil, garlic, and ginger, which adds depth and umami to the dish. For a touch of sweetness, add a bit of honey or maple syrup. If you want to make your stir-fry even more substantial, consider serving it with brown rice, quinoa, or noodles, which the ninja foodi can also cook in no time.
A Quick, Healthy Meal for Busy Days
Vegetarian stir-fry is the perfect meal when you need something quick and healthy. Whether you’re looking for a light weeknight dinner or a nutritious meal prep option, this dish fits the bill. It takes just 20 minutes to prepare and cook in the ninja foodi, making it ideal for busy days when time is limited but you still want something nourishing.
Stir-fry also offers endless customization possibilities. You can add any combination of vegetables, adjust the seasoning to your liking, or experiment with different plant-based protein options like edamame or chickpeas. The ninja foodi ensures that every batch of stir-fry is quick, fresh, and full of flavor.
In conclusion, a vegetarian stir-fry made in the ninja foodi is a fast, nutritious, and delicious option for those seeking a healthy meal with minimal effort. Thanks to the appliance’s air frying and sautéing capabilities, you can quickly create a satisfying dish loaded with vegetables and flavor, making it a go-to recipe for busy days or meal prep.
Healthy Ninja Foodi Recipes for Guilt-Free Eating
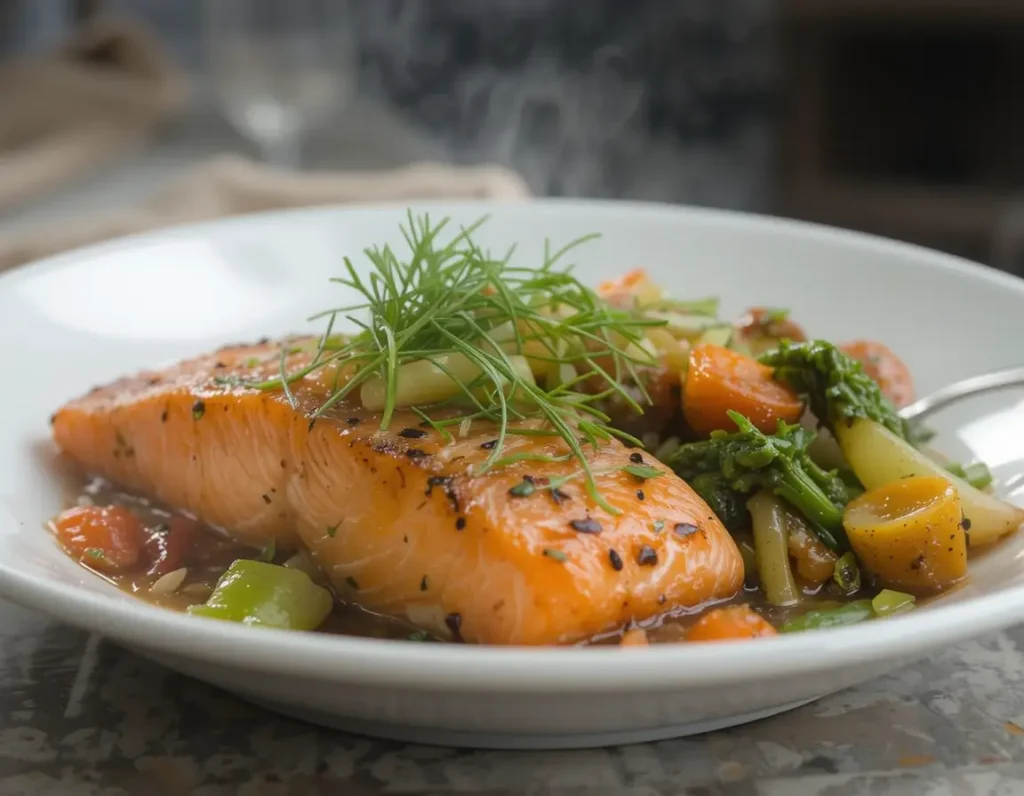
Steamed Salmon with Veggies: A Light and Nutritious Meal in Minutes
Steamed salmon with veggies is the perfect dish when you’re craving something healthy, light, and quick to prepare. This dish combines the rich, buttery flavor of salmon with the crisp, vibrant taste of fresh vegetables, making it a balanced meal that’s both nutritious and satisfying. Thanks to the ninja foodi’s steaming function, you can prepare this meal in just a few minutes while preserving all the natural flavors and nutrients of the ingredients.
Why Steaming is Ideal for Salmon and Vegetables
Steaming is one of the healthiest cooking methods because it preserves the nutrients and flavors of the food. In the ninja foodi, steaming your salmon ensures that it cooks evenly, staying moist and tender without losing its delicate texture. Steaming vegetables is equally beneficial, as it helps retain their vitamins, minerals, and natural color. This method also eliminates the need for excess oil, making it a great choice for a light, heart-healthy meal.
How to Make Steamed Salmon with Veggies in the Ninja Foodi
Start by seasoning your salmon fillets with your favorite herbs and spices. Lemon, garlic, dill, or thyme work well, or you can use a simple drizzle of olive oil and a pinch of salt. Next, prepare your vegetables—broccoli, asparagus, and carrots are great options. You can also include leafy greens like spinach or kale for extra nutrients.
In the ninja foodi, place the salmon fillets on the steaming rack, arranging the vegetables around them. Add water to the pot as directed for the steaming function. Close the lid, set the steam function, and cook at high pressure for about 8-10 minutes. The result will be perfectly steamed salmon that flakes apart easily, paired with tender, flavorful vegetables.
A Balanced Meal in Minutes
This steamed salmon with veggies recipe is quick and easy, making it ideal for busy weeknights when you want a healthy meal without spending too much time in the kitchen. The entire dish is ready in less than 20 minutes, and it requires minimal preparation. Since the ninja foodi’s steaming function cooks everything in one pot, cleanup is simple and quick.
This dish is also versatile, allowing you to swap in different vegetables or seasonings to suit your taste. You can try adding a squeeze of fresh lemon or a drizzle of low-sodium soy sauce for extra flavor. For an added boost of protein, you can pair the meal with quinoa or brown rice, both of which can be steamed in the ninja foodi alongside the salmon and vegetables.
Health Benefits of Steamed Salmon and Veggies
Salmon is a nutrient-dense fish, rich in omega-3 fatty acids, which are beneficial for heart health, brain function, and reducing inflammation. It’s also a great source of protein, vitamins D and B12, and selenium. Pairing the salmon with steamed vegetables gives you a complete, balanced meal full of fiber, vitamins, and antioxidants. Whether you’re looking to maintain a healthy diet or simply enjoy a light, satisfying meal, this dish is a great option.
In conclusion, steamed salmon with veggies in the ninja foodi is a healthy, quick, and flavorful meal that’s ready in just minutes. With the steaming function, the salmon and vegetables cook to perfection, retaining their natural flavors and nutrients. This meal is perfect for anyone looking for a nutritious, balanced dish that’s simple to prepare and easy to clean up afterward.
Air-Fried Zucchini Chips: A Healthy Snack Alternative
Air-fried zucchini chips are a fantastic alternative to traditional fried snacks. They offer the crispiness and satisfaction of chips without the excess oil and calories. The ninja foodi’s air fryer function makes it incredibly easy to prepare these healthy snacks quickly, providing a guilt-free treat that’s perfect for any occasion. Whether you’re looking for a nutritious snack or a side dish to pair with a meal, air-fried zucchini chips are a flavorful, light option that the whole family will enjoy.
Why Air-Frying is the Best Method for Zucchini Chips
Traditional frying often requires a lot of oil, which can add unnecessary calories and fat. Air frying, on the other hand, uses hot air circulation to crisp up the zucchini without the need for excess oil. The ninja foodi’s air fryer function ensures that the zucchini chips turn out crunchy and golden, just like deep-fried chips, but with a fraction of the fat.
The air fryer also cooks the zucchini quickly, ensuring that it retains its nutrients and fresh flavor. Zucchini is high in water content, and air frying helps reduce this moisture while keeping the chips crispy. The result is a healthy snack that’s both light and satisfying.
How to Make Air-Fried Zucchini Chips in the Ninja Foodi
Making air-fried zucchini chips in the ninja foodi is simple and quick. Start by washing and slicing your zucchini into thin, even rounds. Thin slices are key to achieving a crispy texture, so use a mandolin or sharp knife for precision. Once sliced, season the zucchini with olive oil, salt, pepper, and any other spices you prefer, such as garlic powder, onion powder, or Italian seasoning.
Preheat the ninja foodi’s air fryer to 400°F (200°C). Place the seasoned zucchini slices in the air fryer basket in a single layer, ensuring they aren’t overlapping. You may need to cook them in batches depending on how much zucchini you have. Air fry for about 10-12 minutes, flipping halfway through, until the chips are golden and crispy.
For an extra crispy texture, you can lightly spray the zucchini with olive oil before air frying. This helps enhance the crispiness and gives the chips a golden color without adding much extra fat.
A Low-Calorie, Nutrient-Dense Snack
Zucchini is low in calories but packed with nutrients, including fiber, vitamin C, and potassium. These air-fried zucchini chips are a great way to get more veggies into your diet, especially if you’re trying to reduce your intake of processed snacks. Unlike traditional potato chips, zucchini chips are naturally lower in calories and fat, making them a healthier option for snacking.
In addition to being low-calorie, zucchini chips are high in antioxidants and can help promote good digestion, lower blood pressure, and support heart health. By making zucchini chips in the ninja foodi’s air fryer, you can enjoy all these health benefits without sacrificing taste or texture.
Versatile and Customizable
Air-fried zucchini chips are incredibly versatile and can be customized to suit your taste preferences. If you like a bit of heat, add chili flakes or cayenne pepper to your seasoning. For a cheesy flavor, sprinkle some nutritional yeast or grated Parmesan cheese over the chips before air frying. You can also experiment with herbs like rosemary, thyme, or basil for a fragrant twist.
These zucchini chips are a great snack on their own or can be paired with a variety of dips. Try them with hummus, guacamole, or a light yogurt-based dip for an extra burst of flavor. They also make a great side dish for sandwiches, burgers, or salads.
In conclusion, air-fried zucchini chips made in the ninja foodi are a delicious, healthy alternative to traditional chips. They’re quick to prepare, low in calories, and packed with nutrients, making them the perfect snack for anyone looking for a lighter option. With endless flavor possibilities, zucchini chips are sure to become a go-to healthy snack in your kitchen.
Quinoa and Veggie Bowl: A Protein-Packed, Plant-Based Meal
A quinoa and veggie bowl is a vibrant, nutritious dish that combines plant-based protein with fiber-rich vegetables. It’s perfect for anyone looking for a filling, balanced meal that’s both light and satisfying. This dish is not only packed with essential nutrients but also versatile and customizable. Thanks to the ninja foodi’s versatile cooking functions, you can prepare the quinoa and vegetables in one pot, making it an easy and convenient meal to whip up any day of the week.
Why Quinoa is the Perfect Base for a Plant-Based Bowl
Quinoa is a complete protein, meaning it contains all nine essential amino acids that your body cannot produce on its own. This makes it a fantastic choice for those following a plant-based diet, as it provides the protein typically found in animal-based foods. Quinoa is also high in fiber, iron, magnesium, and antioxidants, offering a variety of health benefits. When combined with colorful veggies, it makes for a hearty meal that can help fuel your day without leaving you feeling sluggish.
The texture of quinoa is light and fluffy, making it a perfect base for a veggie bowl. It soaks up the flavors of the vegetables, sauces, and seasonings, enhancing the overall taste of the dish. Whether you like a simple quinoa bowl with just a few veggies or prefer a more complex dish with a variety of ingredients, quinoa serves as a delicious and nutrient-packed foundation.
How to Make a Quinoa and Veggie Bowl in the Ninja Foodi
Start by rinsing the quinoa thoroughly to remove any saponin, a natural coating that can make the quinoa taste bitter. Place the rinsed quinoa in the ninja foodi’s inner pot, along with vegetable broth or water to cook it. Use the pressure cooking function to cook the quinoa for about 1-2 minutes under high pressure. Once done, allow the pressure to release naturally for a few minutes. You’ll have perfectly cooked, fluffy quinoa that’s ready to serve as the base of your veggie bowl.
While the quinoa cooks, prepare your vegetables. You can use a variety of vegetables such as bell peppers, zucchini, carrots, sweet potatoes, broccoli, and spinach. Chop them into bite-sized pieces. You can either sauté the vegetables in the ninja foodi’s pot using the sauté function, or you can opt to air fry them for a crispy, roasted texture. Air-fried vegetables add an extra layer of flavor and make the dish even more delicious.
Once both the quinoa and vegetables are ready, combine them in a bowl. Add a simple dressing made from olive oil, lemon juice, tahini, or a vinaigrette for extra flavor. You can also sprinkle your veggie bowl with seeds (like pumpkin or sunflower seeds), nuts, or fresh herbs to add a bit of crunch and freshness.
Health Benefits of Quinoa and Veggie Bowls
A quinoa and veggie bowl is an excellent source of plant-based protein and fiber. Quinoa provides all nine essential amino acids, making it a complete protein that supports muscle repair, immune function, and overall health. The veggies in the bowl provide a variety of vitamins, minerals, and antioxidants that help promote healthy skin, digestion, and heart health.
The combination of quinoa and vegetables also helps keep you feeling full longer, making it a great option for those looking to control hunger and maintain energy levels throughout the day. Because quinoa is low on the glycemic index, it can also help regulate blood sugar levels, making it a good choice for those managing diabetes or watching their blood sugar levels.
Endless Customization Options
One of the best things about a quinoa and veggie bowl is how easily it can be customized to suit your personal preferences. You can swap in any vegetables you like, based on what’s in season or what you have on hand. Add roasted chickpeas, tofu, tempeh, or edamame for additional plant-based protein.
You can also play around with different spices and herbs to match your flavor profile. A dash of curry powder, cumin, or chili flakes can give your bowl a warm, spicy kick. For a more Mediterranean twist, try adding olives, feta cheese, and a drizzle of olive oil. The ninja foodi makes it easy to experiment with different ingredients and cooking methods, whether you want to sauté, pressure cook, or air fry your vegetables.
In conclusion, a quinoa and veggie bowl made in the ninja foodi is a quick, customizable, and nutritious plant-based meal. Packed with protein, fiber, and vitamins, it’s the perfect choice for anyone looking for a balanced meal that’s light, satisfying, and full of flavor. Whether you’re cooking for yourself or for a family, this easy dish is sure to become a staple in your kitchen.
Low-Carb Cauliflower Fried Rice: A Healthy Twist on a Classic Dish
Low-carb cauliflower fried rice is a healthier version of traditional fried rice. It’s perfect for anyone looking to reduce their carb intake while still enjoying a delicious, satisfying meal. The ninja foodi makes preparing this dish quick and easy. Cauliflower rice is a great substitute for regular rice, providing the same texture but with fewer calories and carbs.
Why Cauliflower is a Great Rice Substitute
Cauliflower is a low-carb vegetable that’s rich in vitamins, minerals, and fiber. It provides the same texture as rice but with far fewer calories. By using cauliflower rice, you can create a lighter, healthier version of fried rice without sacrificing flavor. The ninja foodi helps cook cauliflower rice quickly and evenly, ensuring it turns out perfectly every time.
How to Make Low-Carb Cauliflower Fried Rice in the Ninja Foodi
Start by grating cauliflower into rice-sized pieces or use pre-packaged cauliflower rice. In the ninja foodi, use the sauté function to cook garlic, onions, and any other vegetables you like. After a few minutes, add the cauliflower rice and stir well. Add soy sauce or tamari for flavor, and cook until the cauliflower rice becomes tender.
To enhance the dish, add scrambled eggs and cooked chicken or shrimp for extra protein. You can also include a mix of bell peppers, peas, and carrots for added flavor and texture.
Health Benefits of Cauliflower Fried Rice
Cauliflower fried rice is low in carbs, making it ideal for those following a keto or low-carb diet. It’s also rich in fiber, which supports digestion and helps you feel full longer. Additionally, cauliflower is high in antioxidants, vitamins C and K, and folate, making it a nutrient-packed choice for anyone looking to boost their health.
Customization Ideas
This dish is highly customizable. You can swap in different vegetables or proteins based on your preferences. Try adding spinach, mushrooms, or broccoli for added nutrients. You can also use coconut aminos instead of soy sauce for a gluten-free version. The ninja foodi makes it easy to adjust cooking times and flavors to suit your tastes.
In conclusion, low-carb cauliflower fried rice is a nutritious and delicious alternative to traditional fried rice. It’s quick to make in the ninja foodi, easy to customize, and perfect for anyone looking for a healthier meal option.
Crowd-Pleasing Ninja Foodi Recipes for Families
BBQ Pulled Pork: Tender and Flavorful, Perfect for Sandwiches or Tacos
BBQ pulled pork is a delicious, versatile dish that’s perfect for sandwiches, tacos, or as a main course. The ninja foodi makes it easy to prepare tender, flavorful pulled pork quickly. By using a pressure cooker or slow cook function, the pork becomes perfectly shredded and infused with BBQ sauce. This dish is a great option for weeknight dinners, gatherings, or meal prep.
Why Pulled Pork is a Great Meal Option
Pulled pork is known for its tenderness and rich flavor. The slow-cooking method breaks down the meat, making it easy to shred. It’s also a great dish for feeding a crowd, as it can be used in various meals like sandwiches or tacos. Using the ninja foodi allows you to cook it faster than traditional methods without sacrificing flavor.
How to Make BBQ Pulled Pork in the Ninja Foodi
Start by seasoning the pork with your favorite BBQ rub. Place it in the ninja foodi and add some broth for moisture. Use the pressure cooker function and cook on high for 60-75 minutes. Once the pork is tender, shred it using two forks and mix with BBQ sauce. For extra flavor, let the pork sit in the sauce for a few minutes before serving.
You can serve the pulled pork on soft buns for sandwiches or in soft tortillas for tacos. Add some coleslaw, pickles, or cheese for extra flavor.
Health Benefits of BBQ Pulled Pork
BBQ pulled pork is a popular dish in many ninja foodi recipes, offering a great source of protein necessary for muscle repair and overall health. By preparing this dish using lean cuts of pork and a homemade BBQ sauce, you can easily control the fat and sugar content. Ninja foodi recipes allow for healthier versions of traditional comfort foods like pulled pork, making it easier to enjoy without compromising on taste.
Pulled pork made in the ninja foodi is also packed with essential nutrients, including B vitamins, iron, and zinc. These nutrients are vital for maintaining a healthy body. Whether you are trying out new ninja foodi recipes or sticking to classic ones, this dish offers the benefits of both flavor and nutrition. Embrace the versatility of ninja foodi recipes to create meals that are as healthy as they are delicious, ensuring that every bite of BBQ pulled pork supports your wellness goals.
In summary, BBQ pulled pork cooked with ninja foodi recipes provides a balanced and nutritious option, giving you a wholesome meal that fits into a healthy lifestyle.
Versatile and Customizable
BBQ pulled pork is highly customizable. You can adjust the seasoning, sauce, and toppings to suit your preferences. Try using a spicy BBQ sauce or adding different vegetables like sautéed onions or jalapeños. The ninja foodi’s pressure cooker and sauté functions give you control over the cooking process, ensuring the pulled pork is tender and packed with flavor.
In conclusion, BBQ pulled pork is a delicious and easy dish to prepare in the ninja foodi. It’s perfect for sandwiches, tacos, or as a main dish. It’s also versatile and can be customized to suit any taste.
Mac and Cheese: A Creamy, Kid-Approved Favorite
Mac and cheese is a classic comfort food that’s loved by kids and adults alike. The creamy texture and cheesy flavor make it a go-to dish for family dinners, parties, or any time you’re craving something indulgent. With the ninja foodi, you can make this comforting dish faster and more easily than traditional methods. The pressure cooker function cooks the pasta and sauce simultaneously, ensuring that every bite is perfectly creamy and delicious.
Why Mac and Cheese is a Family Favorite
Mac and cheese is not only comforting but also versatile. You can easily customize it by adding different cheeses, meats, or vegetables. Whether you prefer sharp cheddar, mozzarella, or a blend of cheeses, the flavor possibilities are endless. Kids especially love this dish because it’s creamy, cheesy, and just the right amount of comforting.
How to Make Mac and Cheese in the Ninja Foodi
To make mac and cheese in the ninja foodi, start by cooking the pasta using the pressure cooker function. Add water or broth and set the pressure cooker to cook for about 4-5 minutes. Once the pasta is cooked, switch to the sauté function and stir in milk, butter, and shredded cheese. Stir constantly until the sauce thickens and becomes creamy. You can also add extras like cooked bacon, chicken, or broccoli for added flavor and nutrition.
Health Benefits and Customization
While mac and cheese is traditionally a rich comfort food, you can make it healthier by using whole wheat pasta or adding vegetables. Broccoli, spinach, or peas can be mixed in for an added boost of nutrients. You can also use lighter versions of cheese or milk for a lower-fat option. The ninja foodi makes it easy to experiment with different ingredients while still achieving the creamy texture and taste everyone loves.
Why the Ninja Foodi is Perfect for Mac and Cheese
The ninja foodi is ideal for making mac and cheese because it combines the pressure cooker and sauté functions. This combination allows for quick cooking, minimal mess, and a creamy, cheesy finish. The one-pot cooking method reduces cleanup and ensures that your mac and cheese is cooked evenly, making it easier than ever to prepare a family-friendly meal.
In conclusion, mac and cheese made in the ninja foodi is a quick, delicious, and creamy dish that the whole family will love. It’s easy to prepare, customizable, and perfect for any occasion. Whether you’re making a simple version or adding extra ingredients, this kid-approved favorite will never disappoint.
Cheesy Broccoli Casserole: A Side Dish That Doubles as a Meal
Cheesy broccoli casserole is a comforting dish that can serve as both a side dish and a main course. It’s loaded with broccoli, cheese, and creamy goodness, making it a crowd-pleaser for both kids and adults. The ninja foodi makes it easy to prepare this casserole quickly, with minimal fuss and cleanup. Whether you’re serving it as a side or enjoying it as a main, it’s a versatile and delicious option that’s sure to satisfy.
Why Cheesy Broccoli Casserole is So Popular
Cheesy broccoli casserole is a fantastic way to incorporate more vegetables into your diet. The cheese sauce adds richness and flavor, making the broccoli more appealing, especially for picky eaters. The casserole’s creamy texture and cheesy topping make it feel indulgent, while still providing the health benefits of broccoli. It’s an easy, family-friendly meal that can be enjoyed by people of all ages.
How to Make Cheesy Broccoli Casserole in the Ninja Foodi
To make cheesy broccoli casserole in the ninja foodi, start by steaming or pressure cooking the broccoli until it’s tender. Once cooked, place the broccoli in the ninja foodi’s inner pot. In a separate bowl, mix together a cheese sauce using butter, flour, milk, and shredded cheese. Pour the sauce over the broccoli and stir to combine. Top with additional cheese and breadcrumbs for a crispy, golden topping.
Use the baking function on the ninja foodi to cook the casserole until the cheese is melted and bubbly. This process ensures that the casserole is cooked evenly, with a crispy top and creamy interior. It’s a one-pot dish, making cleanup quick and easy.
Health Benefits of Cheesy Broccoli Casserole
Broccoli is a powerhouse vegetable, rich in vitamins C and K, fiber, and antioxidants. It supports digestion, boosts immunity, and helps reduce inflammation. While the cheese sauce adds some richness, you can opt for lighter versions of cheese and milk for a healthier dish. By making it in the ninja foodi, you can control the amount of cheese and other ingredients, making it a healthier option compared to store-bought casseroles.
Customizing Your Cheesy Broccoli Casserole
This cheesy broccoli casserole is highly customizable. You can add other vegetables like carrots, cauliflower, or bell peppers for extra flavor and nutrients. If you want to add some protein, consider mixing in cooked chicken, turkey, or bacon. You can also use different types of cheese such as cheddar, mozzarella, or even a blend of your favorites. The ninja foodi allows you to experiment with flavors and ingredients to create your ideal casserole.
In conclusion, cheesy broccoli casserole made in the ninja foodi is a versatile, comforting dish that can be served as both a side and a main. With its creamy texture and cheesy flavor, it’s a great way to get more vegetables into your meals. Plus, it’s easy to make and customize to suit your taste, making it a perfect addition to any family dinner.
Classic Beef Stew: A Hearty Family Dinner Option
Classic beef stew is a timeless, hearty meal that’s perfect for family dinners. It’s made with tender beef, vegetables, and a rich, savory broth that warms the soul. The ninja foodi makes cooking beef stew faster and easier while keeping all the flavors intact. Whether you’re preparing it for a cozy weeknight dinner or a special occasion, this dish is sure to satisfy everyone at the table.
Why Beef Stew is a Family Favorite
Beef stew is a well-loved dish because of its comforting nature. The tender chunks of beef, combined with root vegetables like carrots, potatoes, and onions, create a deliciously filling meal. It’s also a flexible dish, as you can add a variety of vegetables or herbs to match your preferences. With its rich broth, beef stew provides a wholesome and satisfying option for the entire family.
How to Make Classic Beef Stew in the Ninja Foodi
To make beef stew in the ninja foodi, begin by sautéing onions and garlic in the pot to build flavor. Next, add beef chunks and brown them on all sides. Add your choice of vegetables, such as carrots, potatoes, and celery. Then, pour in broth, wine, or a combination of both to create a rich base. Add seasonings like thyme, bay leaves, salt, and pepper to enhance the taste.
Use the pressure cooker function on the ninja foodi and cook the stew for about 35 minutes. Once done, release the pressure and stir the stew. The beef will be tender, and the flavors will be perfectly melded together. You can also thicken the stew with a bit of cornstarch if needed.
Health Benefits of Beef Stew
Beef stew is a balanced meal that provides a good source of protein from the beef. Protein is essential for muscle growth and repair. The vegetables in the stew, such as carrots and potatoes, provide essential vitamins and fiber. You can adjust the ingredients to make the stew healthier, using lean cuts of beef or adding more vegetables. The ninja foodi helps you retain the nutrients in the stew, ensuring a wholesome meal.
Customizing Your Beef Stew
Classic beef stew is highly customizable. You can change up the vegetables, using sweet potatoes, parsnips, or turnips instead of regular potatoes. Adding herbs like rosemary or basil can give the stew a different flavor profile. For extra richness, consider adding a splash of cream or Worcestershire sauce. The ninja foodi makes it easy to adjust the stew’s texture and flavor to your liking, making it a perfect dish for personalizing.
In conclusion, classic beef stew made in the ninja foodi is a hearty, comforting, and customizable family meal. With its tender beef and flavorful broth, it’s a satisfying dish that everyone will enjoy. It’s quick to prepare, easy to clean up, and perfect for feeding a crowd or enjoying leftovers the next day.
Tips and Tricks for Perfect Ninja Foodi Recipes
Prepping Ingredients: Tips for Efficient Prep to Save Time
Efficient ingredient prep is key to saving time in the kitchen, especially when using versatile appliances like the ninja foodi. With the right techniques, you can streamline the prep process, making cooking faster and less stressful. By organizing and prepping ingredients in advance, you ensure a smooth cooking experience and make the most of your meal prep time.
Why Ingredient Prep is Important
Proper ingredient prep is essential for saving time and reducing mistakes during cooking, especially when you’re working with ninja foodi recipes. By chopping, measuring, and preparing your ingredients ahead of time, you won’t waste precious moments searching for ingredients or scrambling to prepare them mid-cooking. This streamlined approach ensures a smoother cooking process, particularly when using the ninja foodi.
When making ninja foodi recipes, having all your ingredients ready allows you to efficiently add them to the pot, letting the appliance handle the cooking. The ninja foodi’s versatility makes it an excellent tool for meal prep, allowing you to focus on flavor and technique rather than running around gathering ingredients.
This method of preparation is key to making ninja foodi recipes a success, ensuring every dish turns out as planned. Whether you’re preparing a quick dinner or experimenting with new ninja foodi recipes, having your ingredients prepped will make the process faster and more enjoyable.
Incorporating proper prep into your cooking routine can drastically improve your ninja foodi recipes, giving you the confidence to tackle more complex dishes with ease.
How to Efficiently Prep Ingredients
Start by washing and peeling your vegetables first. If you need to chop or dice them, try using a sharp knife or a food processor for quicker results. For proteins like chicken or beef, cut them into uniform pieces to ensure even cooking. If you plan to use the ninja foodi’s pressure cooker function, ensure your ingredients are cut into smaller, bite-sized pieces to reduce cooking time.
Next, measure out any spices, herbs, or sauces ahead of time. Having everything ready to go will save you from scrambling during the cooking process. Consider using small bowls or containers to organize your ingredients by the recipe.
Batch Cooking and Prepping for Multiple Meals
Batch cooking is an excellent way to save time, especially if you’re preparing several meals in one go. Pre-chop vegetables or portion out proteins in advance, storing them in airtight containers in the fridge. You can also prepare sauces, marinades, and spice mixes ahead of time. This way, you can simply grab your prepped ingredients and quickly assemble meals, reducing your daily prep time.
Using the Ninja Foodi for Efficient Cooking
The ninja foodi helps save even more time once your ingredients are prepped. Its multi-functionality allows you to sauté, pressure cook, steam, and bake all in one pot. This means less mess and fewer steps in the cooking process. You can also use its delay timer for hands-off cooking, allowing you to set it and forget it while you focus on other tasks.
For efficient cooking, layer your ingredients in the ninja foodi based on cooking time. Place ingredients that take longer, like root vegetables, at the bottom, and add quicker-cooking items on top. This ensures everything cooks evenly without overcooking or undercooking any part of your meal.
Freezing Ingredients for Later Use
If you’re really short on time, consider prepping ingredients for future meals and freezing them. Chopped vegetables, marinated meats, or cooked grains can all be frozen for later use. Just ensure you store them in airtight bags or containers to keep them fresh. The ninja foodi is great for quickly cooking frozen ingredients, making it easier to have meals ready in no time.
In conclusion, efficient ingredient prep is essential for saving time in the kitchen. By organizing, chopping, and measuring ingredients ahead of time, you’ll make the cooking process smoother and faster. With the ninja foodi, you can maximize your prep time and enjoy a stress-free cooking experience.
Layering for Flavors: How to Layer Ingredients for Optimal Taste
Layering ingredients correctly is essential for maximizing flavor in your dishes. When using the ninja foodi, layering ensures that each component of your meal is cooked to perfection, with flavors melded together harmoniously. Proper layering of ingredients can elevate your dish, making it more flavorful and satisfying. Here’s how to master the art of layering for optimal taste, especially when cooking in the ninja foodi.
Why Layering is Key
Layering helps control the cooking process, especially when you’re using the ninja foodi’s multiple functions. By placing ingredients in the correct order, you ensure that items that require more time to cook are positioned at the bottom, while quicker-cooking ingredients are placed on top. This not only optimizes cooking times but also allows the flavors to develop and blend as they cook.
How to Layer Ingredients in the Ninja Foodi
When using the pressure cooker function, start by adding liquids like broth or water to the pot. This creates steam, which is essential for cooking the ingredients quickly. Then, layer hearty ingredients that need longer cooking times, such as root vegetables, potatoes, or tougher cuts of meat. These should go at the bottom of the pot, as they require more time to cook through.
Next, add ingredients that cook more quickly, like fish, chicken breasts, or leafy vegetables. These should go on top, so they cook in the steam created by the lower layers without getting overcooked. For dishes like soups or stews, you can stir the ingredients gently once the cooking cycle is complete, allowing the flavors to meld further.
Building Flavor with Seasonings and Herbs
When layering ingredients, it’s also important to consider how you add seasonings and herbs. Adding spices, herbs, or sauces in layers helps distribute flavors evenly throughout the dish. For example, sprinkle seasoning over the meat at the bottom of the pot, and add fresh herbs on top toward the end of cooking. This layering allows the flavors to infuse into the dish, while preserving the freshness of herbs for the final touch.
If you’re using sauces or marinades, consider adding them at different stages. For example, pour part of the sauce over the meat early in the cooking process, and save the rest to stir in at the end. This creates depth in flavor, allowing the sauce to caramelize slightly on the meat while maintaining its vibrant flavor when added later.
Layering for Texture
Layering is a crucial technique in many ninja foodi recipes, as it helps achieve the desired textures and flavors in your dish. For example, in casseroles or baked dishes, layering ingredients like cheese, breadcrumbs, or a crust on top allows them to bake or brown beautifully. This technique enhances the final presentation and texture, making your ninja foodi recipes even more delicious.
When preparing stews or soups in the ninja foodi, consider layering in thickening agents like flour or cornstarch toward the end of cooking. This prevents over-thickening and ensures the perfect consistency. Layering in ninja foodi recipes ensures that all ingredients cook evenly and maintain their intended textures, whether you’re using the pressure cooker, air fryer, or steam function.
Layering ingredients correctly is essential to the success of your ninja foodi recipes. It allows for better flavor distribution and prevents certain ingredients from overcooking. So, whether you’re making a hearty stew or a crispy casserole, mastering the layering process will elevate your ninja foodi recipes to the next level.
Incorporating this technique into your cooking routine ensures that each dish in your ninja foodi turns out with the perfect texture and taste every time.
Using the Ninja Foodi’s Functions to Enhance Layering
The ninja foodi’s versatility allows you to enhance your layered dishes with its multiple cooking functions. After pressure cooking, switch to the air fryer or baking function to create crispy, golden layers on top of casseroles or meats. This not only adds flavor but also a satisfying texture that contrasts beautifully with the tender, juicy ingredients below.
You can also use the sauté function to caramelize onions, garlic, or spices before layering them into the pot. This helps develop a deeper flavor profile for your dish and adds a rich base for the remaining ingredients.
Examples of Layering in Dishes
Some dishes that benefit greatly from proper layering include casseroles, stews, lasagna, and even layered cakes. For a layered lasagna, you would start with a layer of sauce, followed by noodles, cheese, and then the meat or vegetables. For a layered casserole, you might begin with potatoes or rice, followed by meat, vegetables, and then a cheese topping that crisps up during the baking process. The ninja foodi makes it easy to achieve these layers with its versatile functions, resulting in perfectly cooked dishes every time.
In conclusion, layering ingredients for optimal taste is an essential cooking technique, especially when using the ninja foodi. By placing ingredients in the correct order, you ensure even cooking, balanced flavors, and an enjoyable texture. Experiment with different combinations of ingredients and seasonings, and use the ninja foodi’s various functions to enhance the flavors and textures of your layered dishes.
Cleaning and Maintenance: Tips to Keep Your Ninja Foodi in Top Condition
Proper cleaning and maintenance of your ninja foodi are essential to ensure its longevity and optimal performance. Regular cleaning not only keeps your appliance in excellent working order but also ensures that each meal you prepare tastes fresh and delicious. With a little care, your ninja foodi will continue to provide you with years of efficient cooking. Here are some practical tips for maintaining your ninja foodi in top condition.
Why Cleaning Your Ninja Foodi Is Important
Regular cleaning is key to maintaining the performance of your ninja foodi. Food residue, grease, and oils can build up over time, affecting the taste and quality of your meals. A clean appliance also prevents the buildup of bacteria and ensures safety while cooking. Proper maintenance ensures that the appliance continues to function smoothly, especially with its many different cooking functions, such as air frying, pressure cooking, and steaming.
How to Clean Your Ninja Foodi
- Unplug and Cool Down: Always unplug your ninja foodi and allow it to cool down before starting the cleaning process. This is especially important after using functions like pressure cooking or air frying, which can generate high temperatures.
- Disassemble Components: Remove all detachable components, including the inner pot, crisping lid, and any trays or racks. These parts are typically dishwasher-safe, but be sure to check the user manual for specific instructions.
- Clean the Inner Pot: The inner pot is the most used part of the ninja foodi. It’s important to wash it thoroughly after each use to remove any food particles. Use warm, soapy water and a soft sponge to clean the pot. Avoid using abrasive scrubbers that could damage the non-stick coating.
- Clean the Crisping Lid: The crisping lid can accumulate grease and food splatter, especially when using the air fryer function. Wipe it down with a damp cloth or sponge. For tougher grease, use a small amount of mild dish soap and warm water. Never submerge the lid in water, as it contains electrical components.
- Clean the Silicone Ring: The silicone ring inside the pressure cooker lid can trap food odors. To prevent odors from transferring to your food, remove the ring and wash it with warm, soapy water after each use. You can also use a small brush to clean it. Ensure it is completely dry before reinserting it into the lid.
- Clean the Exterior: Wipe down the exterior of the ninja foodi with a damp cloth to remove any splashes or spills. Avoid using harsh chemicals or abrasive materials, as they could damage the appliance’s finish.
Deep Cleaning the Ninja Foodi
For a deeper clean, especially if you notice a buildup of grease or burnt food, you can use a vinegar-water solution. Fill the inner pot with equal parts water and vinegar, then run the pressure cooker function on a short cycle (about 5 minutes). This will help loosen any stuck food particles. Once the cycle is complete, carefully release the pressure and wipe down the interior.
To clean the air fryer’s crisping tray, place it in the sink and scrub it gently with warm, soapy water. If there are stubborn grease spots, you can soak the tray for a few minutes before scrubbing.
Maintaining the Ninja Foodi’s Performance
- Regularly Check for Wear and Tear: Over time, parts of the ninja foodi may show signs of wear. Check the silicone ring for any cracks or tears. Replace it if necessary. Also, inspect the lid, seals, and other components for any damage that may affect the appliance’s performance.
- Keep the Vent Area Clear: The ninja foodi has vents to release steam and heat. Ensure these vents are not blocked by food particles or grease. Use a small brush or cloth to clean them regularly, keeping the appliance ventilated and functioning properly.
- Store Properly: When not in use, store your ninja foodi in a dry, cool place. If you’re storing it for an extended period, make sure all parts are completely dry before placing them back together.
- Use Non-Abrasive Cleaning Tools: Always use non-abrasive sponges and cloths to clean your ninja foodi. Harsh scrubbing tools, such as steel wool, can scratch or damage the non-stick surfaces.
- Follow the Manufacturer’s Instructions: Refer to the manufacturer’s manual for specific cleaning and maintenance guidelines. The ninja foodi’s user manual often includes additional tips and recommendations for care based on the specific model.
Extending the Life of Your Ninja Foodi
Regular maintenance goes a long way in ensuring that your ninja foodi continues to perform at its best. Keep an eye on the appliance’s condition, and make sure all parts are clean, dry, and properly assembled. By following these cleaning and maintenance tips, you can maximize the lifespan of your ninja foodi and enjoy consistently excellent cooking results.
In conclusion, cleaning and maintaining your ninja foodi is essential to keep it in top condition. Regularly washing components, inspecting for wear, and following proper storage procedures will ensure that your ninja foodi continues to deliver high-quality results meal after meal. With a little attention and care, you’ll enjoy using your appliance for years to come.
Common Mistakes to Avoid: Advice to Prevent Overcooking or Under-Seasoning
Cooking in the ninja foodi offers convenience and versatility, but like any kitchen appliance, it’s easy to make mistakes if you’re not careful. Overcooking, under-seasoning, or improperly layering ingredients can lead to less-than-ideal results. To help you get the best out of your ninja foodi, here are some common mistakes to avoid, with tips on how to prevent overcooking and under-seasoning.
Mistake 1: Overcooking Ingredients
Overcooking is a common mistake, especially when using the pressure cooker or air fryer functions. These functions cook food faster than traditional methods, so it’s crucial to adjust cooking times accordingly.
To prevent overcooking:
- Follow Recommended Cooking Times: Always check the recommended cooking times for your ingredients. For example, meat or vegetables might need less time in the pressure cooker than you’re used to.
- Use the Ninja Foodi’s Auto Features: The ninja foodi often has auto settings for specific foods, ensuring they are cooked just right without the risk of overcooking.
- Monitor Cooking Progress: If possible, check the progress midway through cooking, especially for foods like fish, chicken breasts, or delicate vegetables.
- Release Pressure Correctly: When using the pressure cooker, be mindful of the type of pressure release. Quick releases are ideal for certain foods like vegetables, while natural releases are better for tougher cuts of meat.
Mistake 2: Under-Seasoning Food
Under-seasoning is another issue many home cooks face, especially when using a new appliance like the ninja foodi. The cooking process can sometimes mask the natural flavors of your ingredients, leaving the final dish bland.
To prevent under-seasoning:
- Taste and Adjust Seasonings: Always taste your food before finishing the cooking process. If needed, add salt, pepper, or herbs and spices to adjust the flavor.
- Season in Layers: Adding seasonings in layers during cooking ensures that the flavors are more evenly distributed. For example, season meat at the bottom of the pot first and add fresh herbs on top toward the end of cooking.
- Use Marinating: Marinating meats and vegetables before cooking can enhance the flavors and prevent them from tasting bland. Even a short marination time can make a big difference in flavor.
- Incorporate Aromatics: Don’t skip ingredients like garlic, onions, or shallots. These can add depth and complexity to your dish, especially when sautéed before adding other ingredients.
Mistake 3: Not Considering Cooking Time for Each Ingredient
The ninja foodi’s multi-functionality allows you to cook a wide variety of ingredients, but not all ingredients require the same amount of time to cook. Placing all your ingredients in the pot without considering their different cooking times can lead to uneven results.
To avoid this mistake:
- Layer Ingredients by Cooking Time: When using the pressure cooker or slow cook function, start with ingredients that require the longest cooking time, like root vegetables or tough meats, at the bottom. Add quicker-cooking ingredients like leafy greens or fish on top.
- Use the Right Cooking Method for the Ingredient: If you’re cooking delicate items like fish or seafood, the air fryer may be your best option. If you’re preparing tougher cuts of meat, use the pressure cooker or slow cook feature to tenderize them.
- Stagger Cooking Times: For dishes like soups or stews, consider adding ingredients in stages. Start with longer-cooking items, then add quicker-cooking vegetables or grains toward the end to prevent overcooking.
Mistake 4: Not Using Enough Liquid
Pressure cooking and slow cooking both require liquid to create steam, which helps cook the ingredients evenly. Not using enough liquid can result in burnt food or uneven cooking.
To prevent this mistake:
- Follow the Liquid Requirements: Be sure to follow the liquid recommendations in the ninja foodi’s recipe guide. This ensures there’s enough moisture to cook your ingredients thoroughly.
- Avoid Overcrowding: While it’s tempting to add as many ingredients as possible, overcrowding the pot can interfere with steam circulation. This can result in uneven cooking and may require additional liquid.
- Use Broth or Stock for Extra Flavor: Instead of just using water, add broth or stock to enhance the flavor of your dish. This can improve the taste of soups, stews, and grains.
Mistake 5: Not Preheating the Ninja Foodi
Some cooking functions, like air frying and baking, benefit from preheating the appliance. Not preheating can result in uneven cooking or longer cooking times.
To prevent this mistake:
- Preheat Before Air Frying or Baking: Set the ninja foodi to the desired temperature and allow it to preheat for the recommended time before adding your ingredients. This ensures that food crisps up nicely and cooks evenly.
- Give the Air Fryer Basket Time to Heat: If you’re air frying, make sure the basket is hot before adding your ingredients. This helps create a crispy texture on the outside while keeping the inside tender.
Mistake 6: Not Using the Right Accessories
Using the wrong accessories or tools for certain cooking functions can impact your food’s texture and cooking time.
To avoid this mistake:
- Choose the Right Accessories: For air frying, use the crisping tray for optimal airflow around the food. For pressure cooking, make sure to use the correct steam rack or trivet.
- Use the Right Size for Your Meal: Ensure that your ingredients fit properly in the pot without overcrowding, as this can affect cooking times and texture.
In conclusion, avoiding these common mistakes will help you make the most out of your ninja foodi. By being mindful of cooking times, seasoning, and proper techniques, you can prevent overcooking and under-seasoning while ensuring your dishes are flavorful and cooked to perfection. Take the time to learn the nuances of your ninja foodi and soon you’ll be preparing delicious meals with ease.
Conclusion: Mastering Ninja Foodi Recipes
Ninja Foodi recipes offer an excellent way to prepare meals quickly and easily, utilizing the air fryer, pressure cooker, and steaming functions. These versatile appliances are perfect for creating a variety of dishes, whether you’re in the mood for a hearty meal or a light snack. With ninja foodi recipes, you can enjoy the convenience of cooking in one pot while achieving flavors and textures that will impress anyone at the table.
When experimenting with ninja foodi recipes, you have the freedom to customize and adjust ingredients to your preferences. From savory comfort food to healthy meals, the possibilities are endless. For those seeking more inspiration, exploring ninja foodi recipes can lead to creative dishes that take minimal time and effort.
If you’re also interested in trying new cuisines, check out this blog on Top 7 Guatemalan Lunch Recipes for an Authentic Experience, where you can discover even more exciting recipes to add to your collection. Embrace the versatility of ninja foodi recipes and enjoy the ease of preparing delicious meals every day!